Requesting API Authorization with X-API-Key
This feature allows users to apply for an X-API-Key bound to a Client through a self-service process, and use the key to authorize API calls after obtaining it via email.
Creating an X-API-Key
Log in to the Admin Console, and go to Client Management > API Client.
Click on the
 (Security) icon of the client to which the X-API-Key will be bound to access
the security page.
(Security) icon of the client to which the X-API-Key will be bound to access
the security page.

Select the X-API-Key Settings tab, and click Add X-Api-Key to access the creation page.

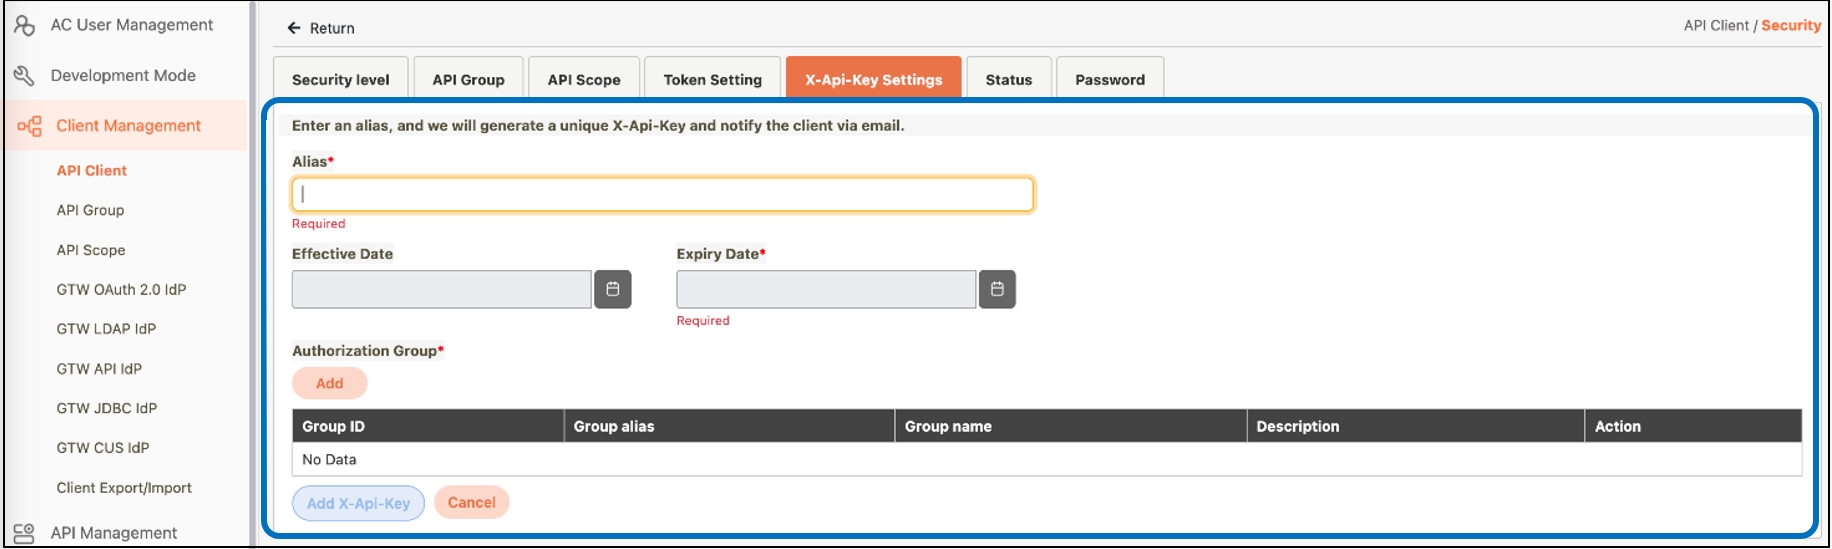
Fill in the required fields or make selections as instructed below.
Alias*: An identifiable name for the key.
Expiry Date*: The date until which the API remains valid.
Authorization Group*: Click Add to access the list page, select the authorization group for the X-Api-Key, and click Confirm to save and exit.
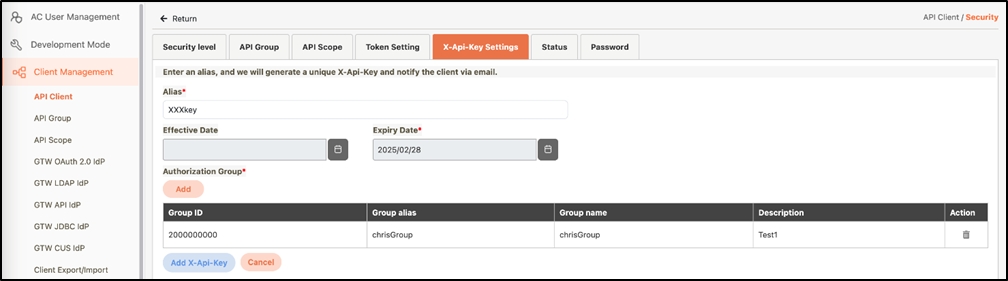
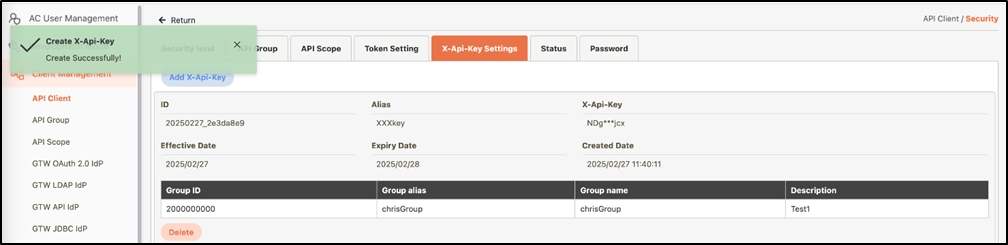
Click Add X-API-Key to complete the creation, and review the displayed information to confirm the key has been successfully created.
Calling APIs with the X-API-Key
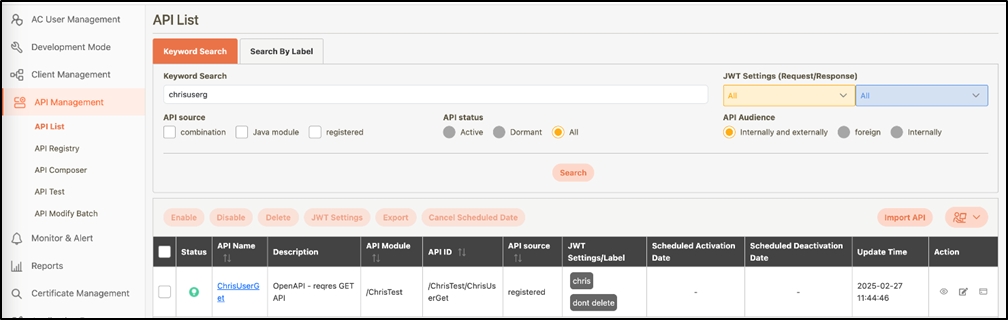
Log in to the Admin Console, and go to API Management > API List.
Locate the authorized API and click on the
 icon to access the API Test page.
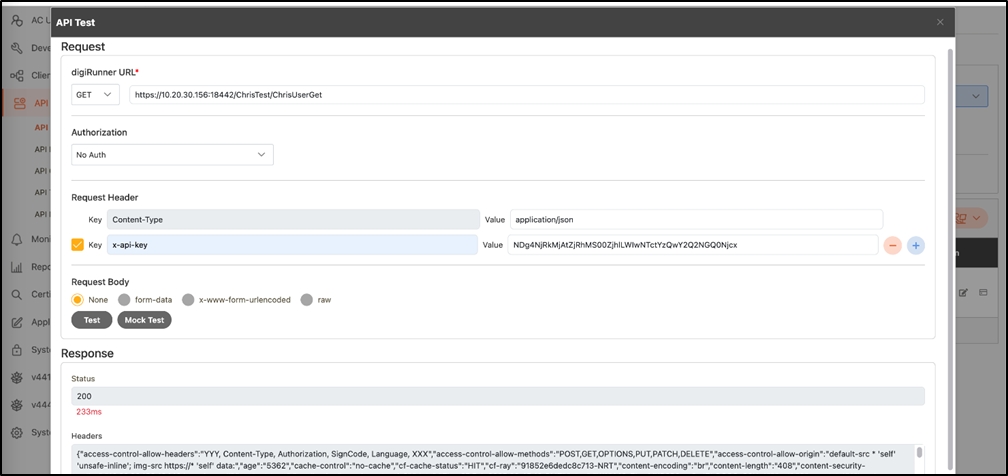
Fill in the data or make selections as instructed below.
Authorization: Select No Auth.
Request Header: Set the Key as x-api-key, and the Value as the issued X-API-Key.
Click Test to call the API and verify that the X-API-Key successfully authorizes access to the API.
Was this helpful?