Google Authentication - OIDC with Google IdP
Log in to AC for Operations
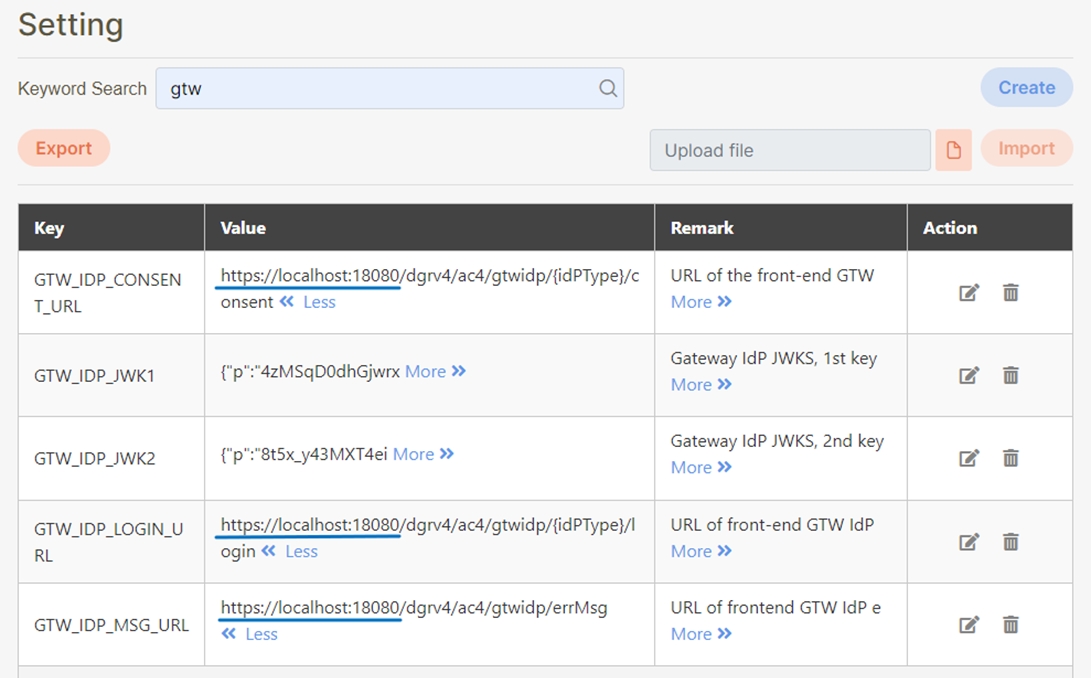
Setting
Confirm the values below according to the domain or IP and port where digiRunner is installed.
Example:
DGR_PUBLIC_DOMAIN = localhost
DGR_PUBLIC_PORT = 18080

Confirm the IP:port of gtw* according to the domain or IP where digiRunner is installed.
Example: https://localhost:18080
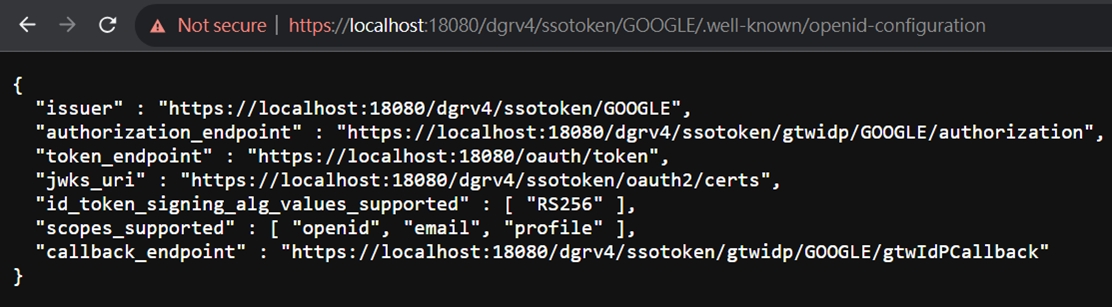
Test digiRunner well-known URL (based on the domain or IP of your installation):
https://localhost:18080/dgrv4/ssotoken/API/.well-known/openid-configuration
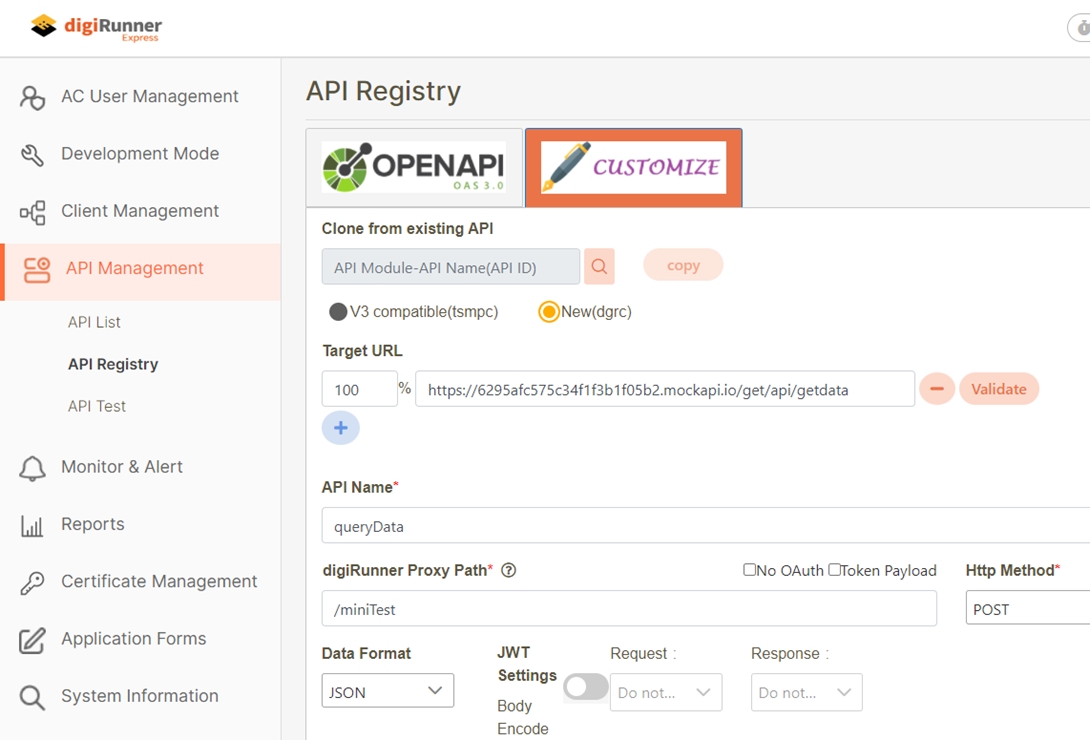
Create API (Register & Enable)
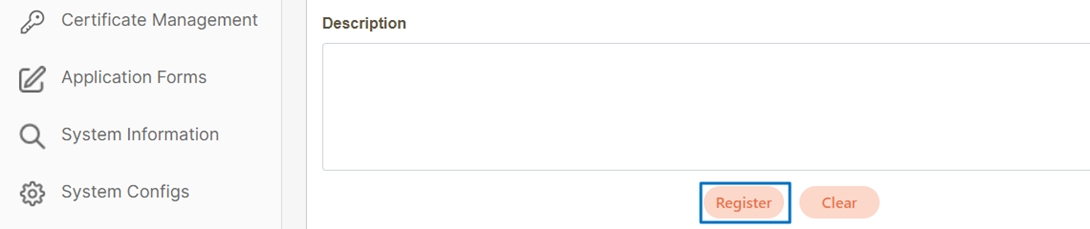
Enter the information and click Register.
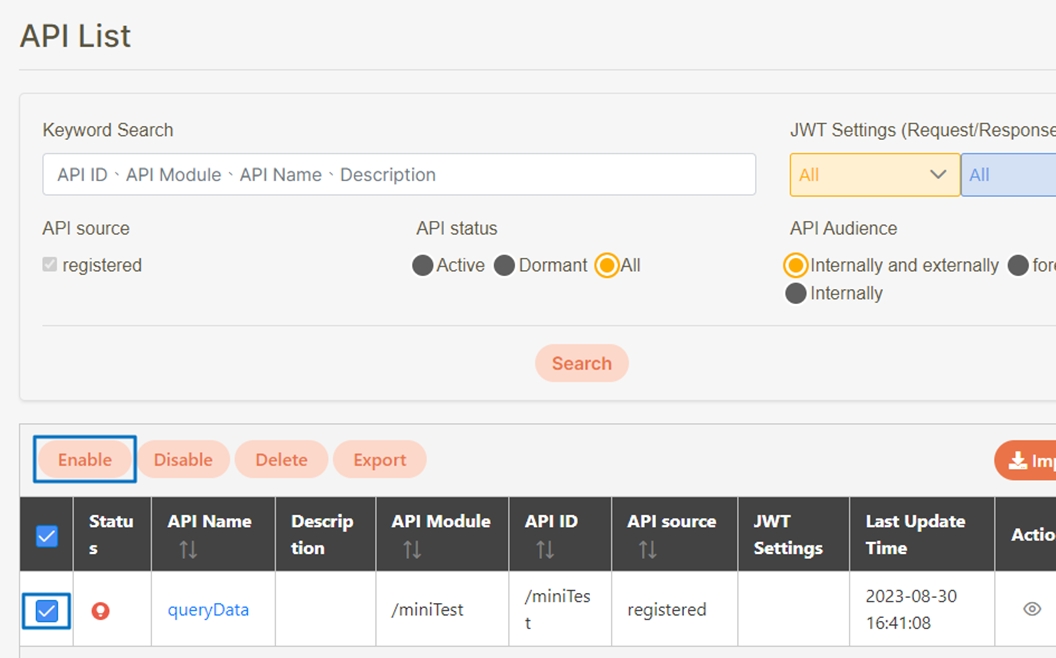
Check the API you want to enable and click Enable.
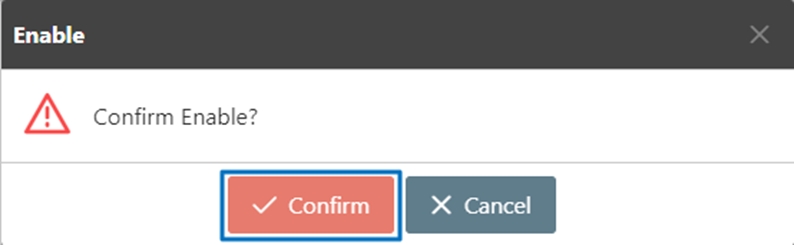
Click Confirm.
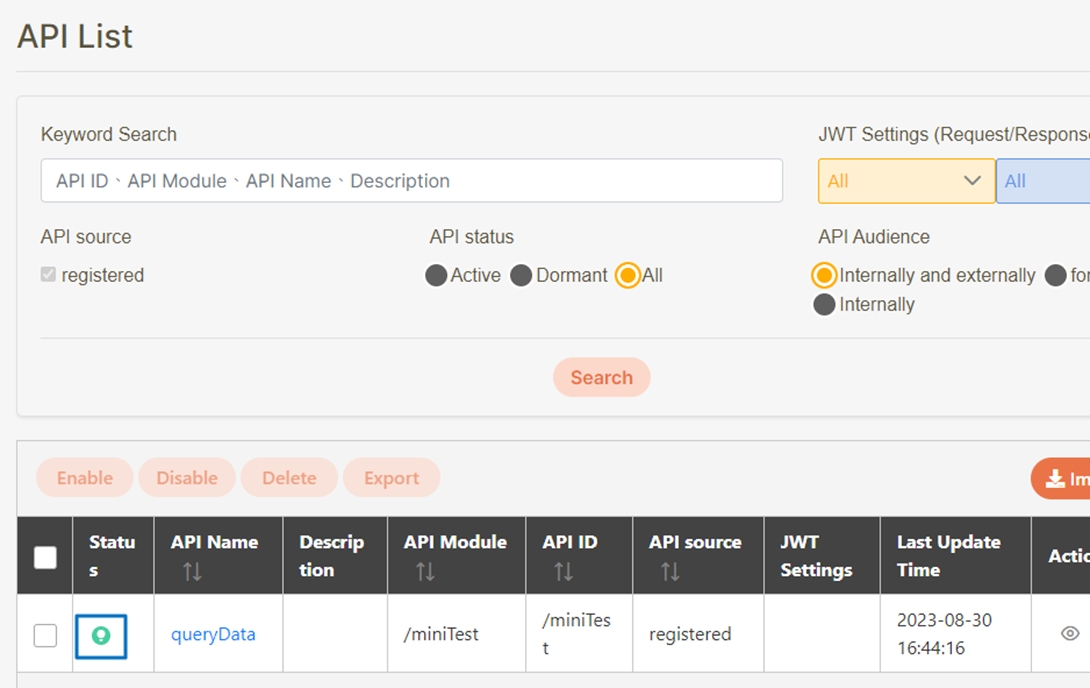
Successfully enabled.
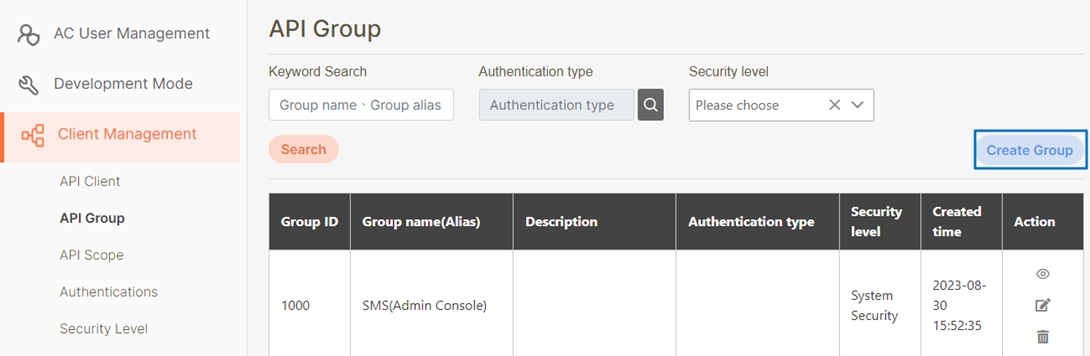
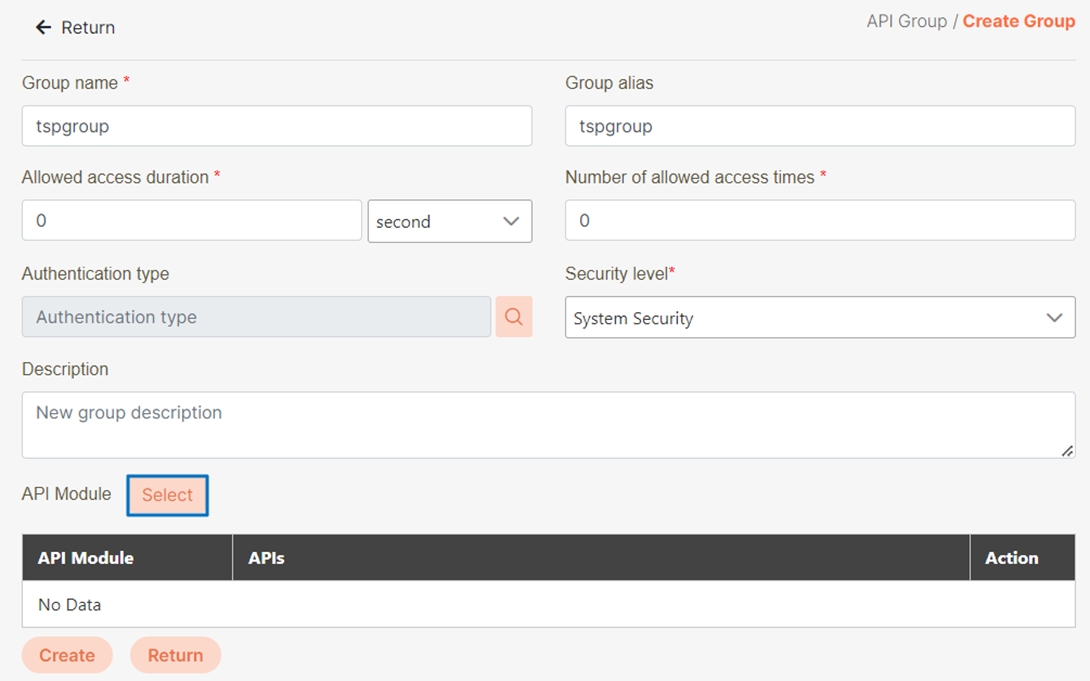
Create Group
Click Create Group.
Enter information, click Select, and add the API to the group.
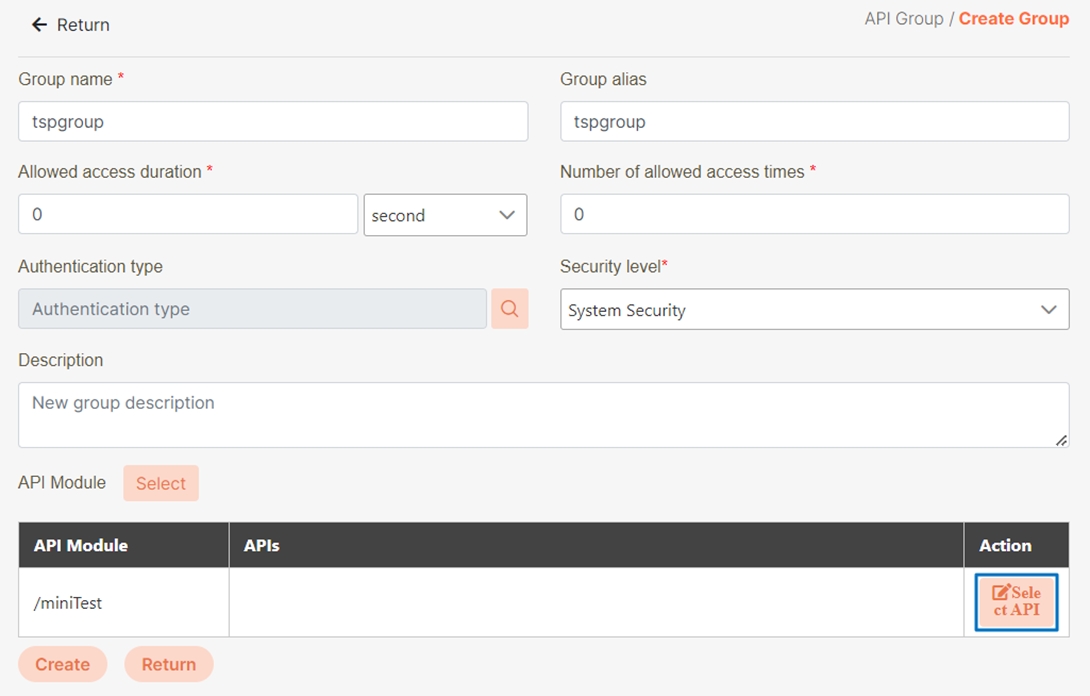
In the selected API Module, click Select, then click Apply.

In the API Module, click Select API.
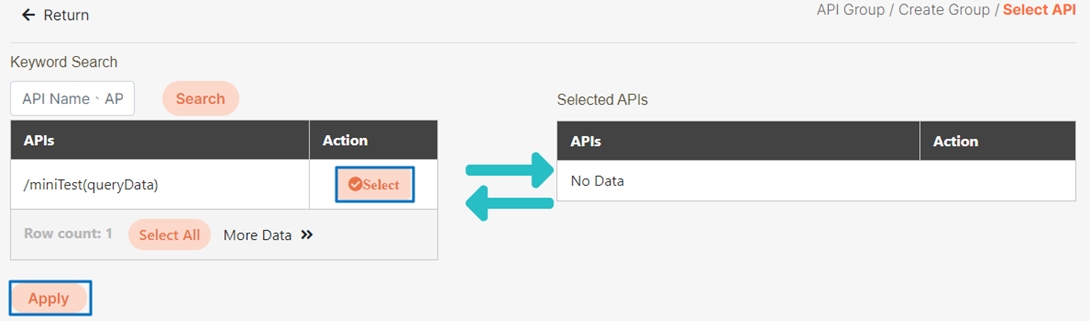
In the selected API, click Select, then click Apply.
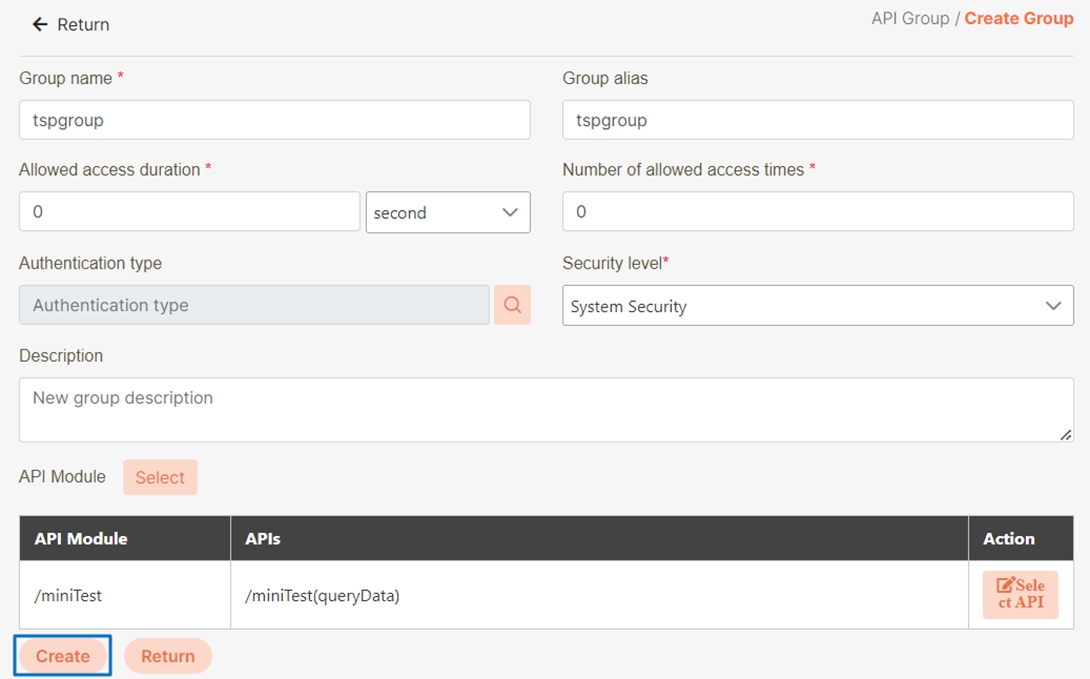
Click Create.
Create Client
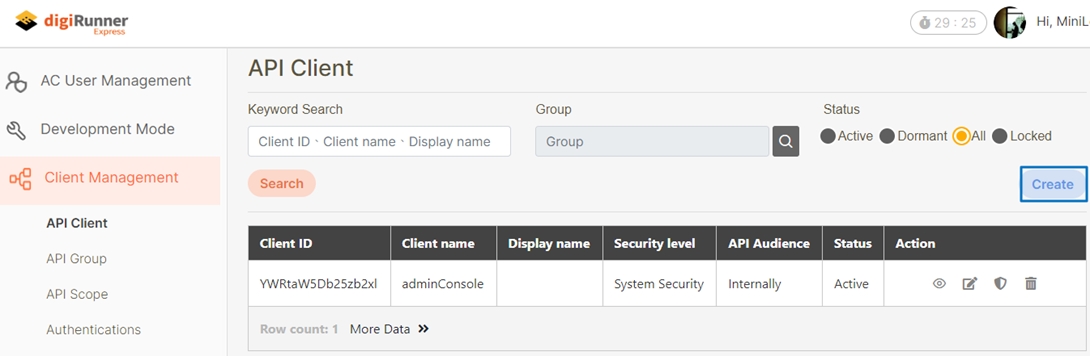
googleclient
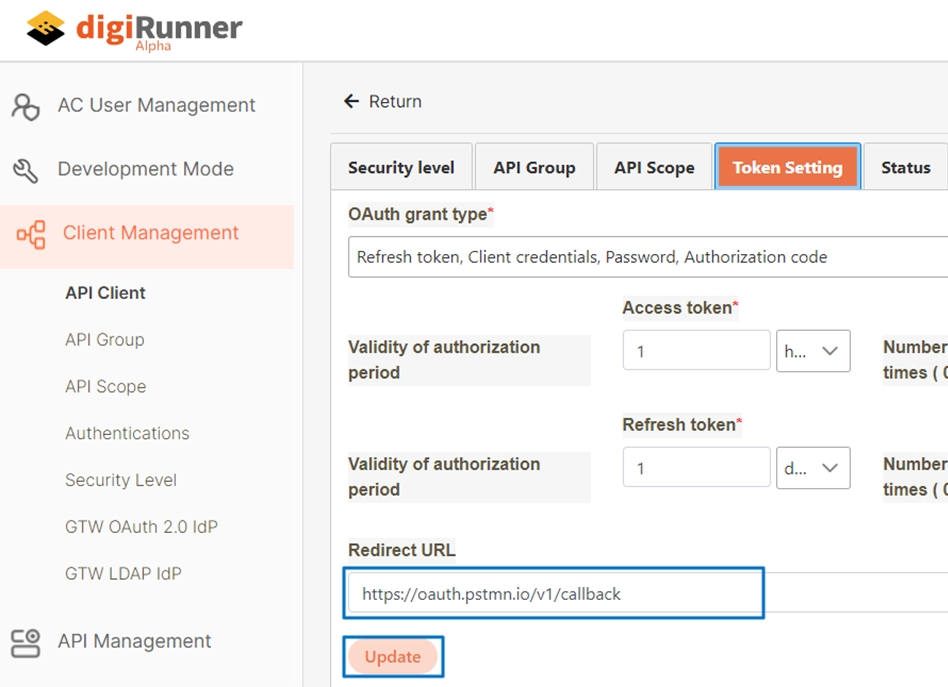
Set Redirect URL
Fill in Postman's callback URL:
https://oauth.pstmn.io/v1/callback
Add to group for authorization
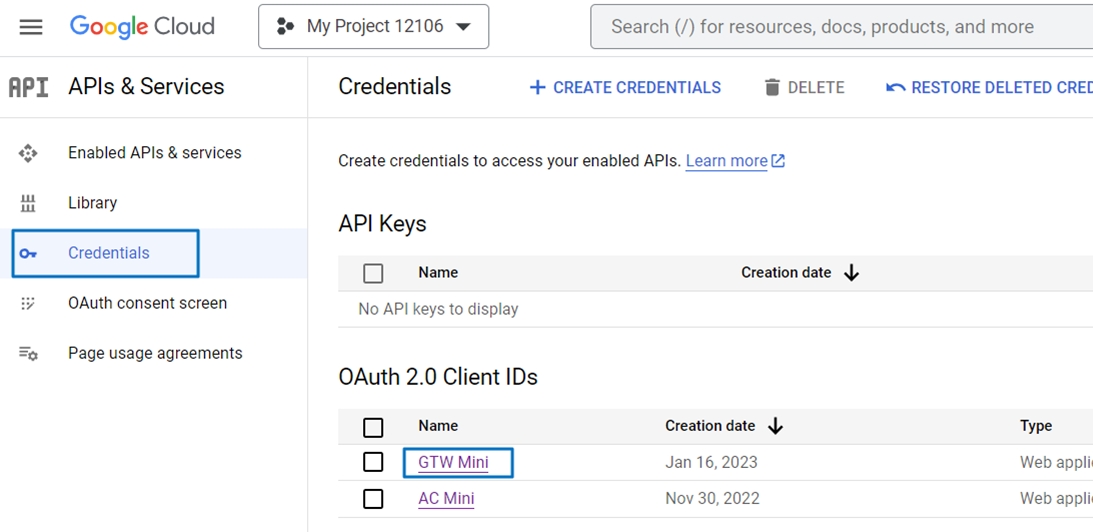
Log in to GCP (Google Cloud Platform) Developer Console
Using the Google scenario:
This page explains how to configure an APIM connection with a Google account.
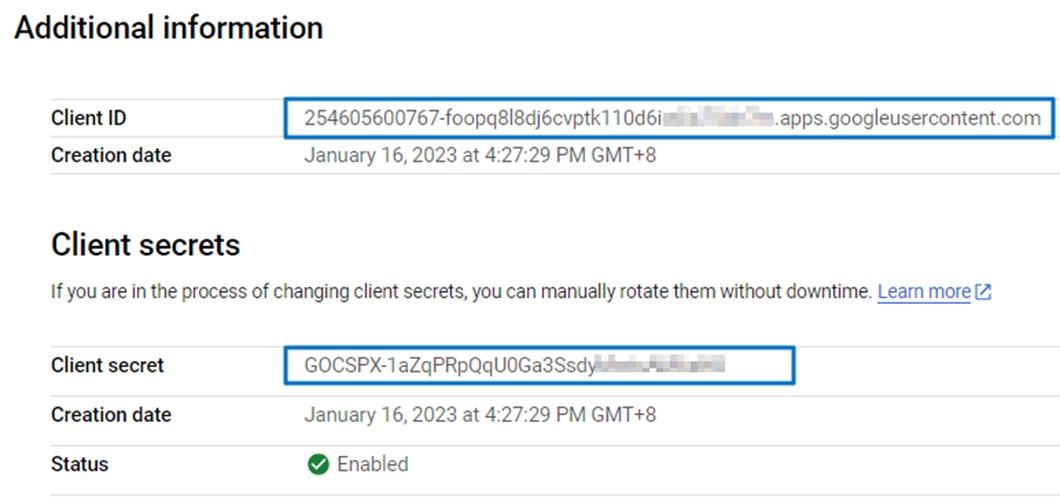
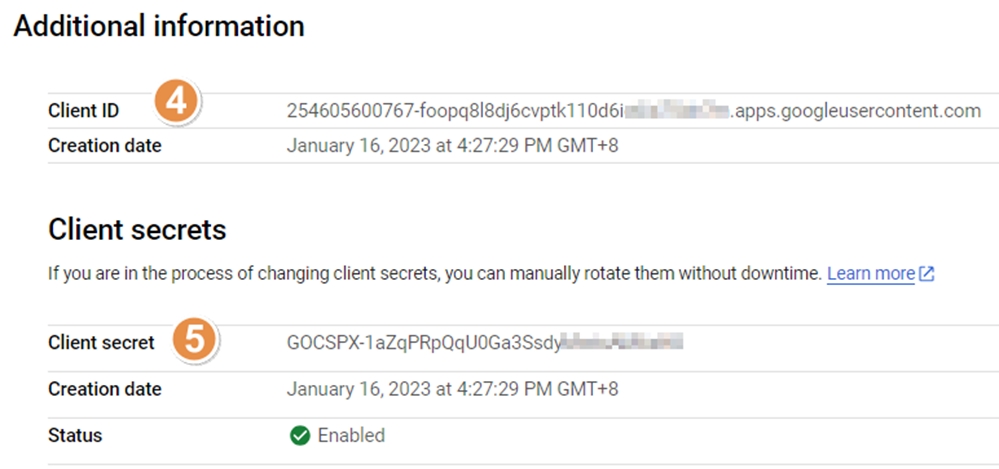
Obtain Client ID & Secret from Google
Example:
Client ID:
254605600767-foopq8l8dj6cvptk110d6i**********.apps.googleusercontent.com
Client Secret:
GOCSPX-1aZqPRpQqU0Ga3Ssdy**********
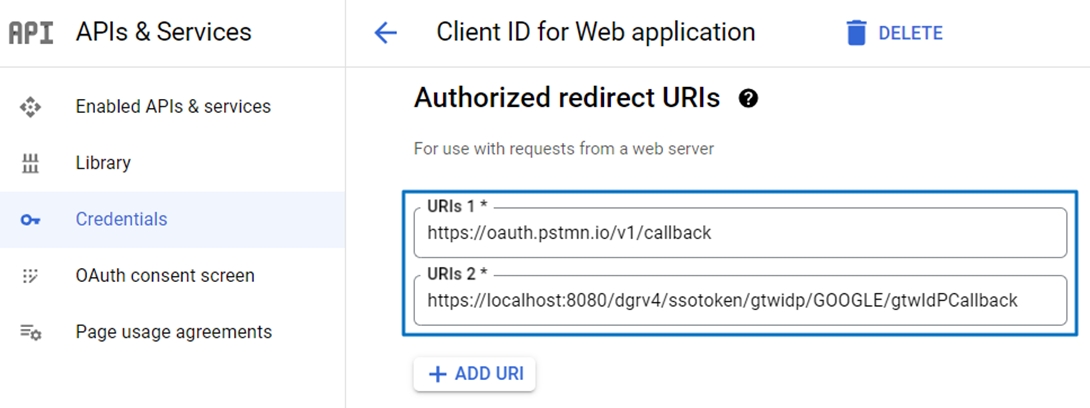
Set Authorized Redirect URI (digiRunner Callback URI)
Example:
Postman's testing callback URI:
https://oauth.pstmn.io/v1/callback
digiRunner's callback URI:
https://localhost:8080/dgrv4/ssotoken/gtwidp/GOOGLE/gtwIdPCallback
Use Postman to Test Google OIDC and Obtain id_token
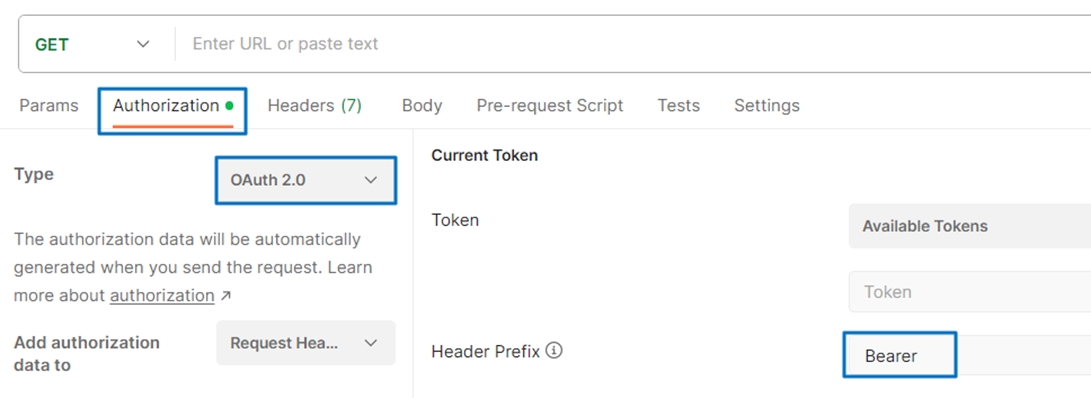
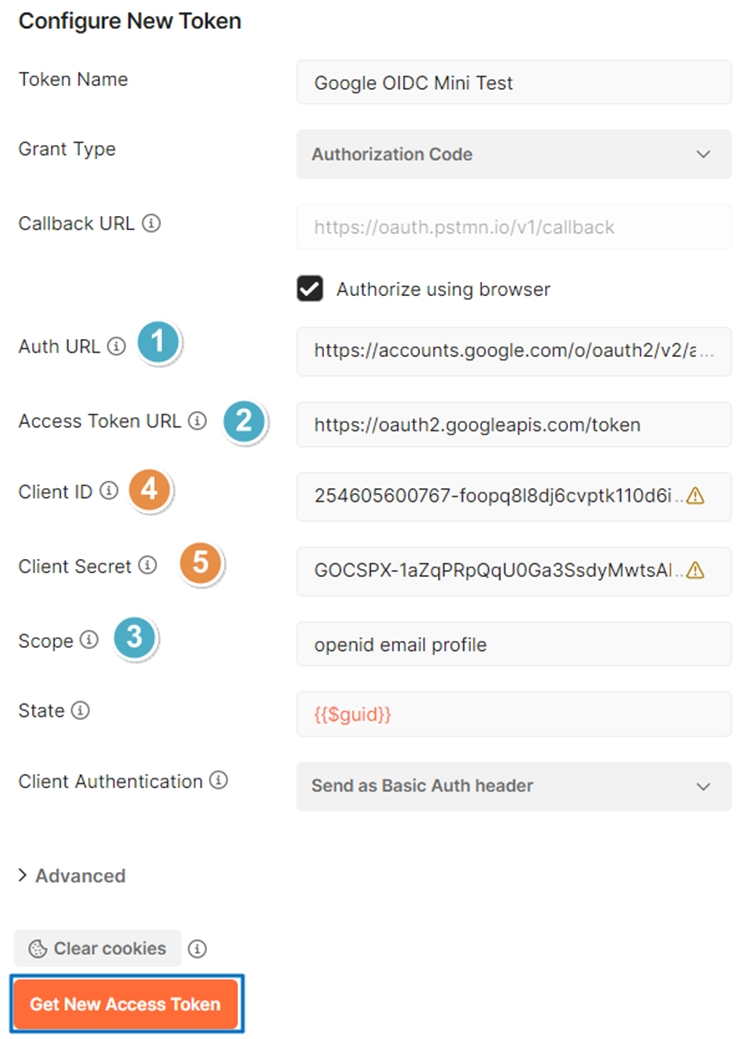
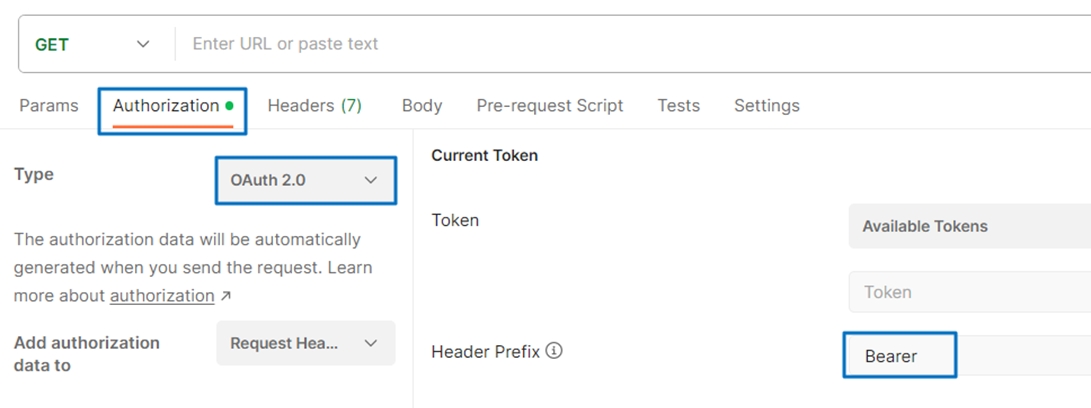
1. Go to the Authorization tab.
2. Type: Select OAuth 2.0.
3. Header Prefix: Bearer.
4. Grant Type: Select Authorization Code.
5. Callback URL: Check Authorize using browser.
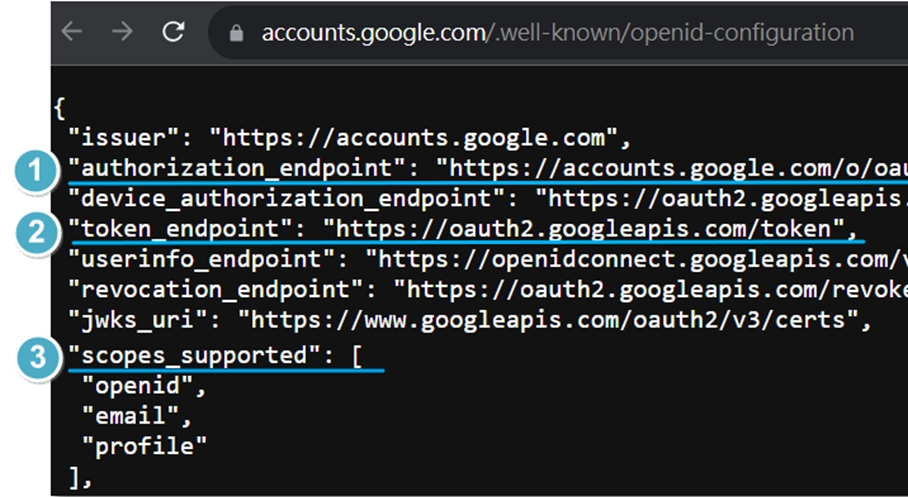
6. Auth URL, Access Token URL, and Scope (points 1–3) can be obtained from Google’s well-known URL:
https://accounts.google.com/.well-known/openid-configuration
Scope: Separate with spaces.
Client ID & Client Secret: From the Google account registration (points 4 and 5).
8. State: {{$guid}}
9. Click Get New Access Token.
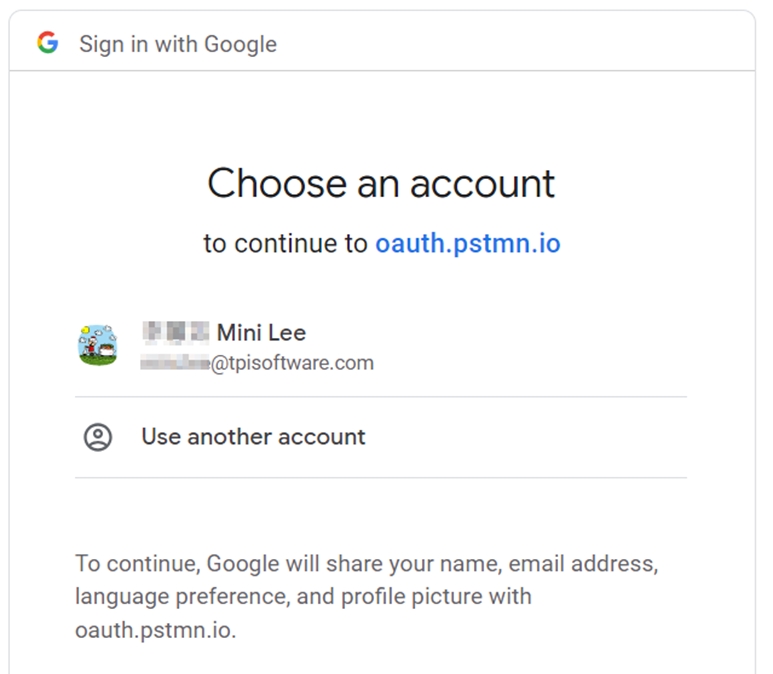
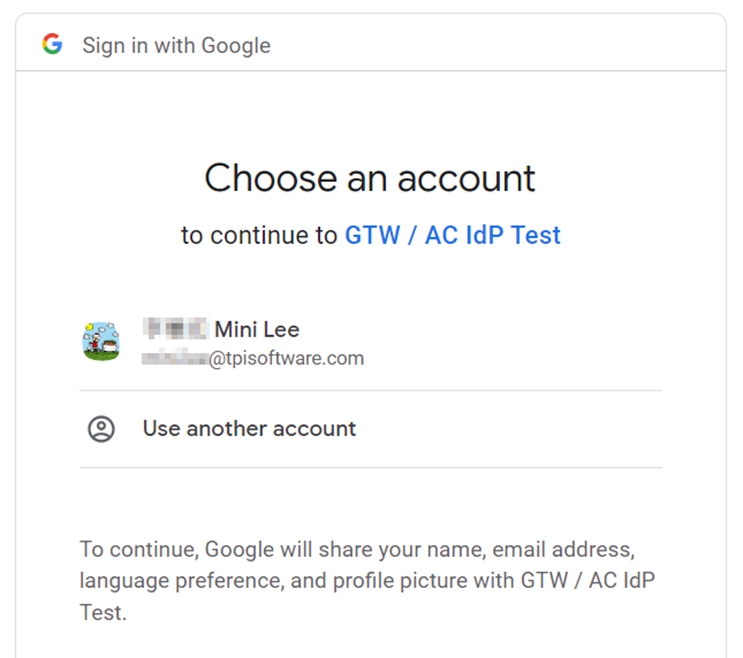
The Google login page appears. User enters credentials.
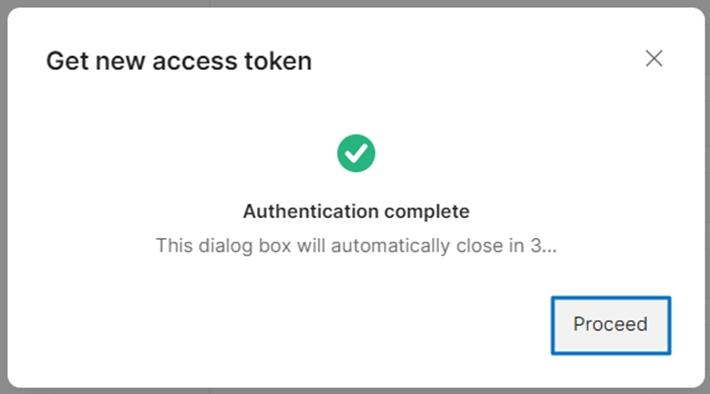
11. After successful authentication, click Proceed.
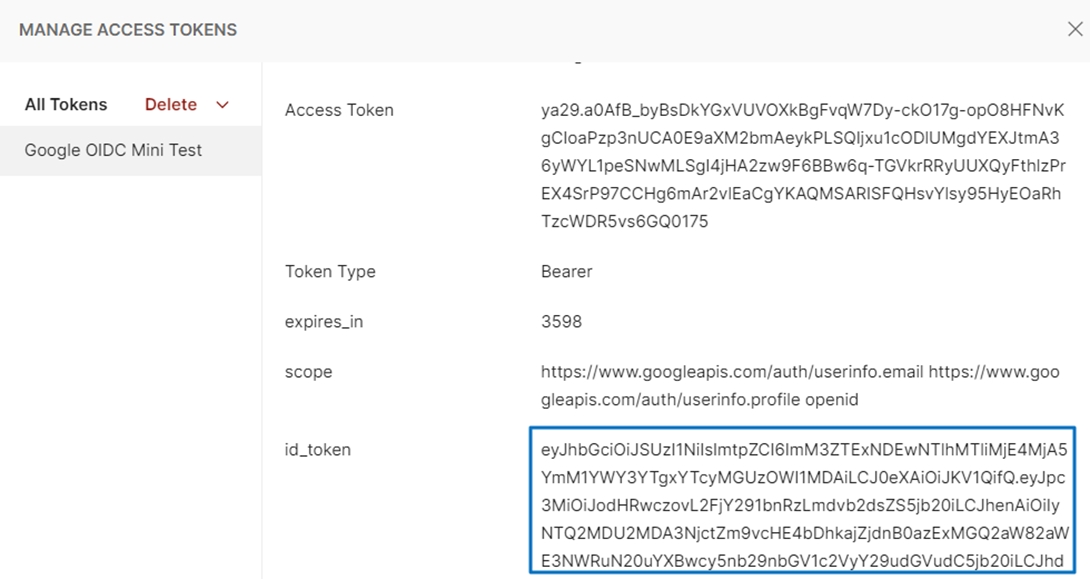
Google id_token is obtained.
Log in to AC Again (Enter Google Information)
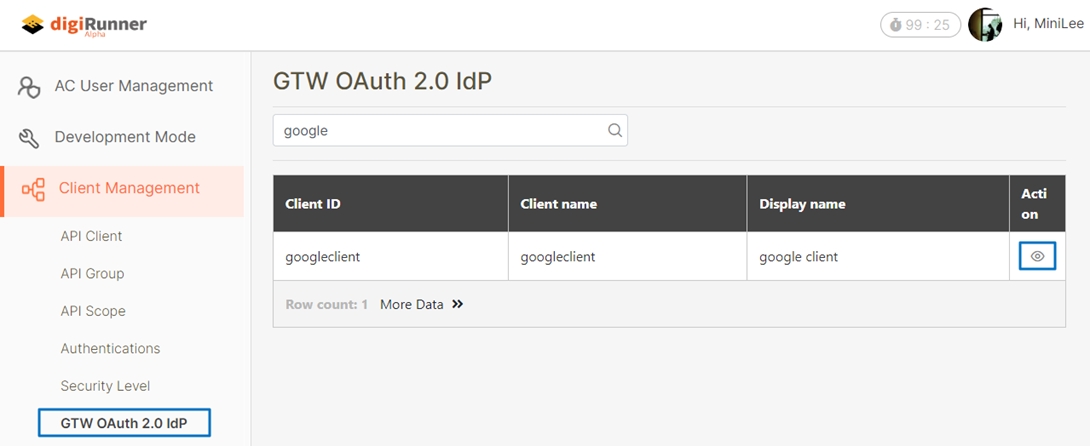
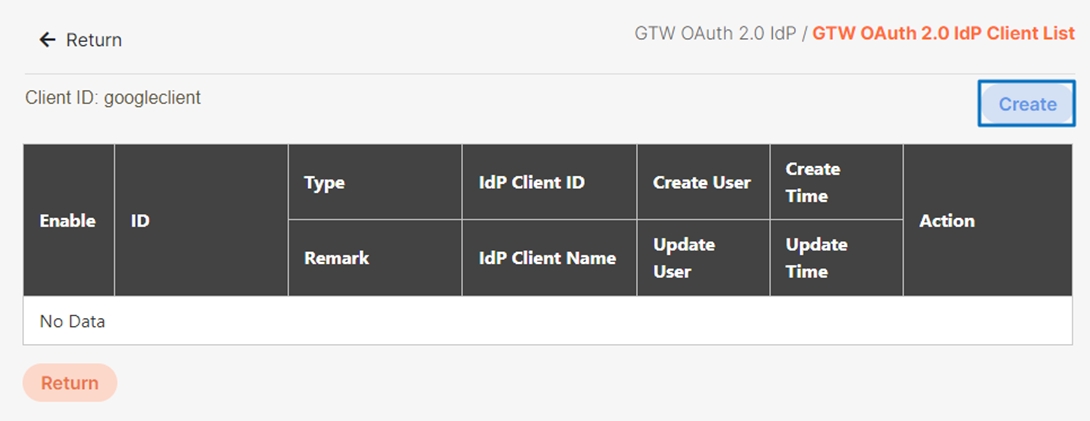
Client Management / GTW OAuth 2.0 IdP
For the specified client, click Details.
Click Create.
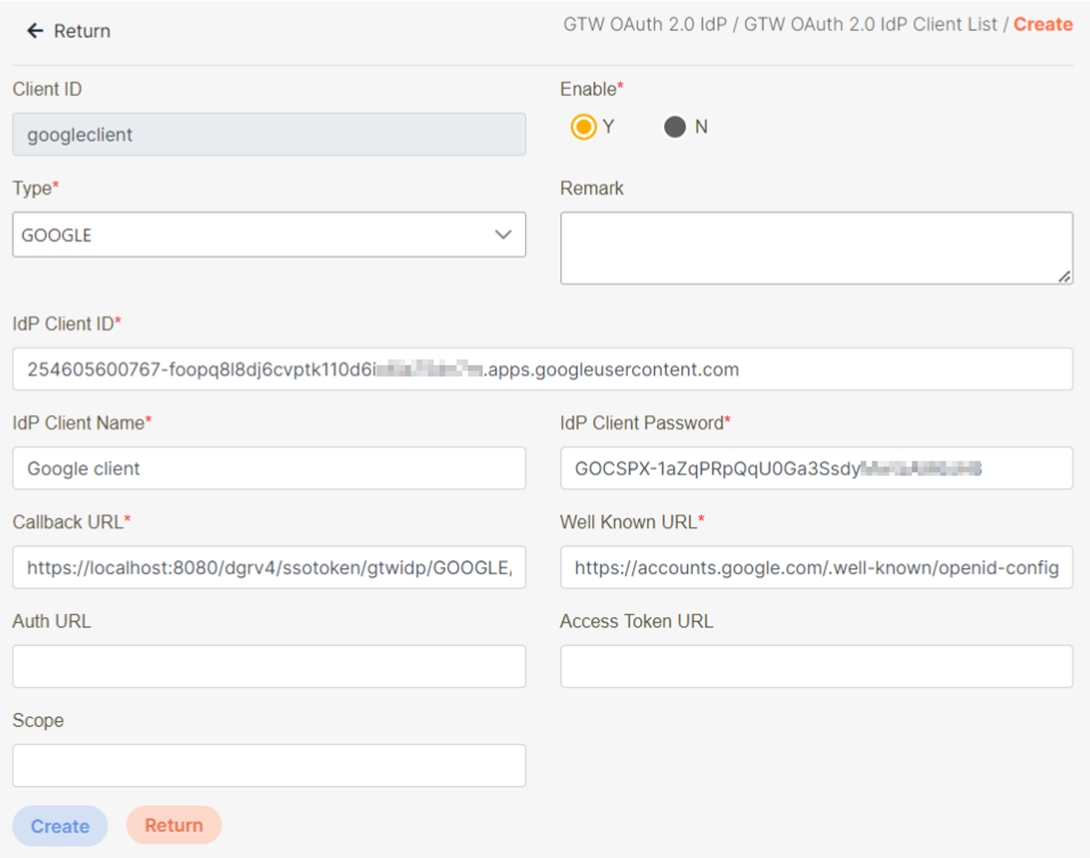
Fill in the fields:
Enable: Whether to enable, e.g., Y
Type: Google
Remark: Description or notes
IdP Client ID: Client ID registered with Google
IdP Client Name: Human-readable identifier
IdP Client Password: Client Secret registered with Google
Callback URL: For Google to return the authentication result; this is the digiRunner callback URL, same as in section 2.2. Example: https://localhost:8080/dgrv4/ssotoken/gtwidp/GOOGLE/gtwIdPCallback
Well Known URL: The Service Discovery URL provided by OIDC for protocol-based auto-discovery of features. Example: https://accounts.google.com/.well-known/openid-configuration
Note: Auth URL, Access Token URL, and Scope can be omitted, since these are included in the well-known config.
Click Create.
Using Postman
1. Go to the Authorization tab.
2. Type: Select OAuth 2.0.
3. Header Prefix: Bearer.
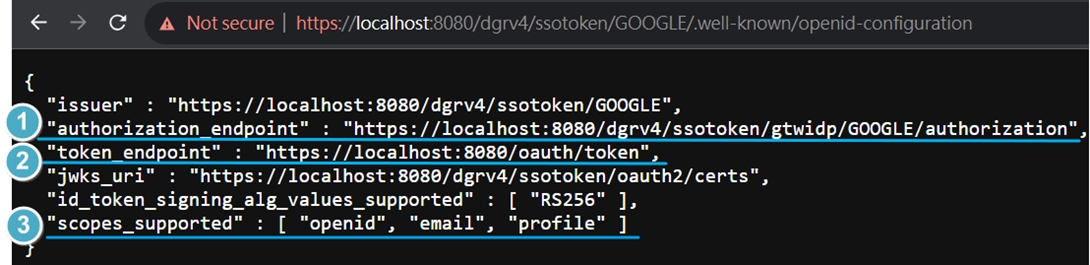
Auth URL, Access Token URL, and Scope (points 1–3) can be obtained from digiRunner’s well-known URL: https://localhost:8080/dgrv4/ssotoken/GOOGLE/.well-known/openid-configuration Scope: Separate with spaces.
5. Client ID: digiRunner's client ID (e.g., googleclient)
6. Client Secret: digiRunner’s client secret. Needs Base64 encoding. Use online tools for Base64 Encode.
7. Scope: Separate with spaces openid email profile
8. State: Random UUID {{$guid}}
9. Click Get New Access Token

The Google login screen will appear. Enter credentials.
11. Authentication success – click Proceed

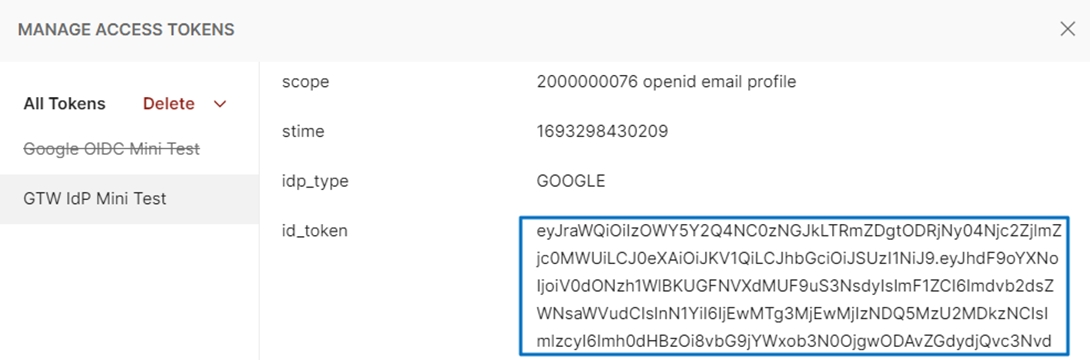
id_token from digiRunner is obtained.
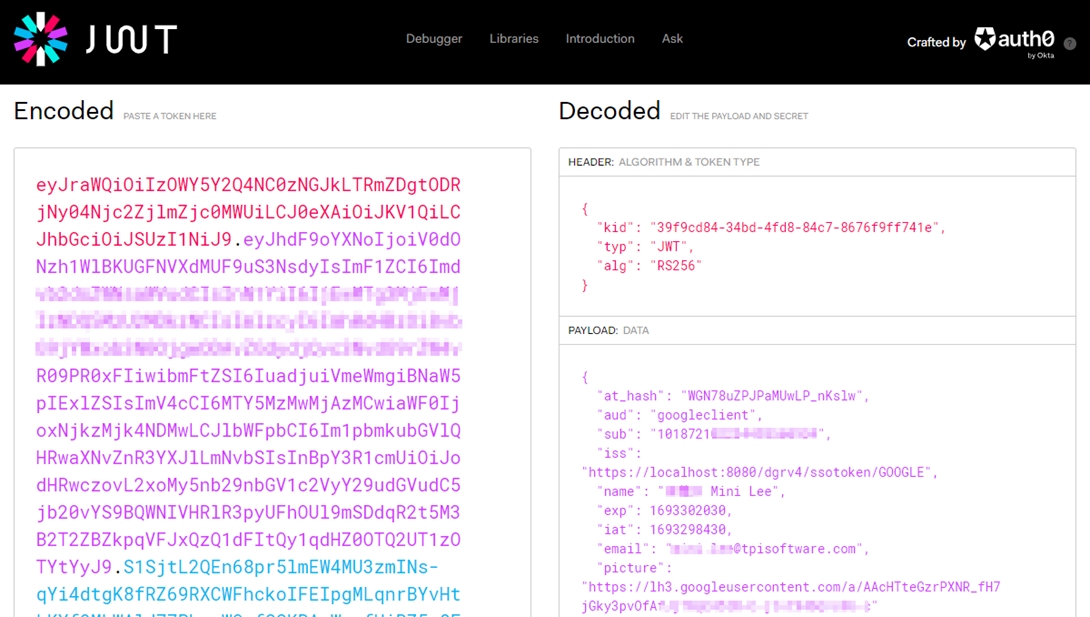
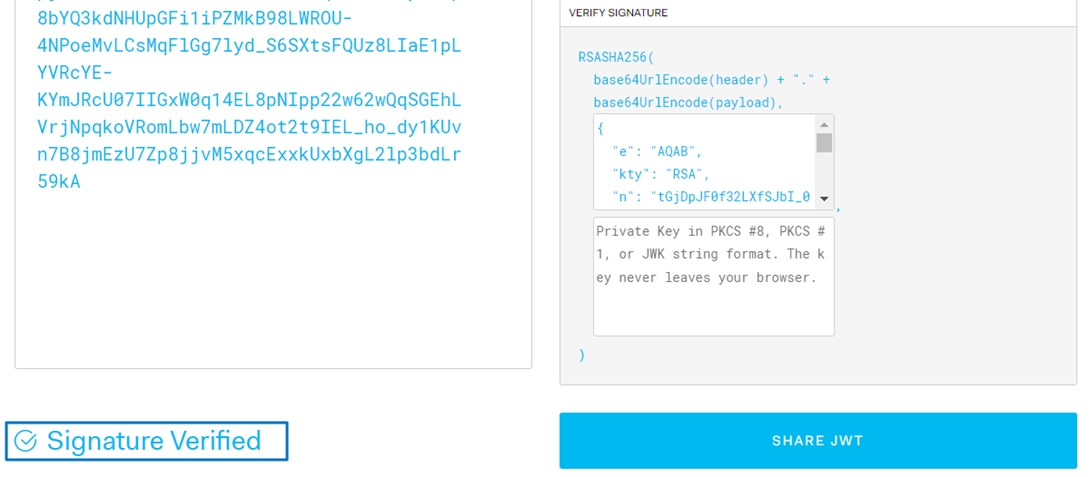
Verifying id_token with External Third-Party Website
Paste the id_token value into the left-hand "Encoded" window on JWT.io, and it will automatically obtain the public key.
Was this helpful?