LogoLogo
TPI.devCommunityGithub
  • Overview
    • Introduction
      • Future Features
    • License & Disclaimer
    • APIM Architecture
      • Production Deployments and Capacity
      • Functions
      • Integration
    • Key Concepts
      • API Group
      • API Scope
      • API Client
      • End-to-End Workflow Combining API Group, API Scope, and API Client
        • Scenario: API Management for an E-commerce Platform
    • Support
    • Glossary
    • Scenarios
      • Financial Industry
        • Transforming Financial Services with digiRunner API Management
        • Redefining Financial Data Migration with digiRunner API Management Platform
      • Manufacturing Industry
        • Enabling Smart Manufacturing with Seamless API Integration and Automation via digiRunner
        • Streamlining Global Operations with API Management via digiRunner
      • Medical Industry
        • Enhancing Healthcare Data Integration and Security with digiRunner API Management
        • Revolutionizing Healthcare Interoperability with digiRunner’s Advanced API Framework
      • Insurance Industry
        • Modernizing Insurance Services with digiRunner API Management
        • Modernizing Insurance with digiRunner—Bridging Legacy Systems and Microservices
      • Government and Public Services
        • Empowering Open Government Services with digiRunner: A Mission for Integration and Transformation
        • Streamlining Public Sector Innovation via digiRunner: Driving Citizen-Centric Digital Transformation
  • Get Started
    • Installing digiRunner API Management
      • SMTP Configuration
    • Registering Your First APIs with digiRunner
    • Client Authorization and Calling APIs
    • Rate Limiting
    • Proxy Caching
    • Load Balancing
    • Sandbox Testing
    • VIP Gateway Priority Settings
    • JWE Certificate
  • Configuring IP Whitelisting via IP Binding
  • Most common use cases
    • Obtaining API Keys and Calling APIs
    • API IP Diversion
    • Viewing Real-time API Logs
    • Enabling APIs and No Auth in Batches with API Imported
    • Role-Based Access Management within a Hierarchical Structure
    • Simplified OIDC Login with Predefined Organizational Frameworks
    • Resetting User Password and Confirmation Email for Admin Console User
  • Guide
    • AC User Management
      • Users
      • My Profile
      • Roles
      • Role Mapping
      • Organization
      • Role & txID
      • Delegate AC User
      • AC OAuth 2.0 IdP
      • AC LDAP IdP
      • AC MLDAP IdP
      • AC API IdP
    • Development Mode
      • Function Management
      • Rtn Code Management
      • Embedded Function Management
    • Client Management
      • API Client
      • API Group
      • API Scope
      • Authentications
      • Security Level
      • GTW OAuth 2.0 IdP
      • GTW LDAP IdP
      • GTW API IdP
      • GTW JDBC IdP
      • Client Export/Import
    • API Management
      • API List
      • API Registry
      • API Test
      • API Modify Batch
    • Monitor & Alert
      • digiRunner Server
      • Alert Settings
    • Reports
      • API Calls
      • API RESP distribution
      • API Avg. RESP Time
      • API GTW traffic
      • Bad Attempt Report
    • Certificate Management
      • JWE Cert. List
      • JWE Cert. Management
      • TLS Cert. List
      • TLS Cert. Management
    • Application Forms
      • API Key
      • Applications
      • Approval Flow Settings
    • System Information
      • API Key Approval History
      • Scheduled Tasks
      • Recurring Tasks
      • Mail Log
    • System Configs
      • Setting
      • Items
      • Files
      • Customer Setting
      • Online Console
      • WebSocket Proxy Management
      • Static Webpage Reverse Proxy
      • RDB Connection
      • Mail Template Export/Import
  • API Integration Guide
    • Using Token for Authentication and Authorization
      • OpenID Connect (OIDC) Mode
      • Client Credentials Mode
      • Password Mode
    • Using X API Key for Authentication and Authorization
      • Applying for X API Key
      • Obtaining X API Key
      • Calling APIs Registered in digiRunner with X API Key
    • Using API Key for Authentication and Authorization
      • Applying for API Key
      • Obtaining API Key and Secret Key
      • Calculating the Signature and DGRK
      • Calling APIs Registered in digiRunner with API Key
    • Using HTTP Basic and OAuth for Authentication and Authorization
      • Calling APIs Registered in digiRunner with Basic Auth
      • Calling APIs Registered in digiRunner with No OAuth
    • Token Lifecycle Management Mechanism
      • Applying Refresh Token
      • Token Revocation
      • Token Introspection
    • JWS/JWE Integration
      • JWS Workflow
      • JWE Workflow
      • Exchanging Public Keys
      • Generating Certificate
      • Operating with JWS
      • Operating with JWE
Powered by GitBook
On this page
  • Create AC API IdP
  • View AC API IdP
  • Update AC API IdP
  • Delete AC API IdP

Was this helpful?

Export as PDF
  1. Guide
  2. AC User Management

AC API IdP

PreviousAC MLDAP IdPNextDevelopment Mode

Was this helpful?

Path: AC User Management > AC API IdP

In this section, you can find instructions on how to manage APIs for access control and authentication, which rely on an identity provider (IdP) to handle user identity information.

Create AC API IdP

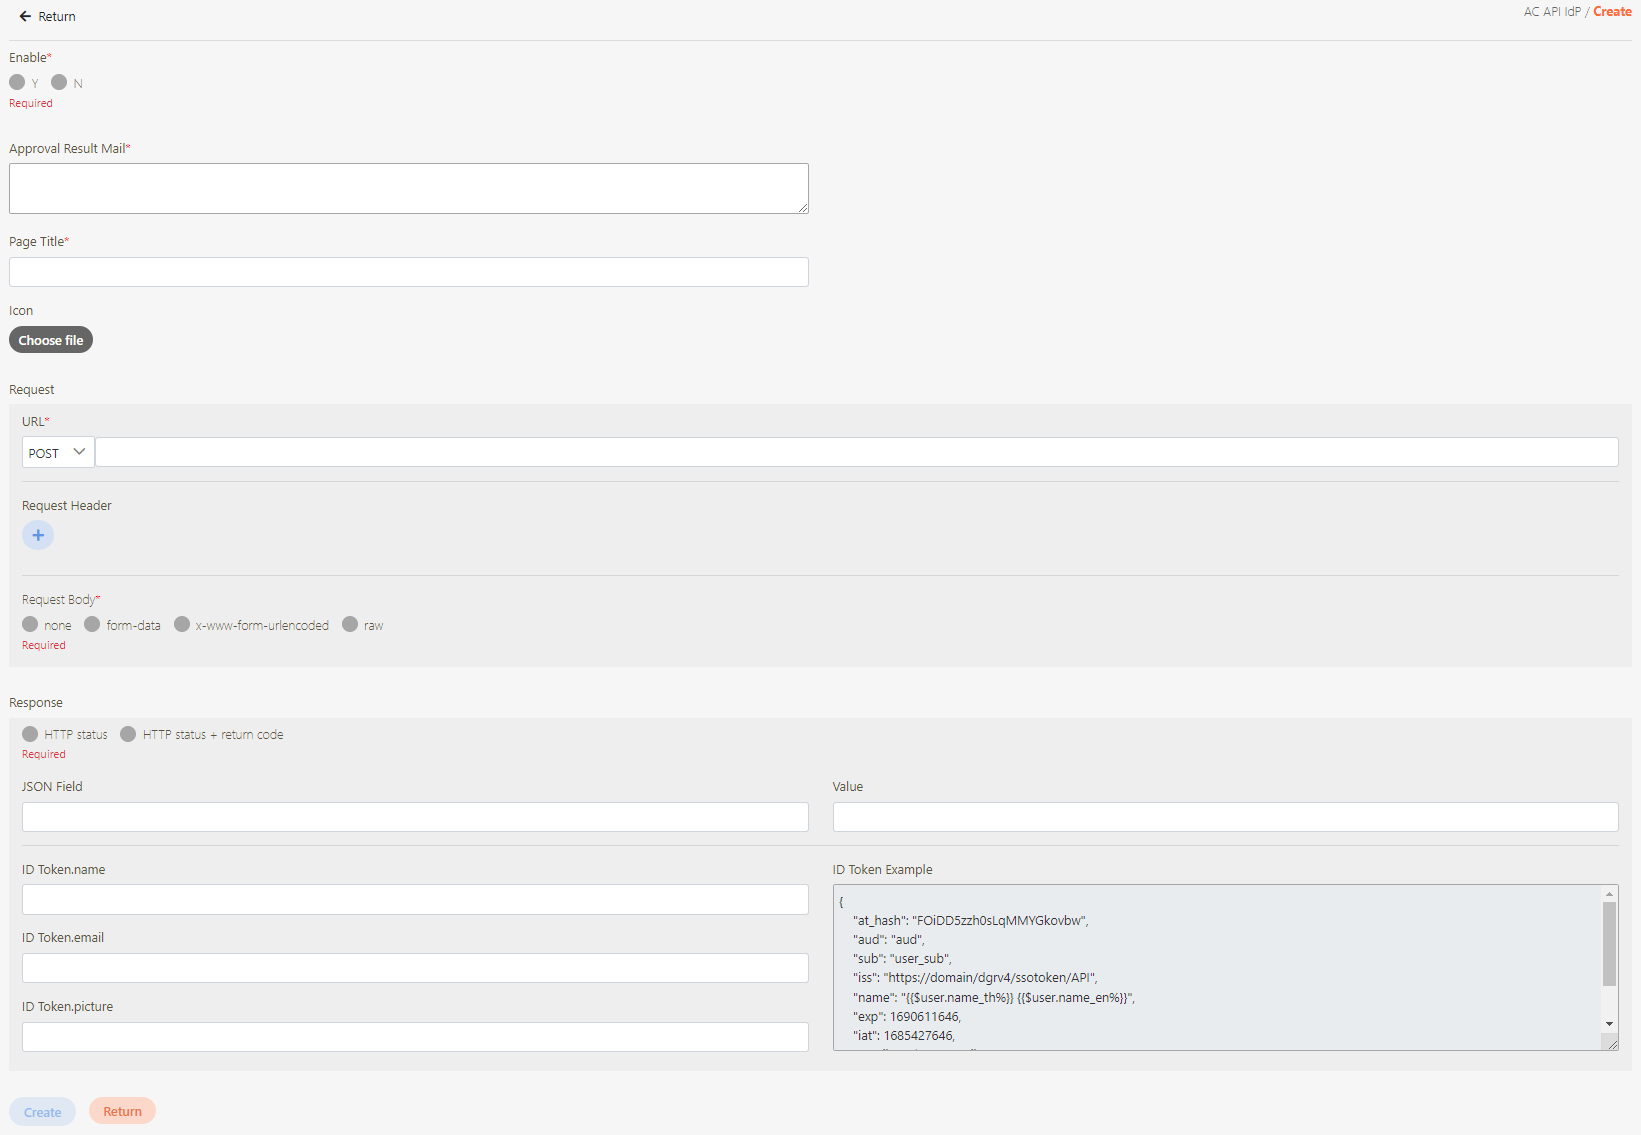
  1. Click Create to access the AC API IdP creation page.

  1. Fill in the data or make selections as instructed below. The fields marked with “*” are required.

  • Enable*: This account is active (Y) or inactive (N).

The best practice is to enable only one account. If multiple accounts are enabled, the system will use the most recently created one.

  • Approval Result Mail*: Specify the reviewer's email, default for manual review, but the system can also perform an auto-review.

  • Page Title*: Header of the login page.

  • Icon: Click Choose file to select and upload an identifiable AC API IdP image. If no image is uploaded, the system will automatically use the digiRunner logo.

  • Request URL*: Specify the Uniform Resource Locator (URL) of the resource or service to be accessed.

  • Request Header: The metadata section of an HTTP request, containing additional information about the request such as request attributes, browser-related information, user authentication, etc. The Request Header is typically used to convey meta-information about the client (such as the browser) and the request, allowing the server to properly handle the request.

  • Request Body*: Select from none / form-data / x-www-form-urlencoded / raw.

  • Response*: Select the response type from HTTP status / HTTP status + return code.

  • JSON Field: A specific element or attribute within a JSON data structure. JSON (JavaScript Object Notation) is a lightweight data interchange format commonly used for transmitting and storing data between applications. JSON data is organized in name/value pairs and can include various types of values such as strings, numbers, booleans, arrays, and other JSON objects.

  • Value: The specific data or information returned as a result of a computation, request, or operation. This data is typically obtained through API requests, function calls, queries, or other interactive processes.

  • ID Token.name: In OAuth 2.0 and OpenID Connect (OIDC), after a user is authenticated, the Authorization Server usually generates an ID Token to provide information about the authenticated user to the client. The ID Token contains several predefined standard claims, one of which is "name".

  • ID Token.email: In OAuth 2.0 and OpenID Connect (OIDC), the ID Token typically includes an "email" claim representing the authenticated user's email address. The value of the "email" claim is the user's email address, which may be used to identify the user or for subsequent application use.

  • ID Token.picture: In OpenID Connect (OIDC), the ID Token can include a "picture" claim representing the authenticated user's avatar or photo. The value of the "picture" claim is the URL or other reference to the user's avatar image. This claim is typically used to allow applications to display the authenticated user's avatar, providing a more personalized user experience.

  1. Click Create to save and exit.
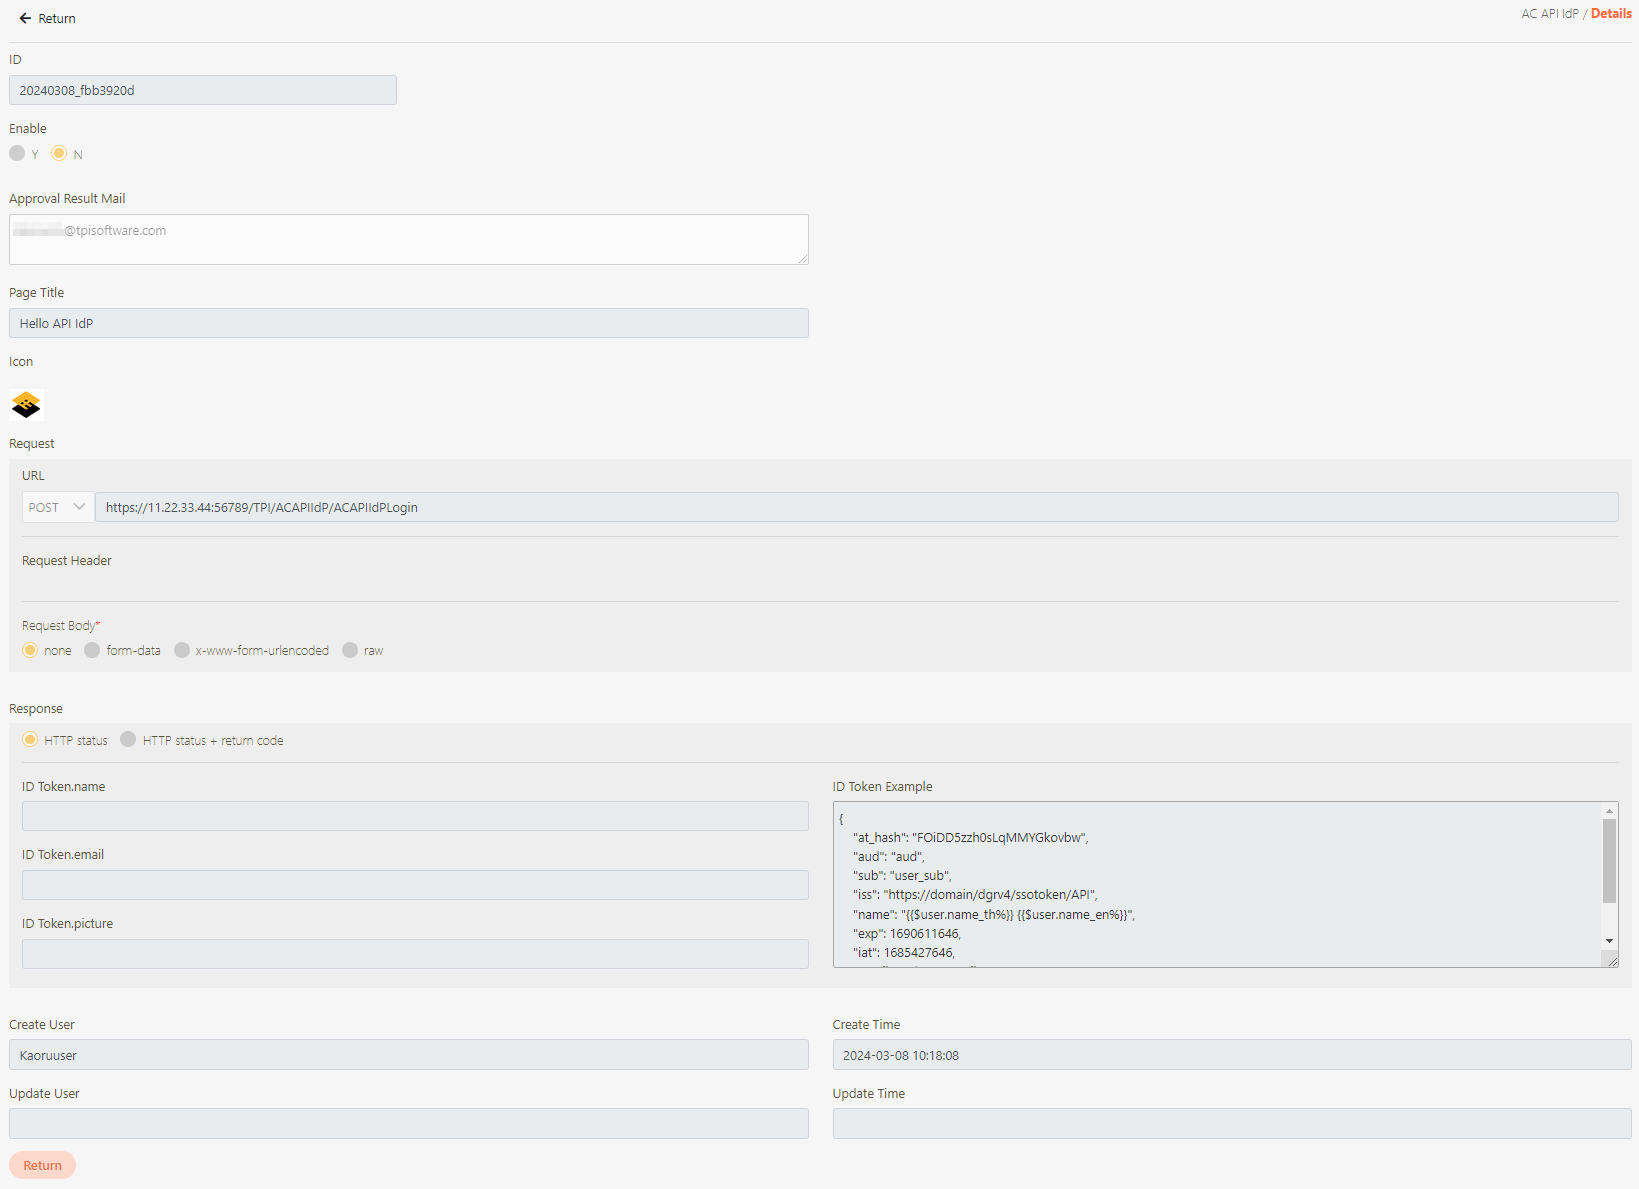
View AC API IdP

Update AC API IdP

  1. Modify the desired fields, and click Update to save and exit.

Delete AC API IdP

  1. A warning prompt displaying the message “Confirm Delete?” will pop up. Click Confirm to delete the AC API IdP and exit.

Click on theicon to access the details page.
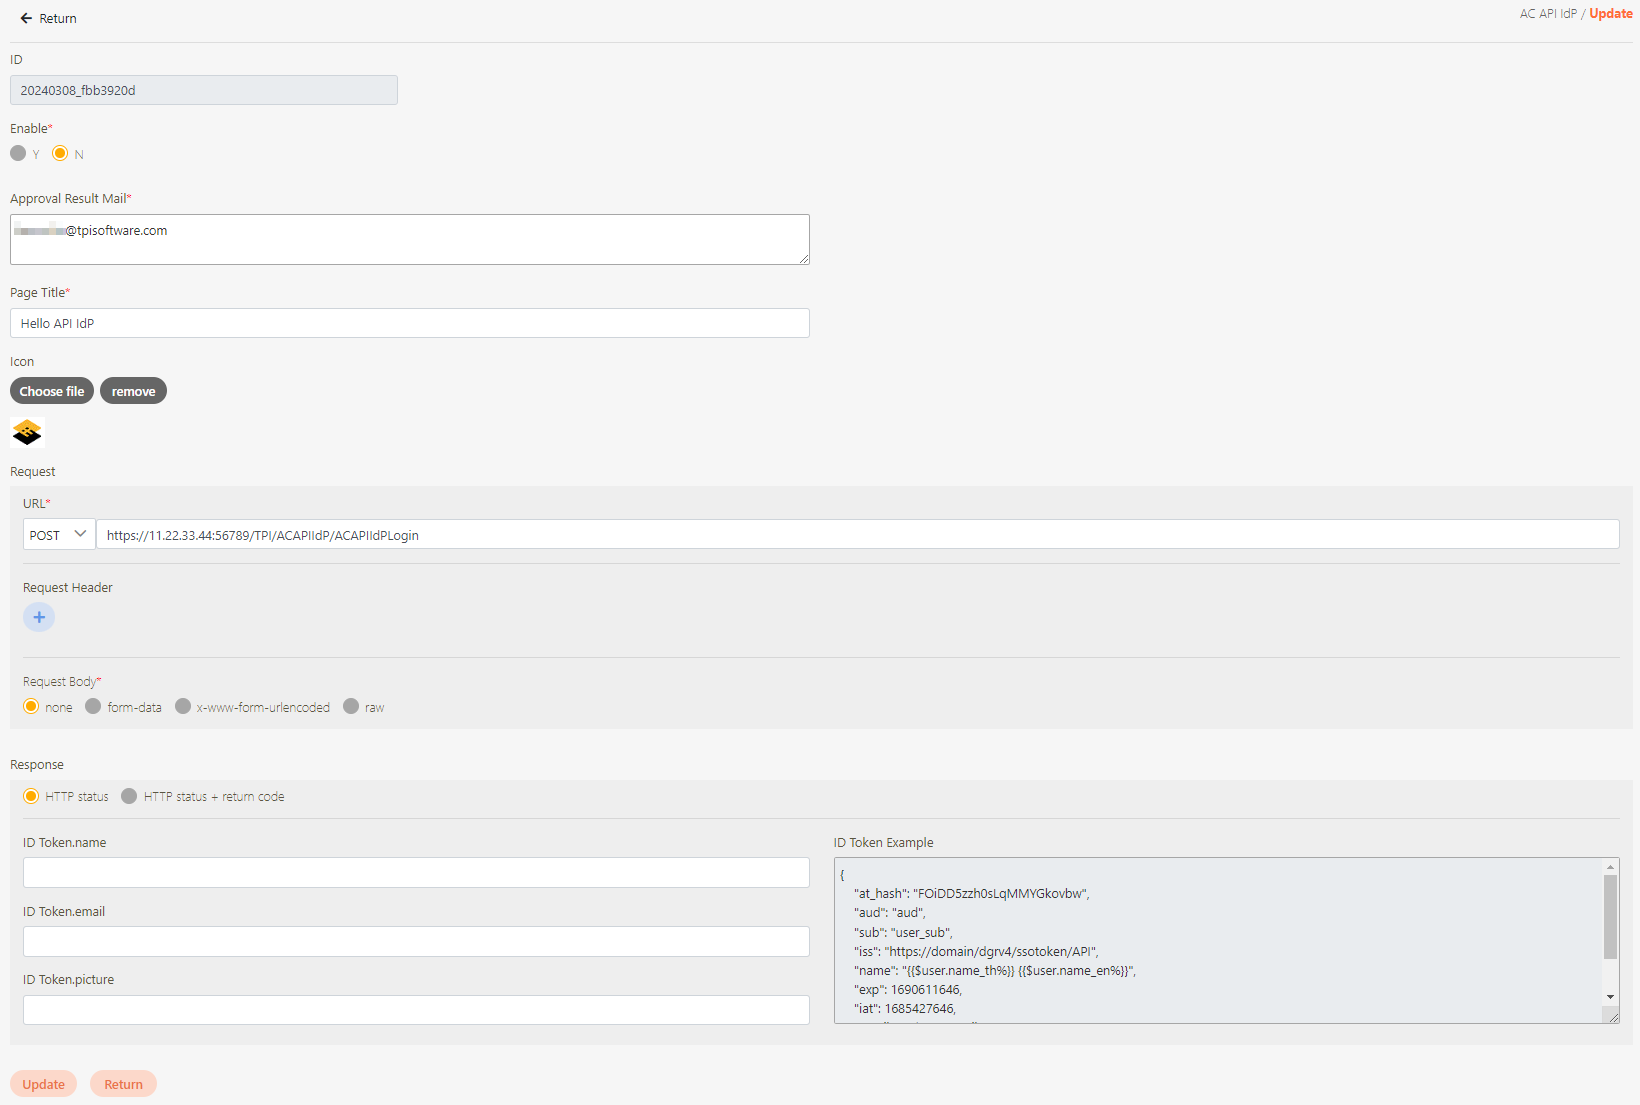
Click on the icon to access the Update page.

Search for the AC API IdP to delete, and click on the icon to proceed.