GTW CUS IdP
Path: Client Management > GTW CUS IdP
In this section, you can find instructions on how to integrate a customized module with an identity provider (IdP) to meet SSO login management requirements. The login authentication settings apply to the customized admin console.

Search GTW CUS IdP
To search for GTW CUS IdP, you can search using the relevant information as keywords.

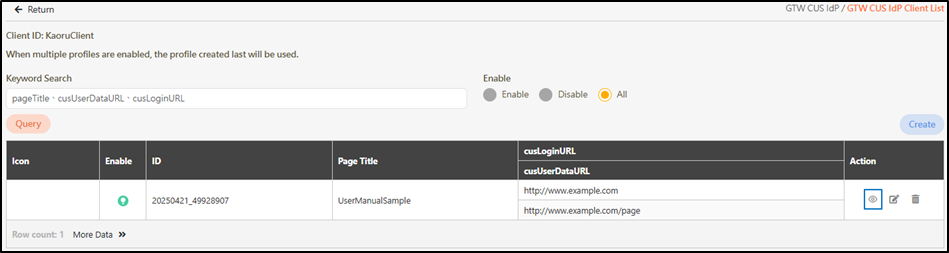
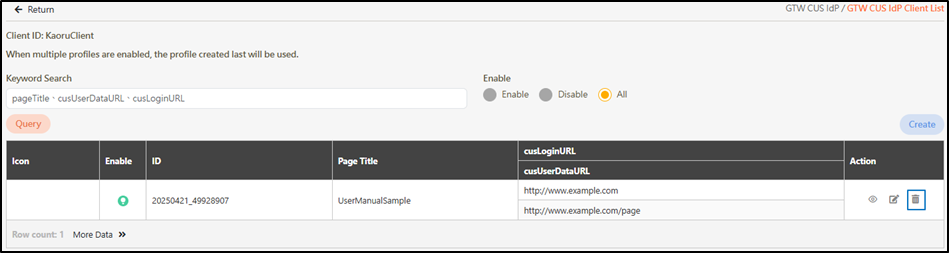
Client List of GTW CUS IdP
To view the details of GTW CUS IdP, you can search using the relevant information as keywords, and click on the
icon to access the GTW CUS IdP Client List page.

Users can query, create, update, view details, and delete the clients.

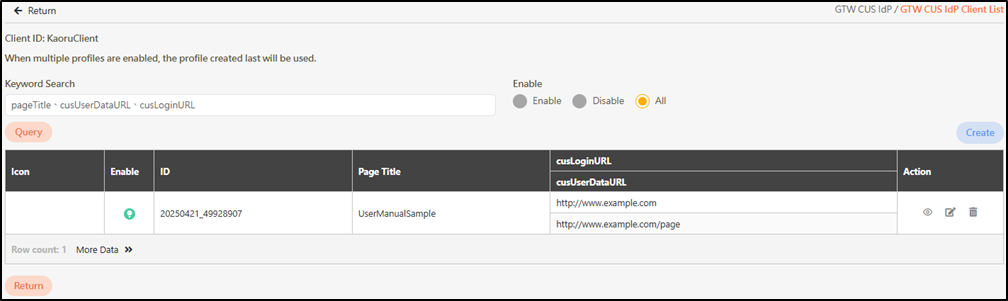
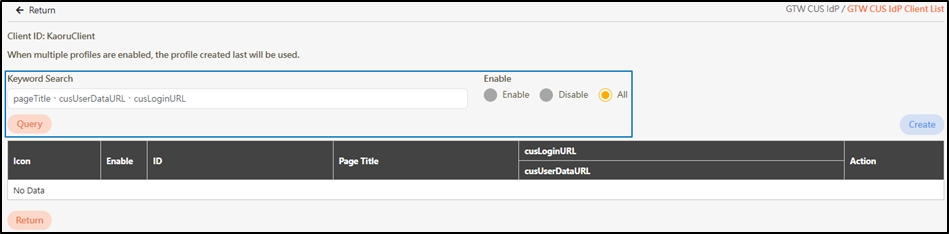
Query CUS IdP Clients
Enter the keywords or select the status from Enable, Disable, or All, and click Query to view the target GTW CUS IdP.

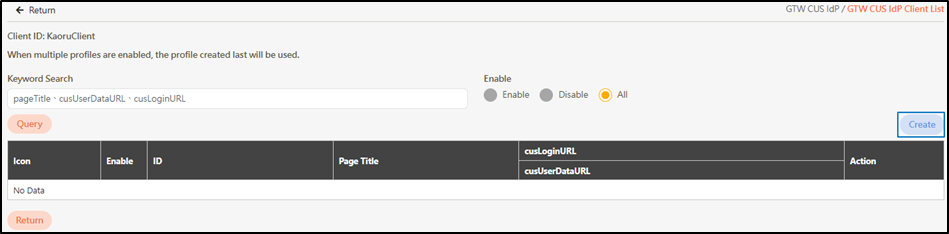
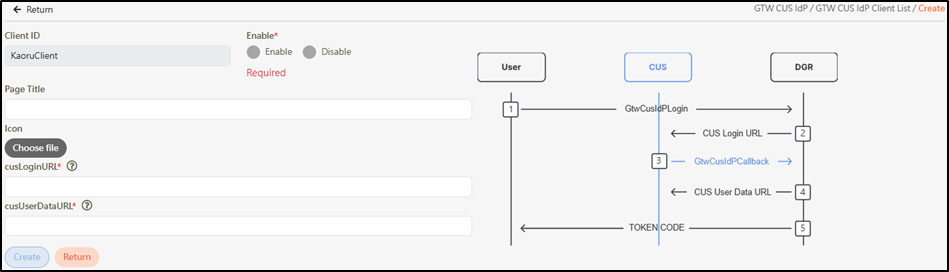
Create CUS IdP Clients
Click Create to access the CUS IdP Client creation page.

Fill in the data or make selections as instructed below. The fields marked with “*” are required.
Enable: Select to Enable or Disable the account.
Page Title: Header of the login page.
Icon: Click Choose file to select and upload an identifiable GTW CUS IdP image. If no image is uploaded, the system will automatically use the digiRunner logo.
cusLoginURL*: The URL for the customer login page, used to authenticate users when they log in to their account. This URL directs users to the login page to complete identity verification before accessing personal accounts or utilizing the platform’s services.
The URL must start with http:// or https://.
The URL must be in a valid and complete format, such as:
http://www.example.com
http://subdomain.example.com/page
http://www.example.com/path/to/resource?param=value
cusUserDataURL*: The URL used to access user data. Since user data is managed by the customer, a standardized API URL must be provided to allow the system to securely retrieve and update user information.
The URL must start with http:// or https://.
The URL must be in a valid and complete format, such as:
http://www.example.com
http://subdomain.example.com/page
http://www.example.com/path/to/resource?param=value
Click Create to save and exit.

Manage CUS IdP Clients
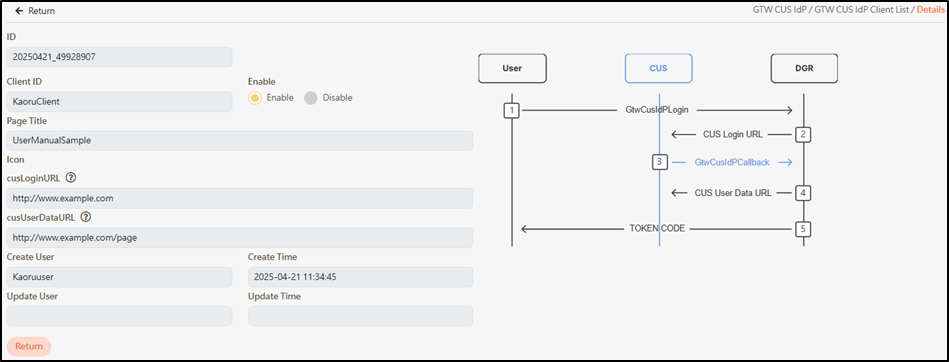
To view the details of the CUS IdP client, search for the client you want to view, and click on the
icon.

Access and view the CUS IdP client details.

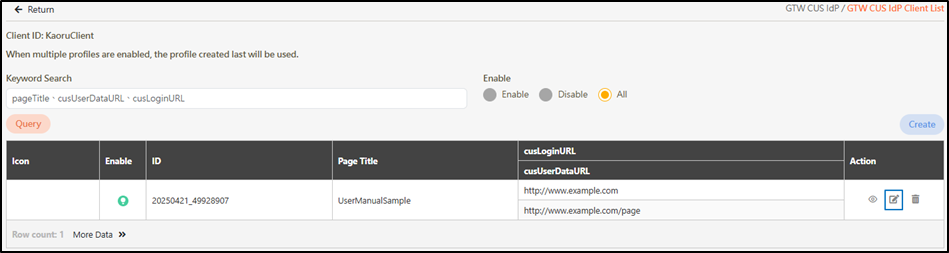
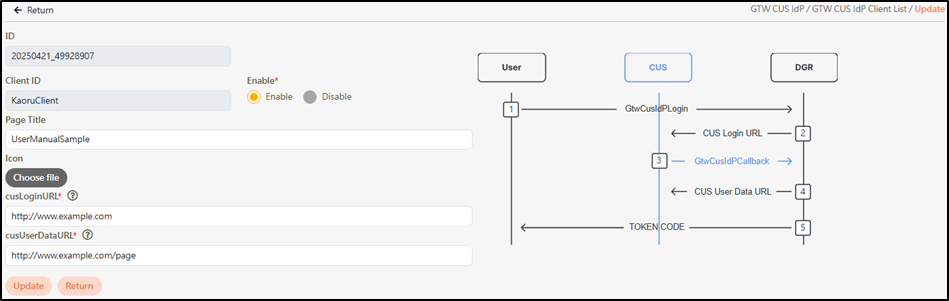
To update an CUS IdP Client, search for the client you want to modify, and click on the
icon to access the Update page.

Modify the desired fields, and click Update to save and exit.

Select the client ID to delete, and click on the
icon to proceed.

A warning prompt displaying the message “Confirm Delete?” will pop up. Click Confirm to delete this CUS IdP Client and exit.

Last updated
Was this helpful?