WebSocket Proxy is an interlayer service used to forward WebSocket communications. When WebSocket communications involve cross-domain or security restrictions, WebSocket Proxy can act as an intermediary to make WebSocket communications run smoothly in different environments.
WebSocket is an agreement that enables full-duplex communication in web applications, allowing real-time data exchange between clients and servers. WebSocket Proxy receives requests from WebSocket clients and forwards them to the WebSocket server, and returns the response from the WebSocket server to the client.
Create WebSocket Proxy
Click Create to access the creation page.
Fill in the data or make selections as instructed below. The fields marked with “*” are required.
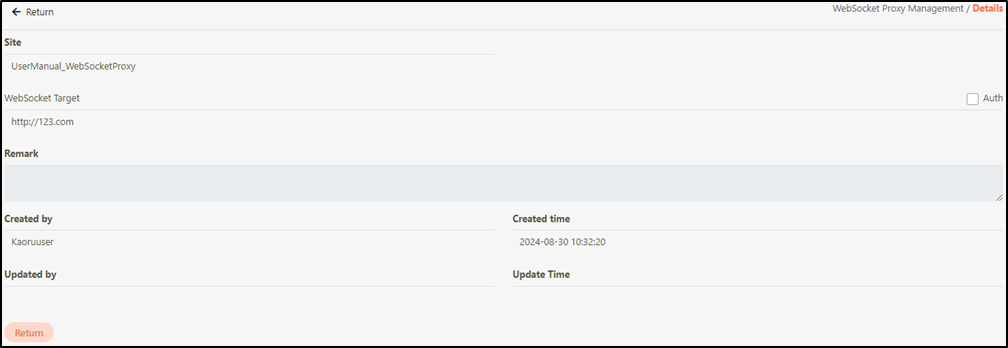
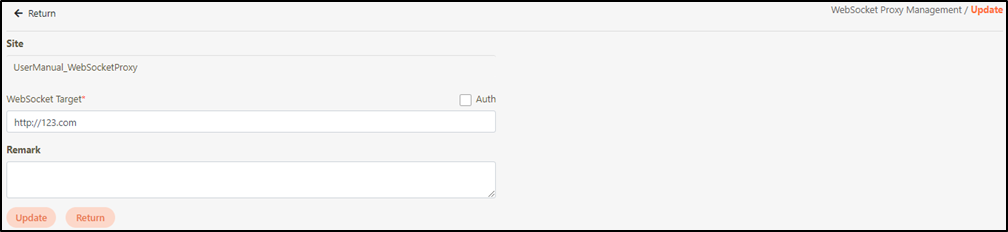
Site*: Refers to the website or server that provides the WebSocket Agent Service.
WebSocket Target*: Refers to the actual target server that receives data in WebSocket communications. When a WebSocket connection request is initiated by the client, the target WebSocket server is the target.
Remark: The description for this site.
Click Create to save and exit.
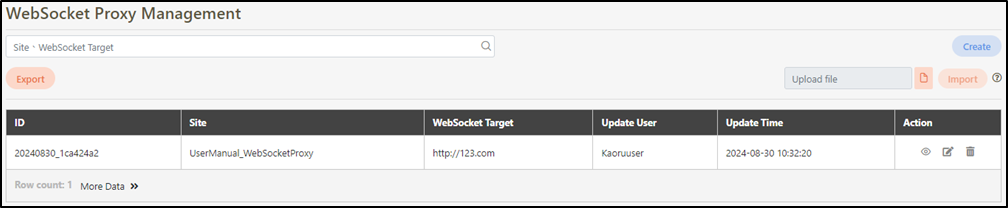
Search WebSocket Proxy
Search for the WebSocket Proxy by entering keywords.
Import and Export WebSocket Proxy
To modify multiple WebSocket Proxies at once, click Export to export the proxies as an .xlsx file. Modify the desired fields, click on the icon, and then click Import to import the modified file without renaming it.
The rules are as follows: based on SITE_NAME, if a duplicate exists, it will be updated; if no duplicate exists, a new record will be added.
View WebSocket Proxy
Search for the WebSocket Proxy to view details, and click on theicon to access the Details page of the WebSocket Proxy.
Update WebSocket Proxy
Search for the WebSocket Proxy to modify, and click on the icon to access the updatepage.
Modify the desired fields, and click Update to save and exit.
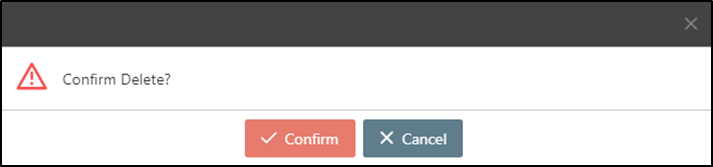
Delete WebSocket Proxy
Search for the file to delete, and click on the icon to proceed.
A warning prompt displaying the message “Confirm Delete?” will pop up. Click Confirm to delete the file and exit.


 icon to access the update page.
 icon to proceed.