Enabling APIs and No Auth in Batches with API Imported
The imported file must be a JSON file exported from digiRunner. This feature simplifies the process of handling multiple APIs with the same settings. If set to No Auth, it simplifies the authentication process, allowing for quick verification of API call success.
Importing APIs to digiRunner
Application scenarios include the operation of launching APIs from the test environment to the official environment, the launching of multi-center APIM, or API migration.
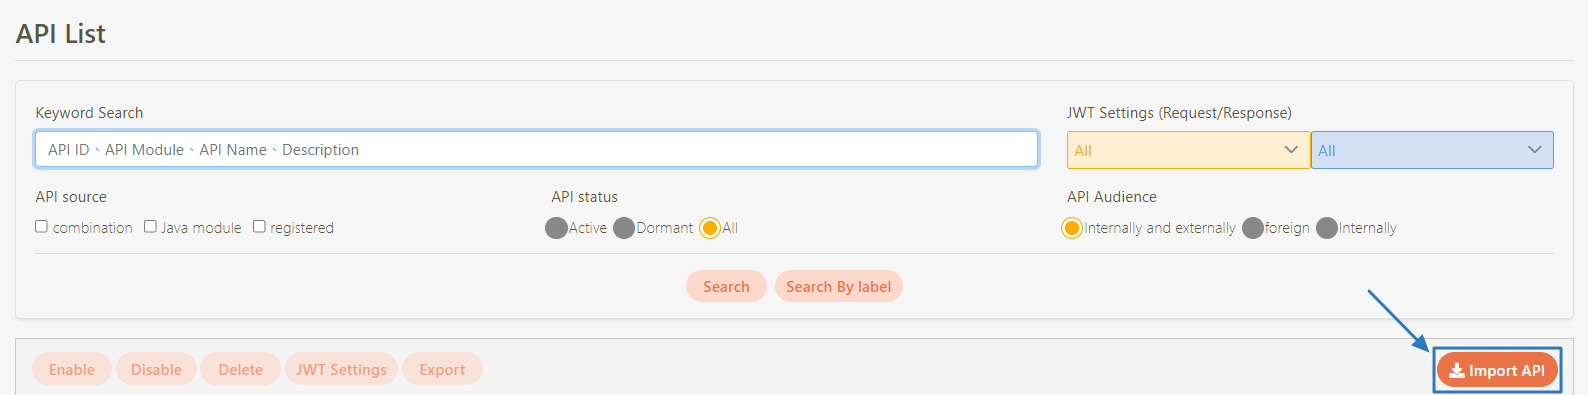
Go to API Management > API List, and click Import API.
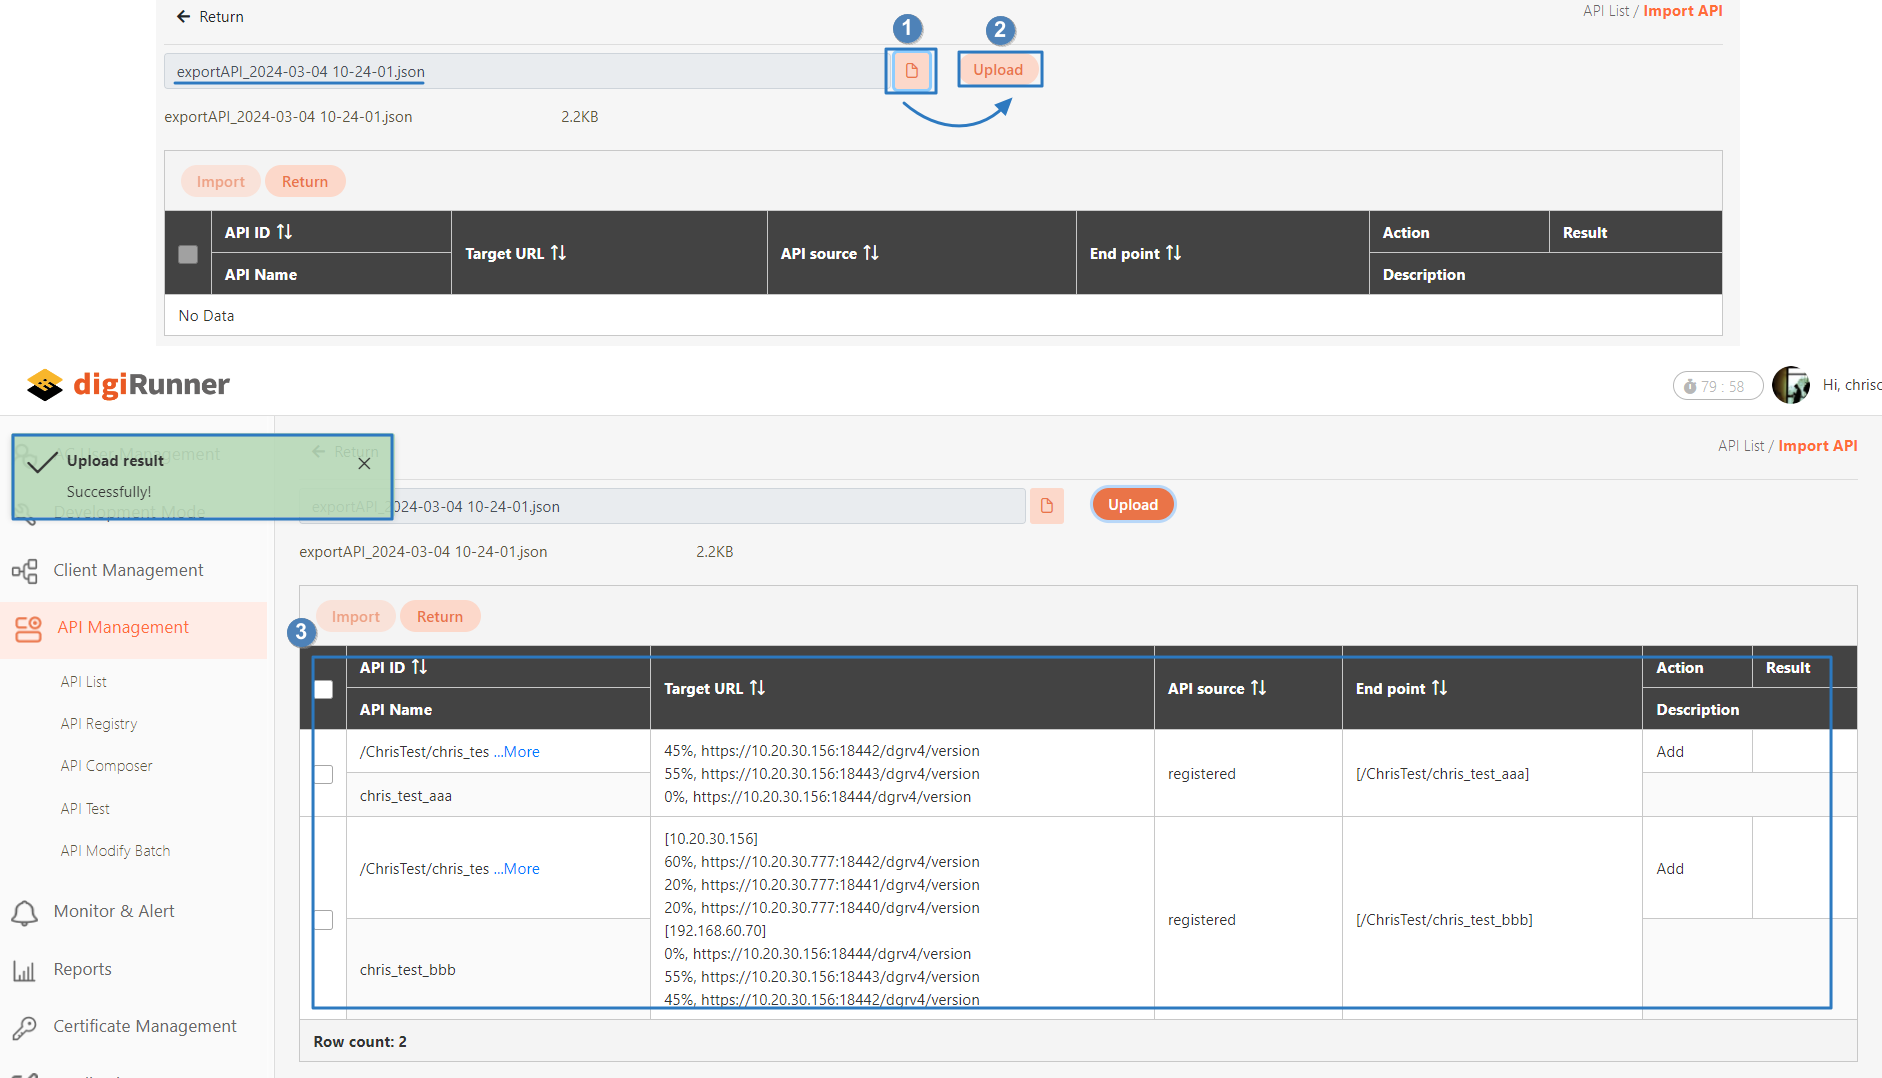
Click on the File icon, select the file, and then click Upload. A successful upload prompt will pop up, and the API information will be displayed in the table below.
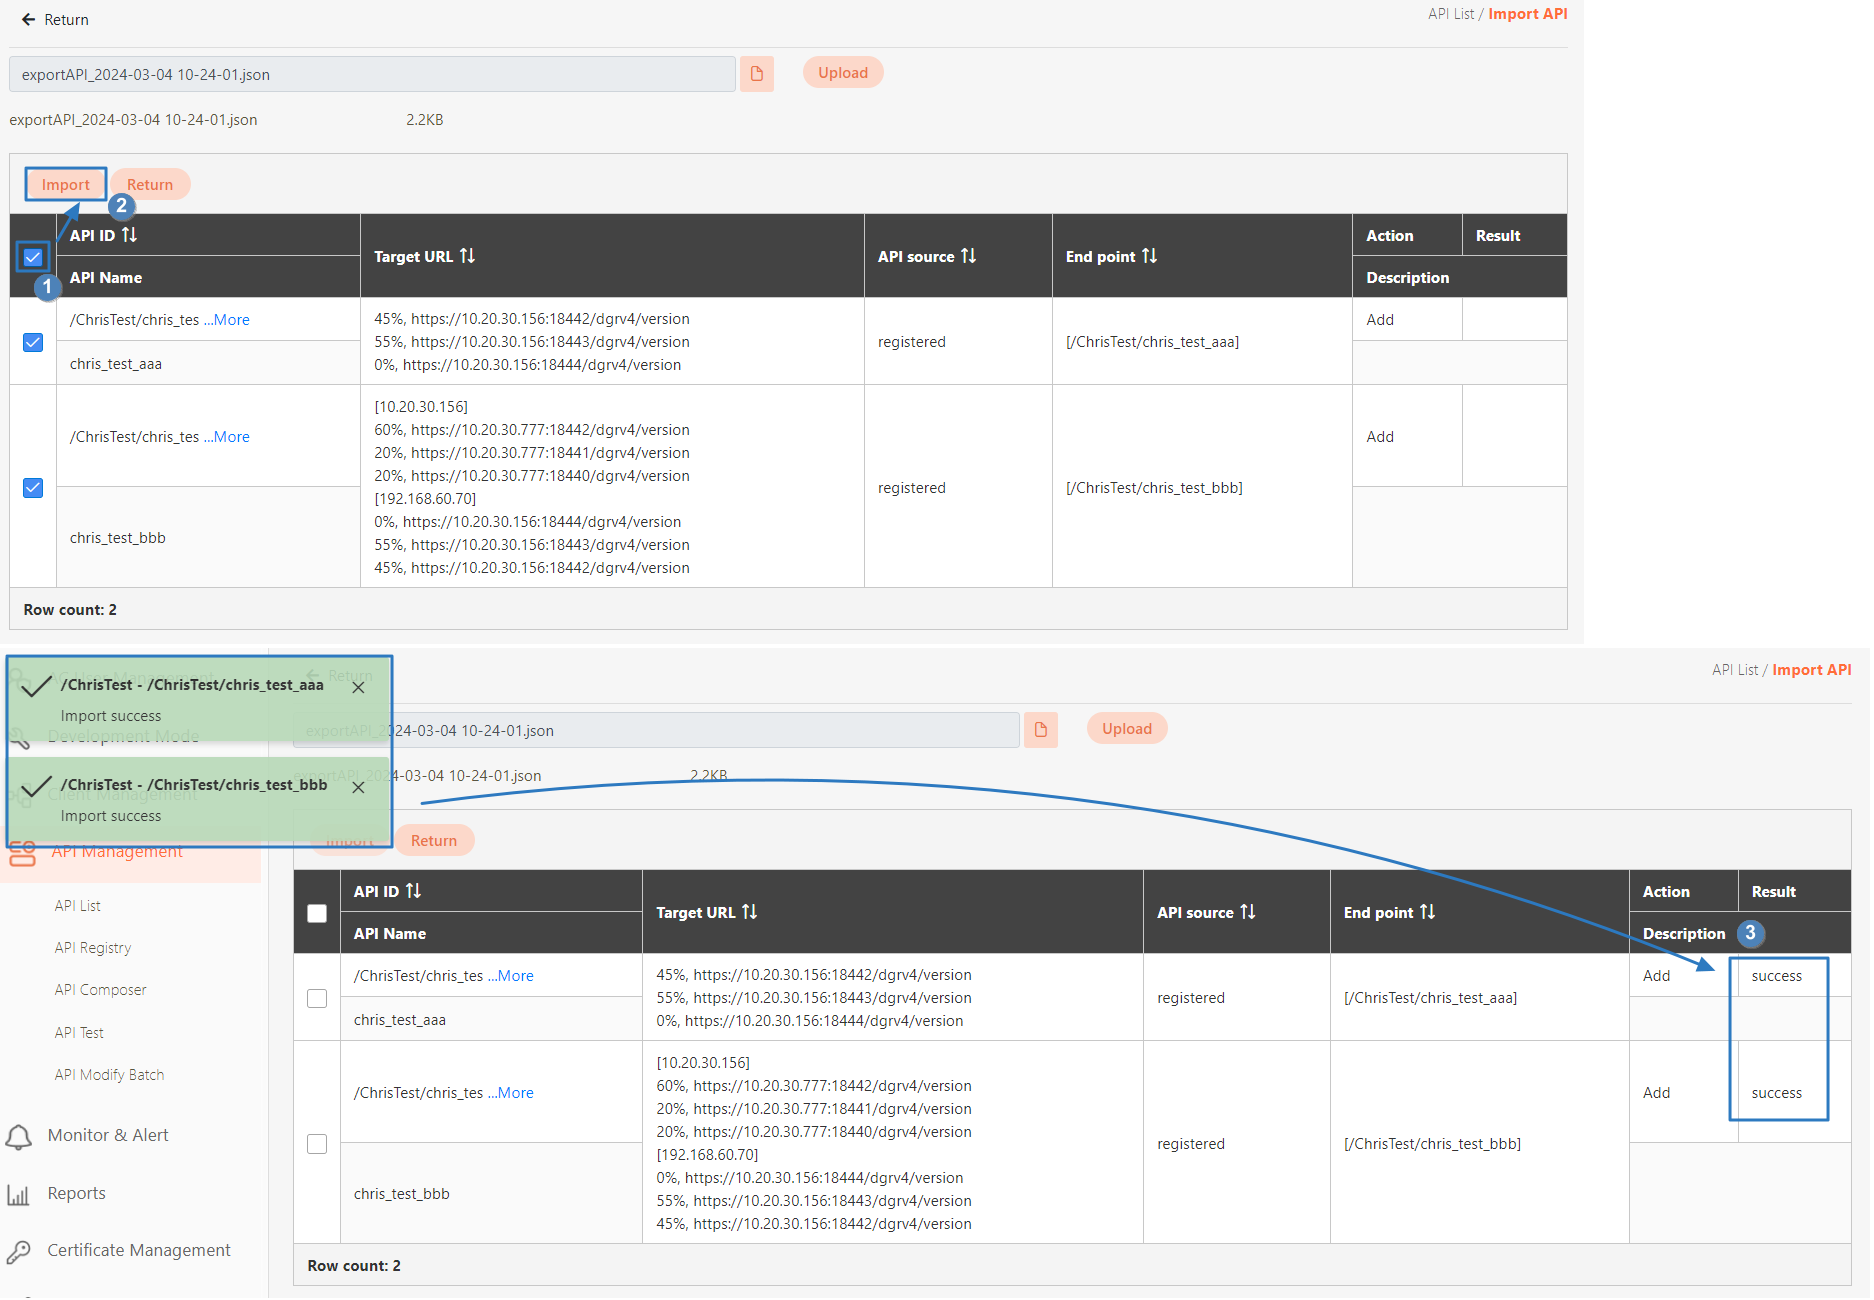
Check the list to select all APIs, and then click the Import button to import the APIs successfully. The import result will be updated to success.
Enabling APIs in Batches
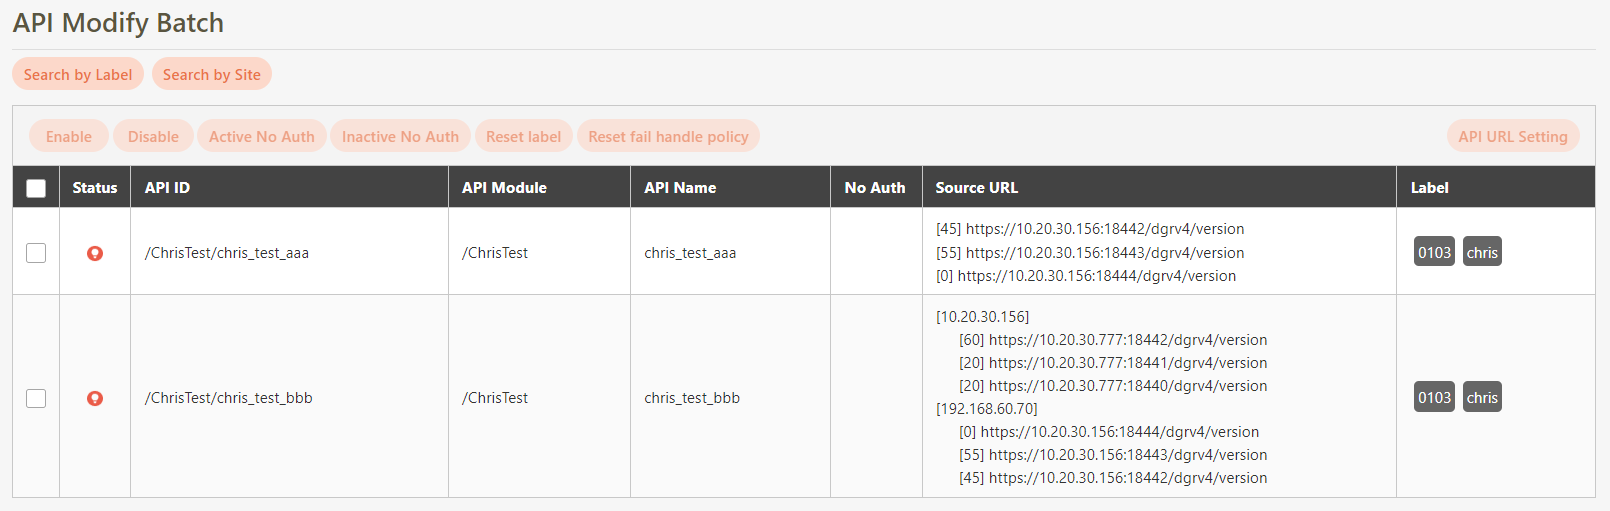
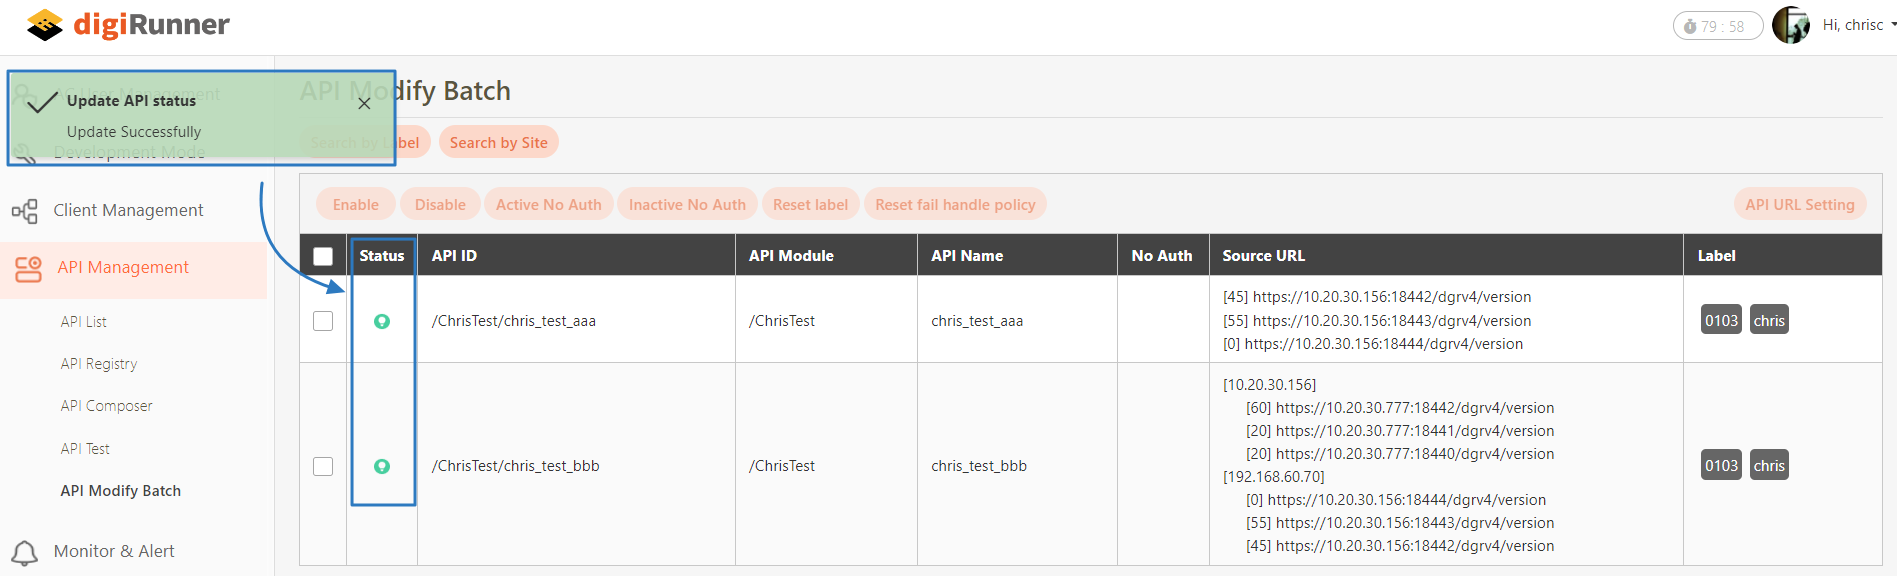
Go to API Management > API Modify Batch to enter the page. The default statuses of the newly imported APIs will be displayed with a red icon, indicating that the API is not yet enabled.
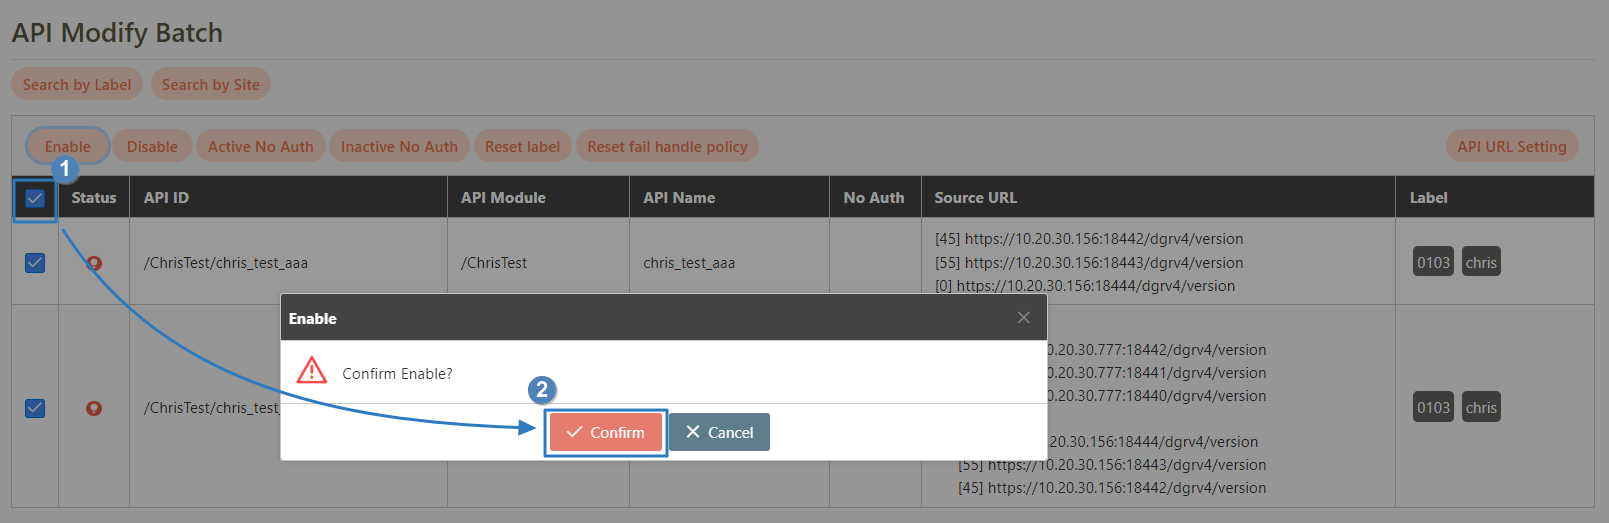
Check the box in the header cell to select all the APIs, and click Enable. A confirmation message will appear, click Confirm to save and exit.
A successful update prompt will pop up, and the status light will turn green, indicating that the API has been successfully enabled.
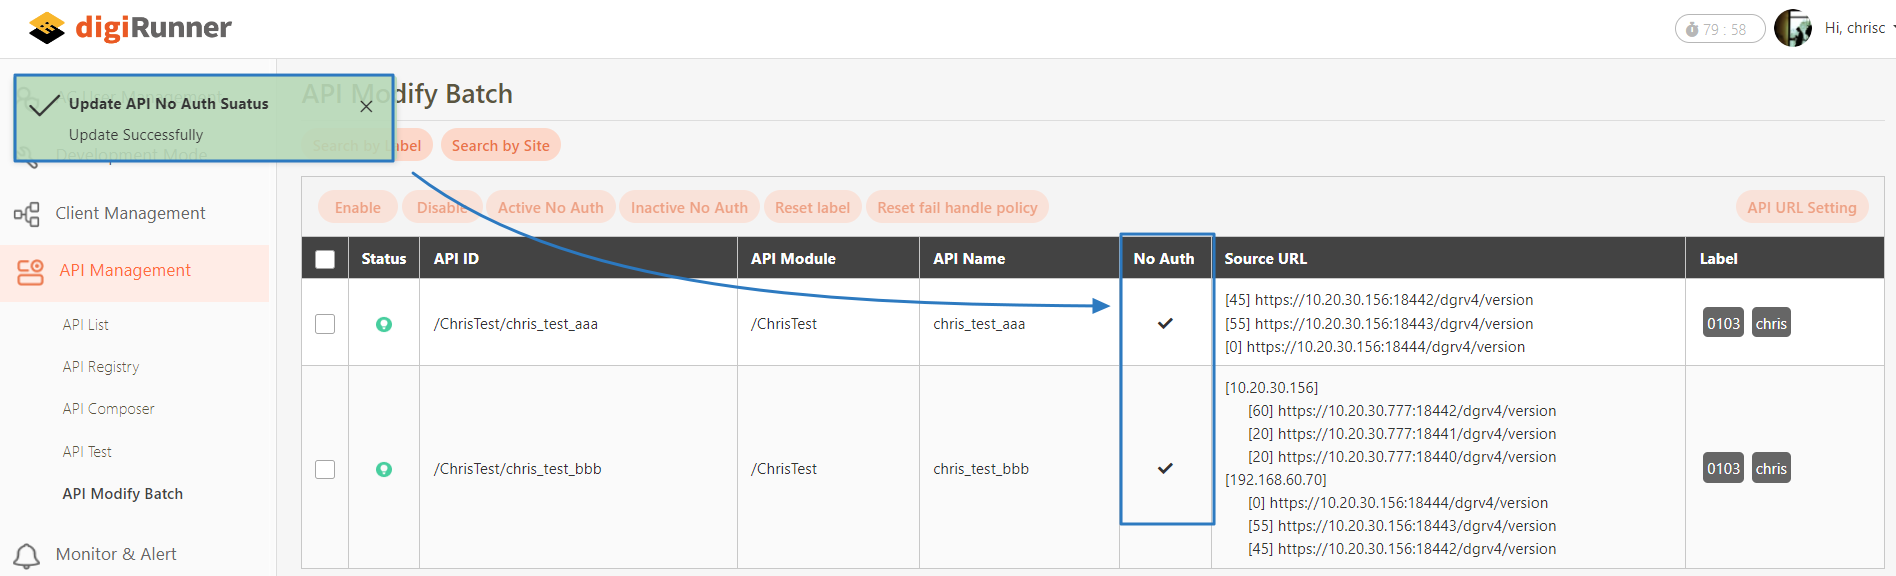
Enabling No Auth for APIs in Batches
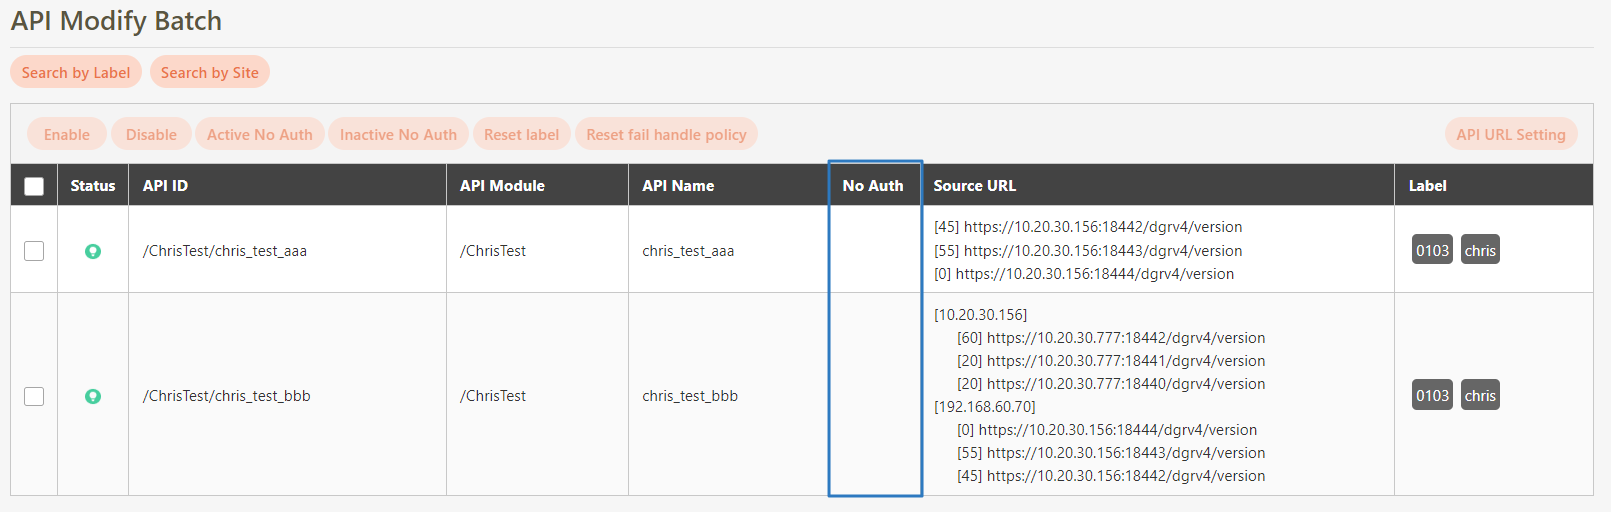
The default status of No Auth for newly imported APIs is disabled, and the field is empty.
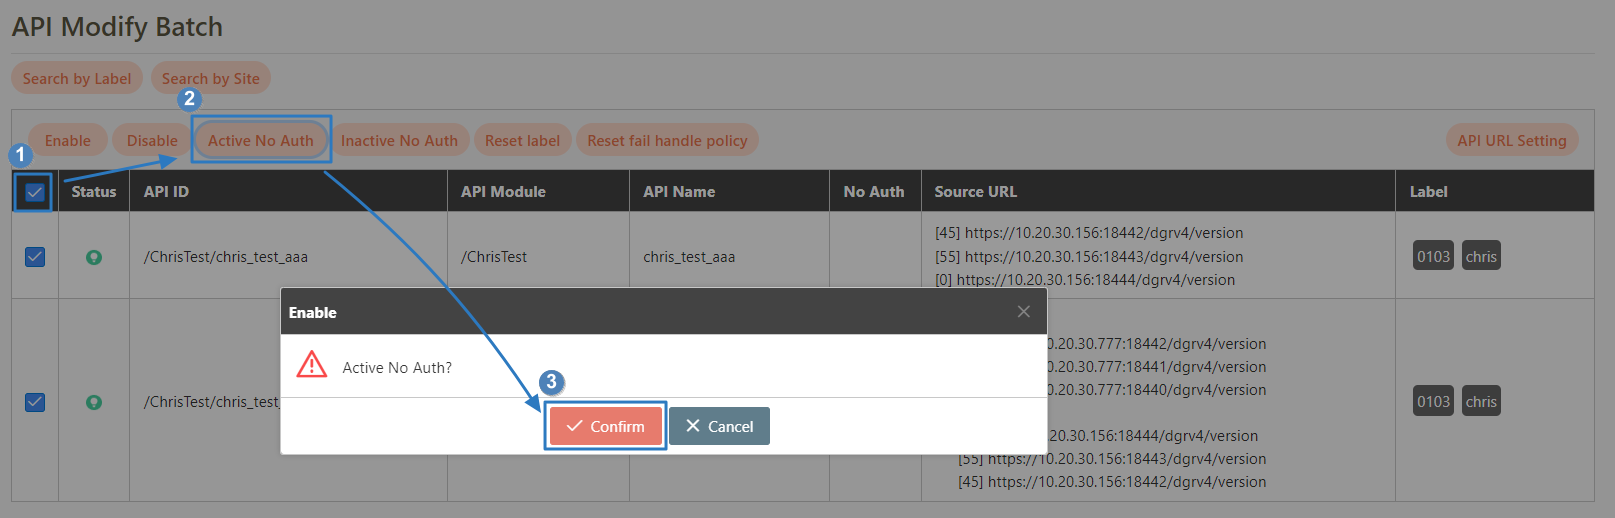
Check the box in the header cell to select all the APIs, and click Active No Auth. A confirmation message will appear, click Confirm to save and exit.
A successful update prompt will pop up, and the No Auth field will display a check symbol, indicating that No Auth has been enabled.
Was this helpful?