Client Authorization and Calling APIs
When internal/external personnel need to use APIs, a set of account and password needs to be acquired first, then pass client management authorization before they can be used. Users can also add and edit the API groups they need to use in groups, and when users and groups have matching security levels, clients can call the APIs in the group.
Group - A list of all APIs that control authorization; APIs authorized to be called successfully through Auth are defined by groups.
Client - To perform account and password verification for Auth authorization through the client, permission to call group APIs need to be obtained from the action of authorization groups.
Creating API Groups
The scope of authorization can refer to the establishment operation of group maintenance.
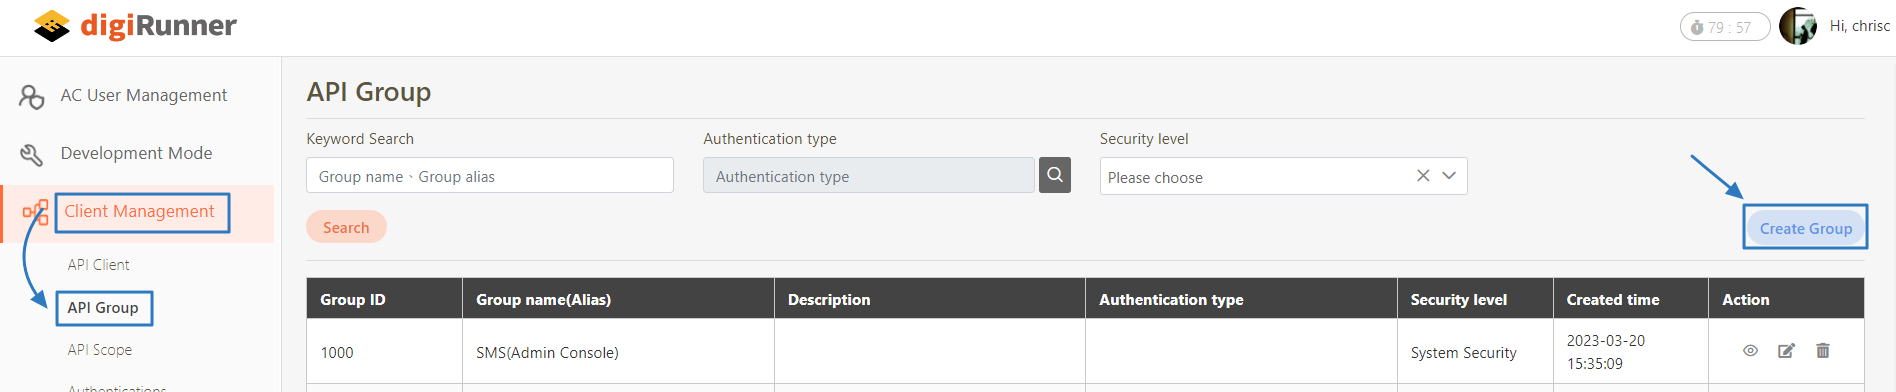
Go to Client Management > API Group, and click Create Group.
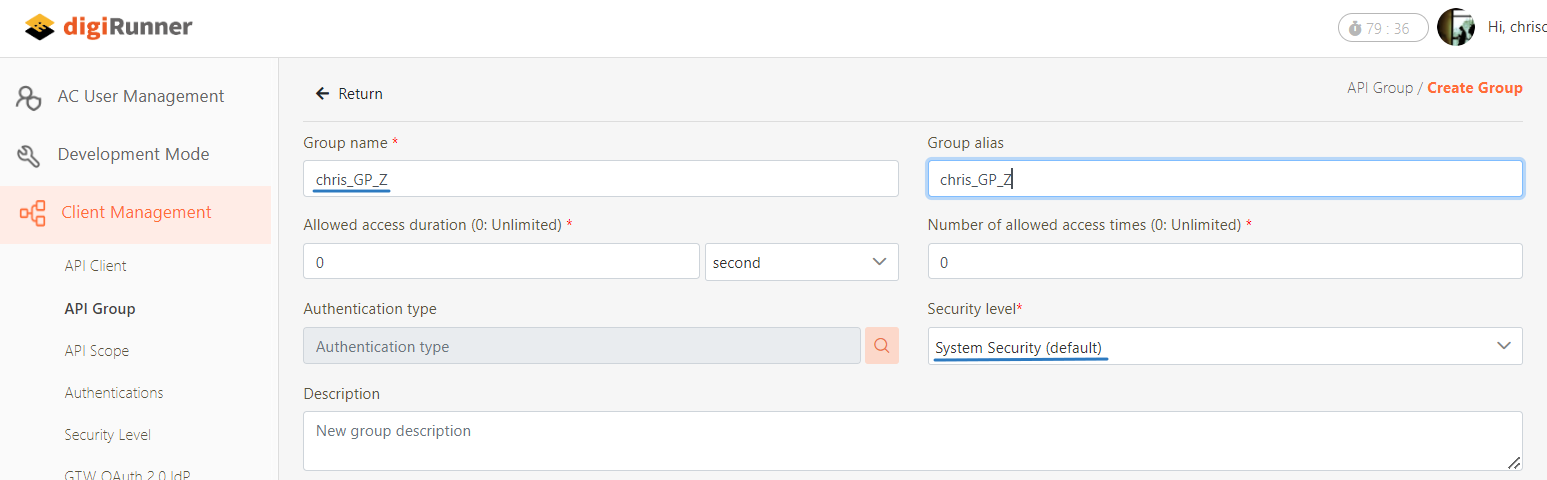
Fill in the required fields.
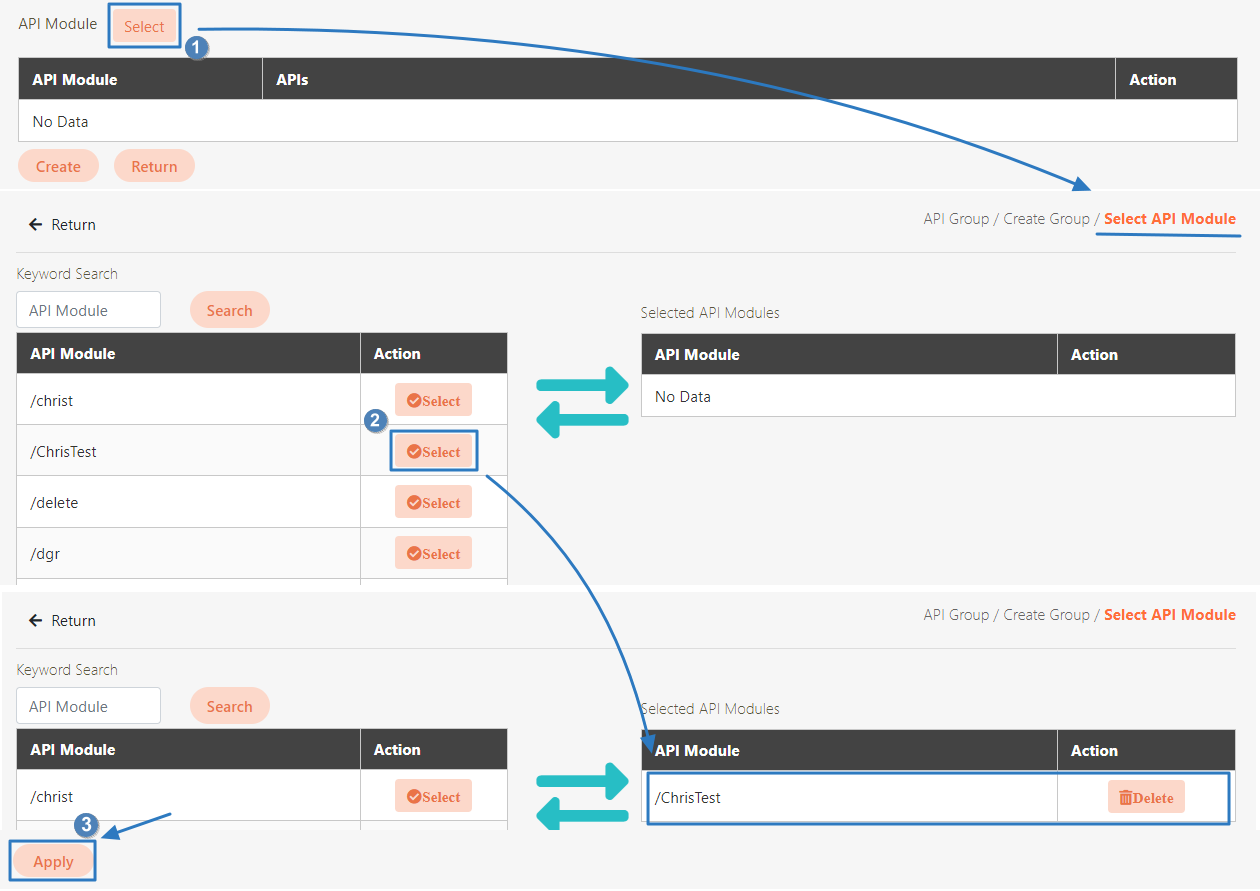
If there are APIs that require authorization, you need to go to the Module list field and click Select.
Go to the Module list and select the Module to authorize, and click Select.
It will move to the list of selected Modules, then click Apply.
Next, click Select API for that Module, and go to the list to select the API to authorize, then click Select.
It will move to the list of selected Modules, then click Apply. Return to the New page and click Create.
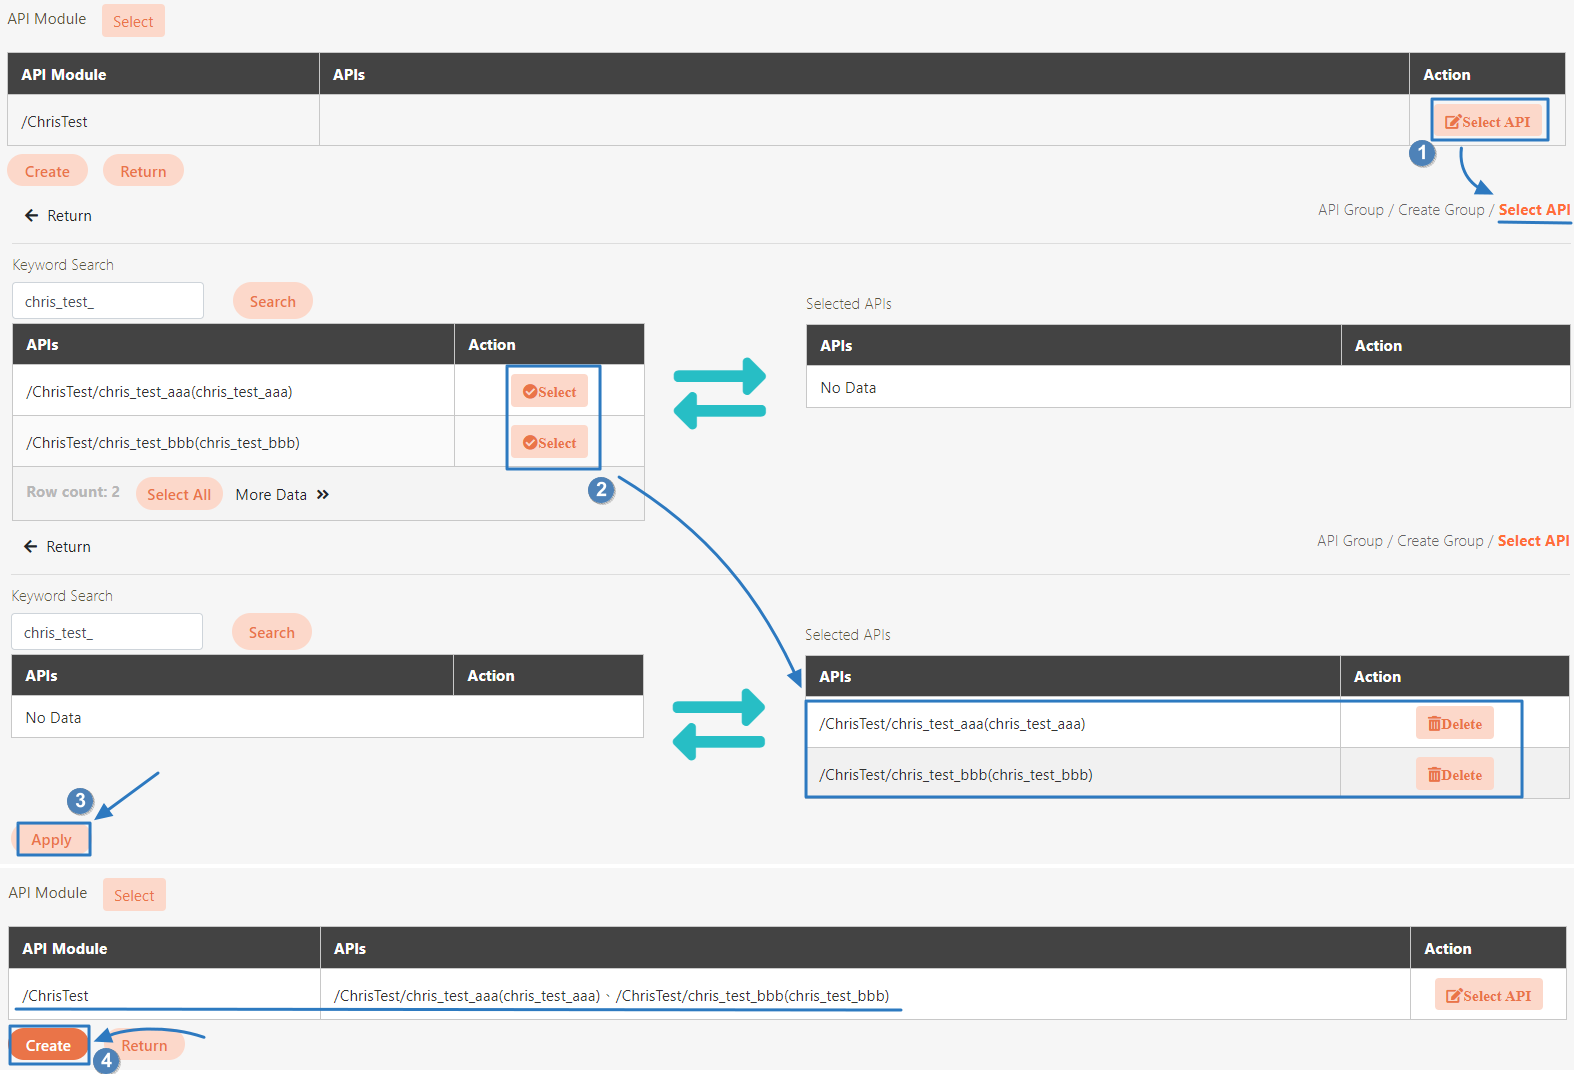
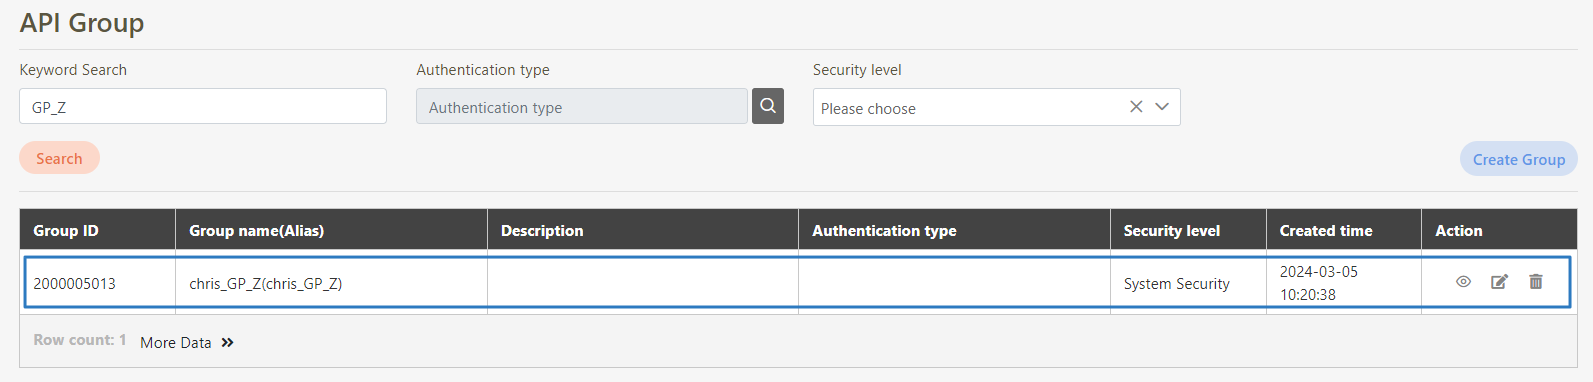
Creation of the group is completed, go to the API Group page and the data entry can be queried.
If you need more help when creating a API Group, please refer to the following link for more information.
API GroupCreating Client Accounts and Authorizing Groups
Creating Client Accounts
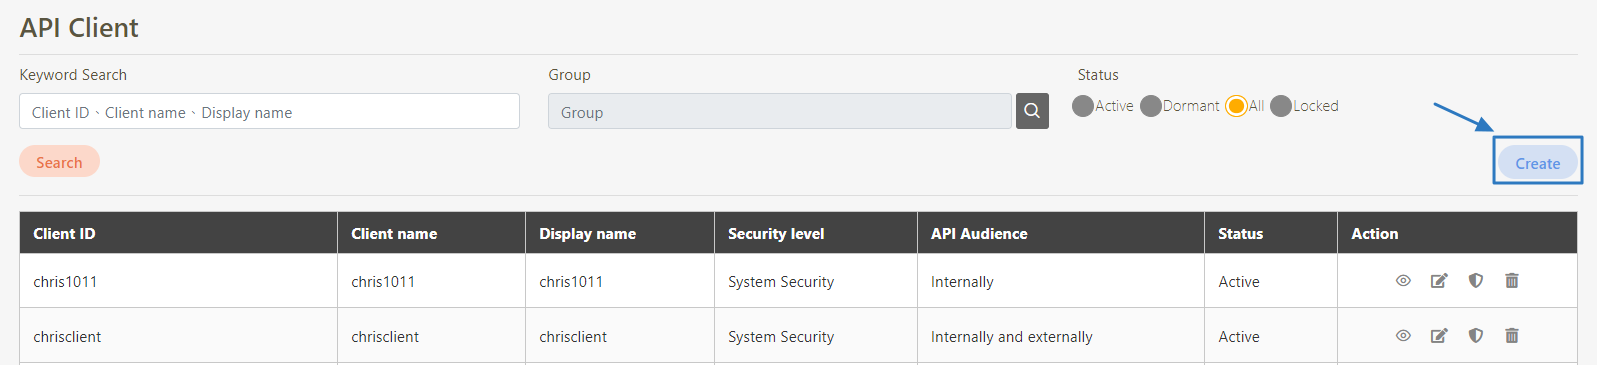
Go to Client Management > API Client, and click Create.
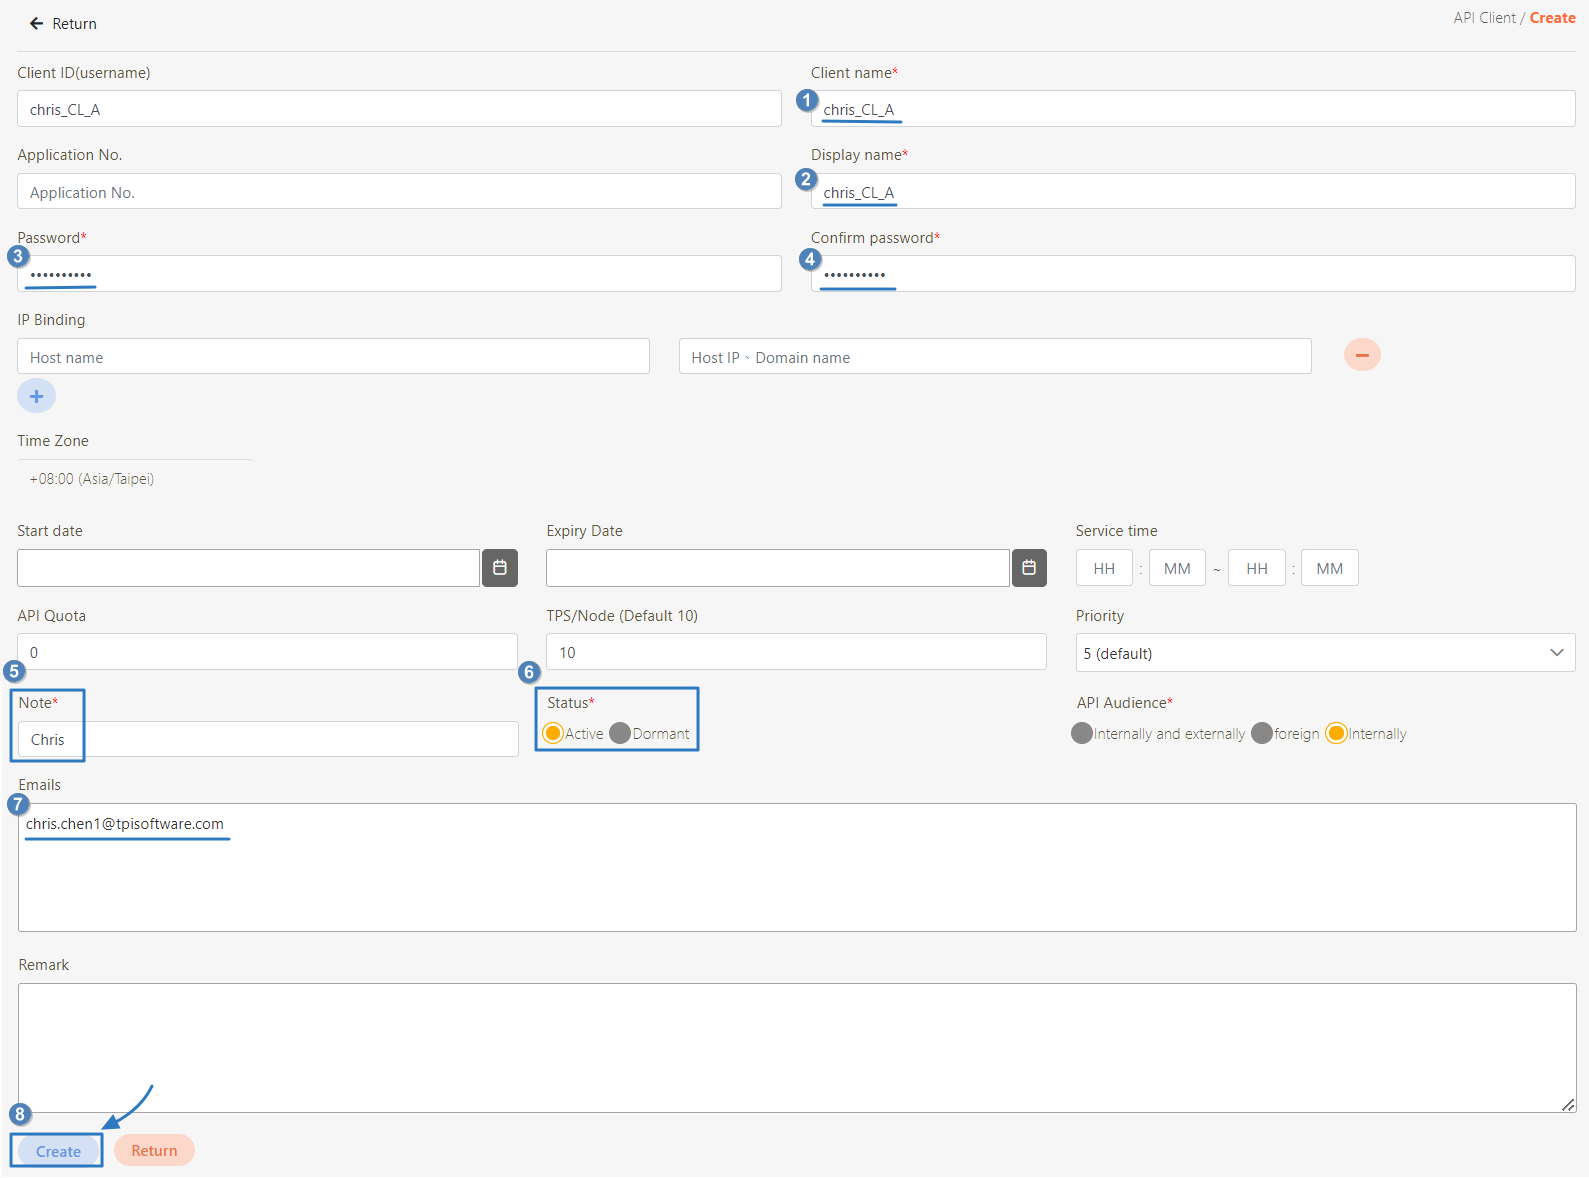
Fill in the required fields.
Click Active for the Status field, and select Internally for the API Audience field.
Although the E-mails field is not required, but it is still recommended to fill it in since there is the E-mail verification function.
Click Create to complete the creation.
Go to the API Client page to verify if the entry has been successfully created.

If you need more help when creating a API Client, please refer to the following link for more information.
API ClientAuthorizing API Groups for Client Use
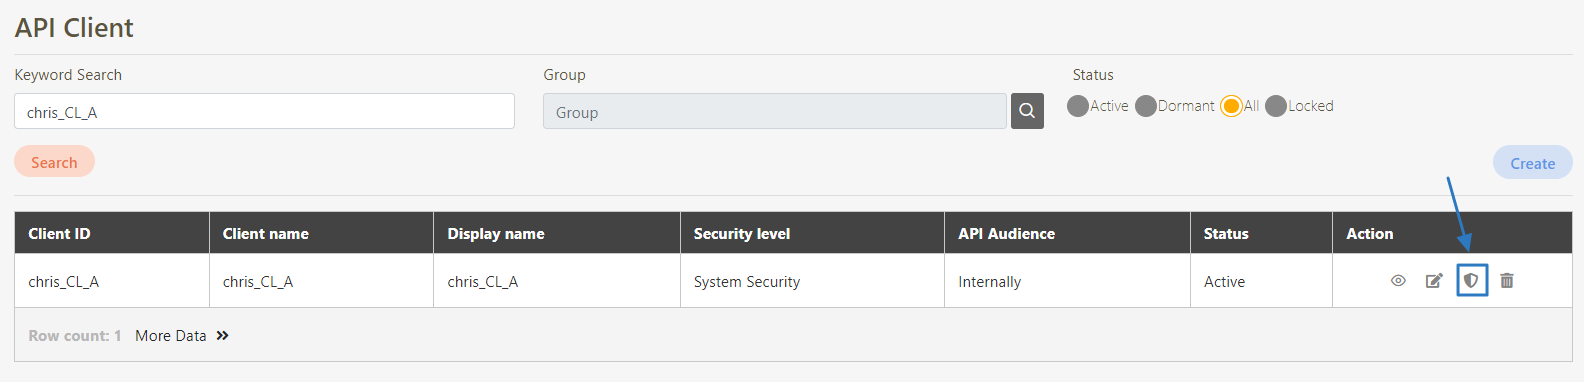
Go to Client Management > API Client, select a client and click on the Security icon
 .
.
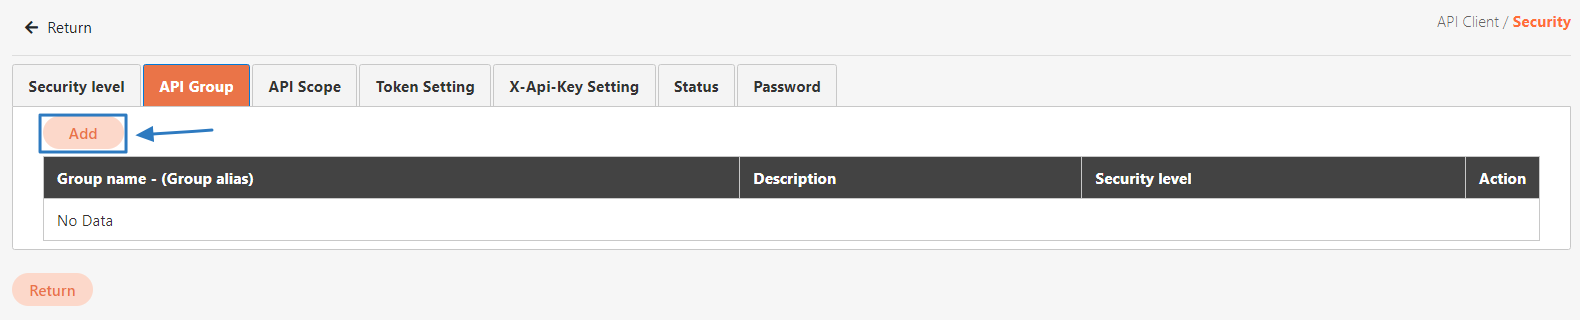
Click the API Group tab to enter the authorization setting page, then click Add.
Search for the created group, then click Update after selecting the group.
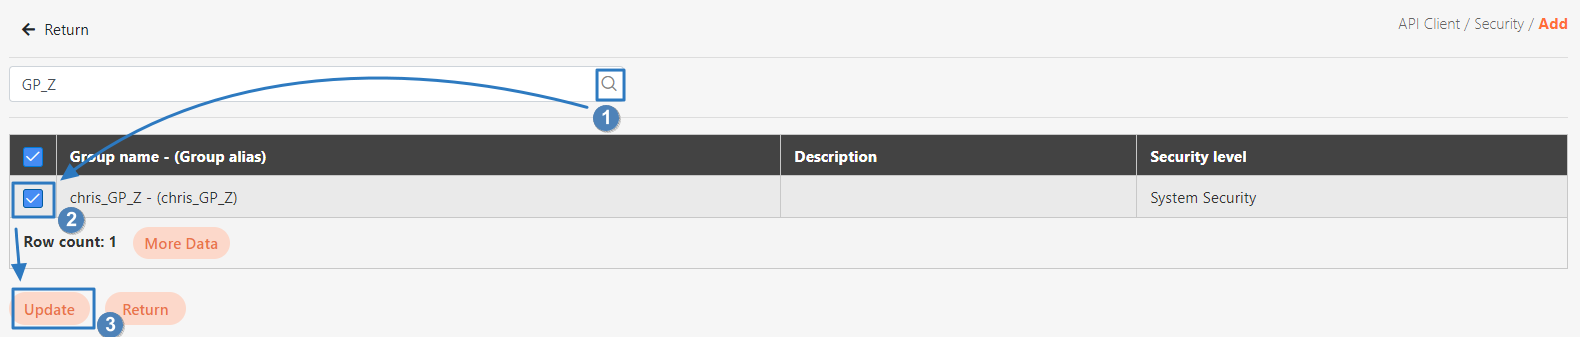
Confirm that the authorization setting page has data of connected groups displayed on the list to finish connection.

Verifying Registered APIs with Client Credentials
APIs registered in the system can use different OAuth Grant Type for verification.
Note: For other authorization methods such as Password and Basic Auth, etc., please refer to their corresponding processes.
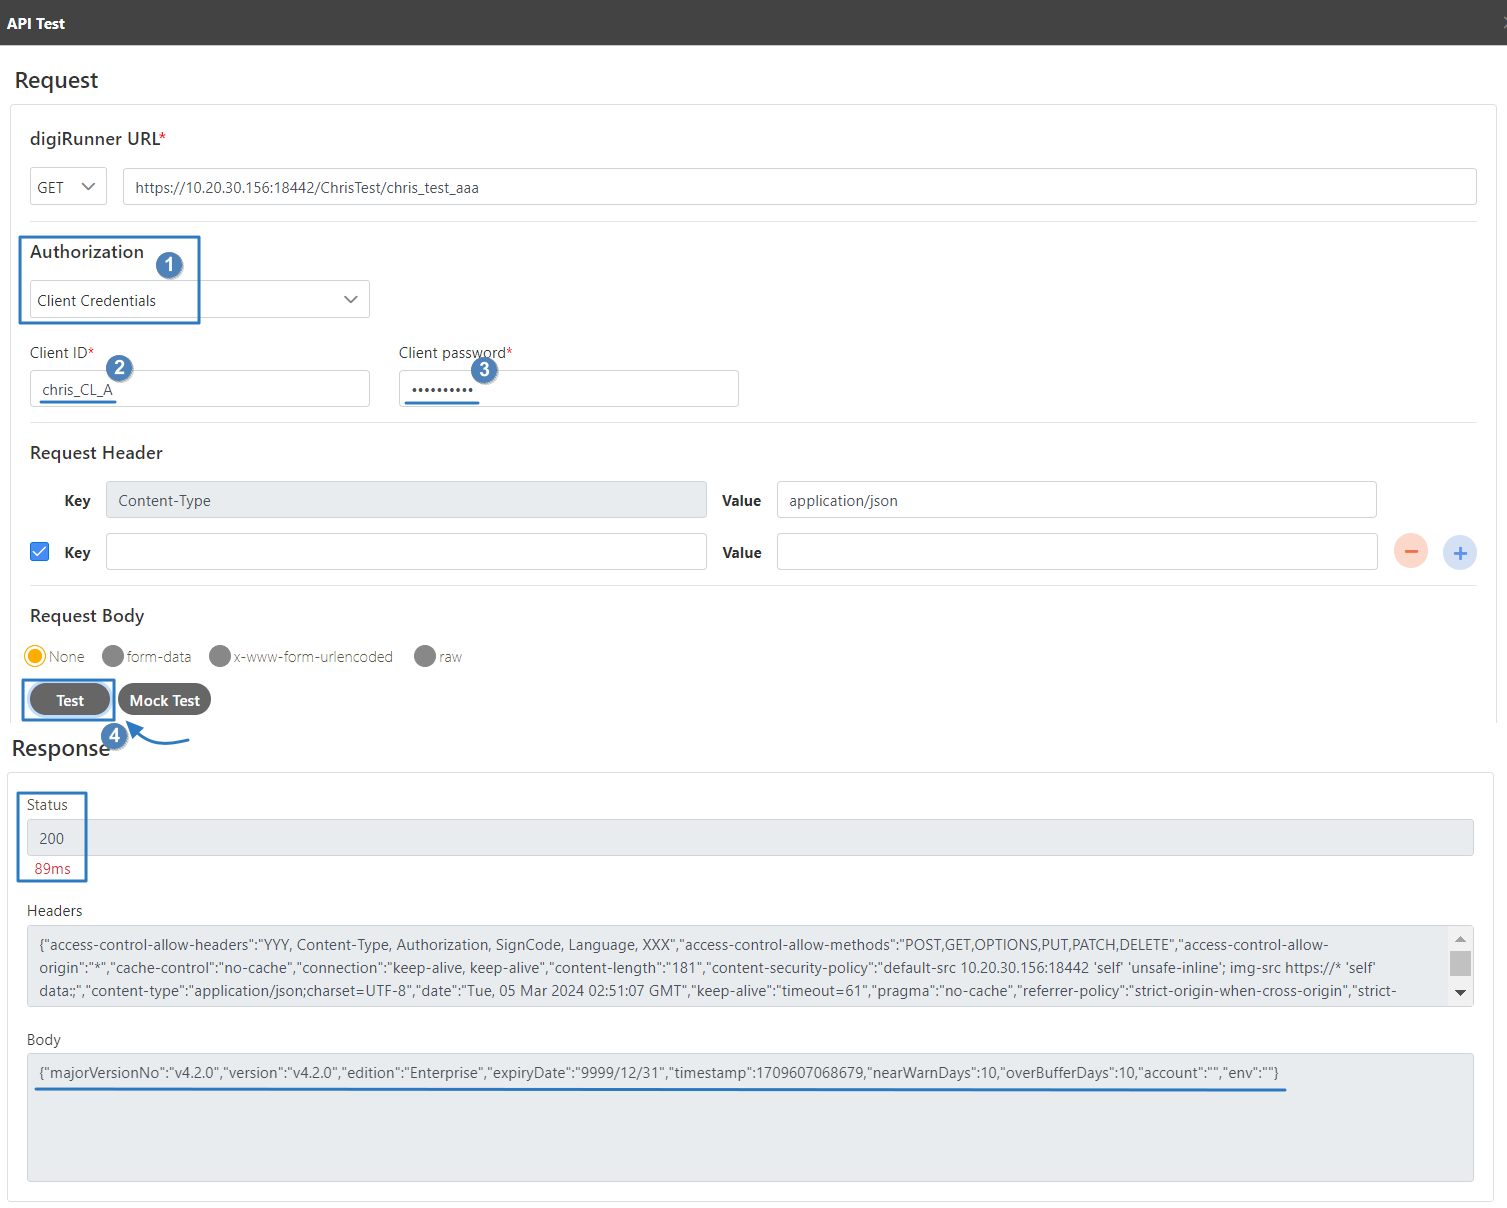
Go to API Management > API Test, and the digiRunner URL field will automatically populate with the API URL registered in digiRunner.
In the Authorization field, select Client Credentials.
In the Client ID and Client password fields, fill in the client account and password that are registered and authorized for the API.
Click Test to view the response. In this example, the status code is 200, indicating the body contains the data defined by the API.
Was this helpful?