Simplified OIDC Login with Predefined Organizational Frameworks
To login using a third-party account, options of this system include: Google, Microsoft, LDAP, mLDAP and API.
Creating Account Details and Connecting OIDC Account
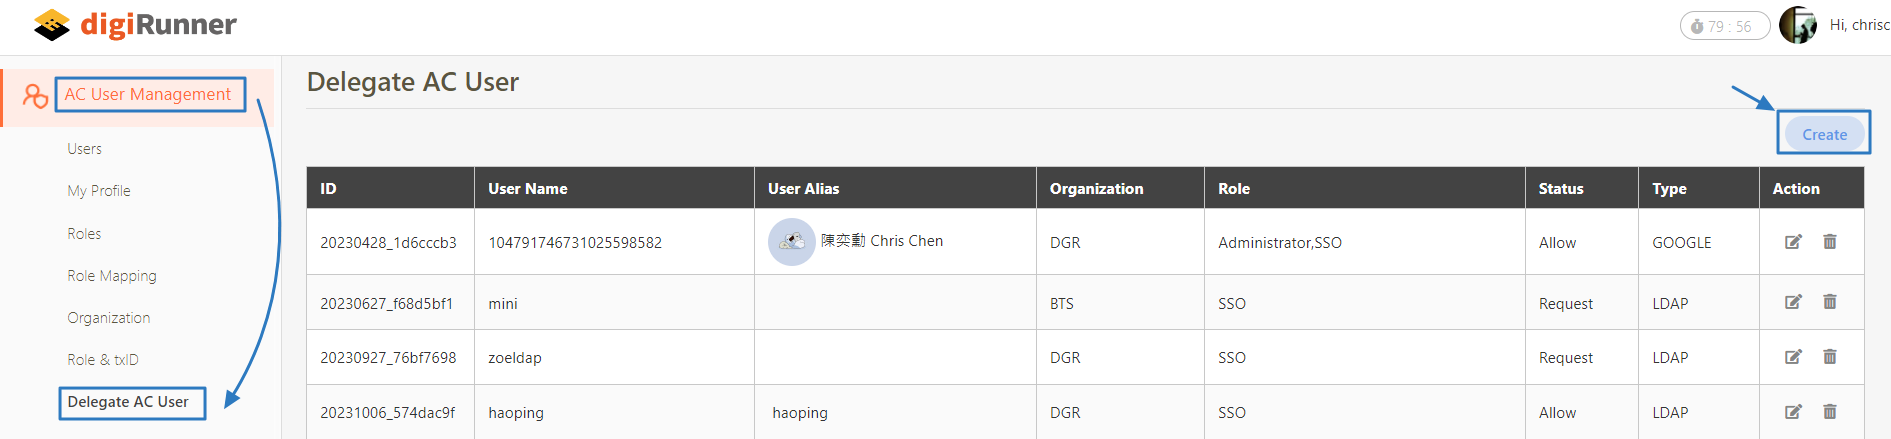
Go to AC User Management > Delegate AC User, and click Create to proceed.
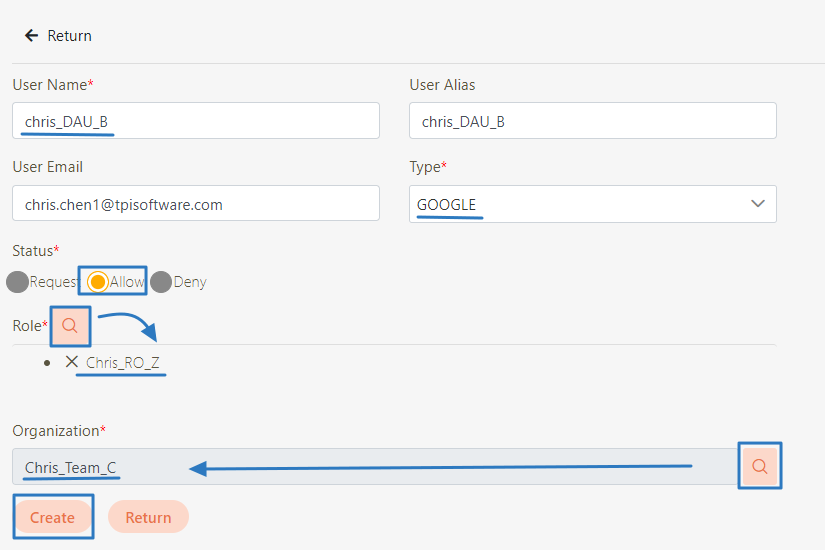
Fill in the required fields or make selections as instructed below:
User Name and Type: Enter the corresponding data.
Status: Select Allow.
Role List: Click on
 , and select the roles that need to be authorized.
Organization Name: Click on
to open the organization tree, and then select the organization.
Click Create to complete the creation.
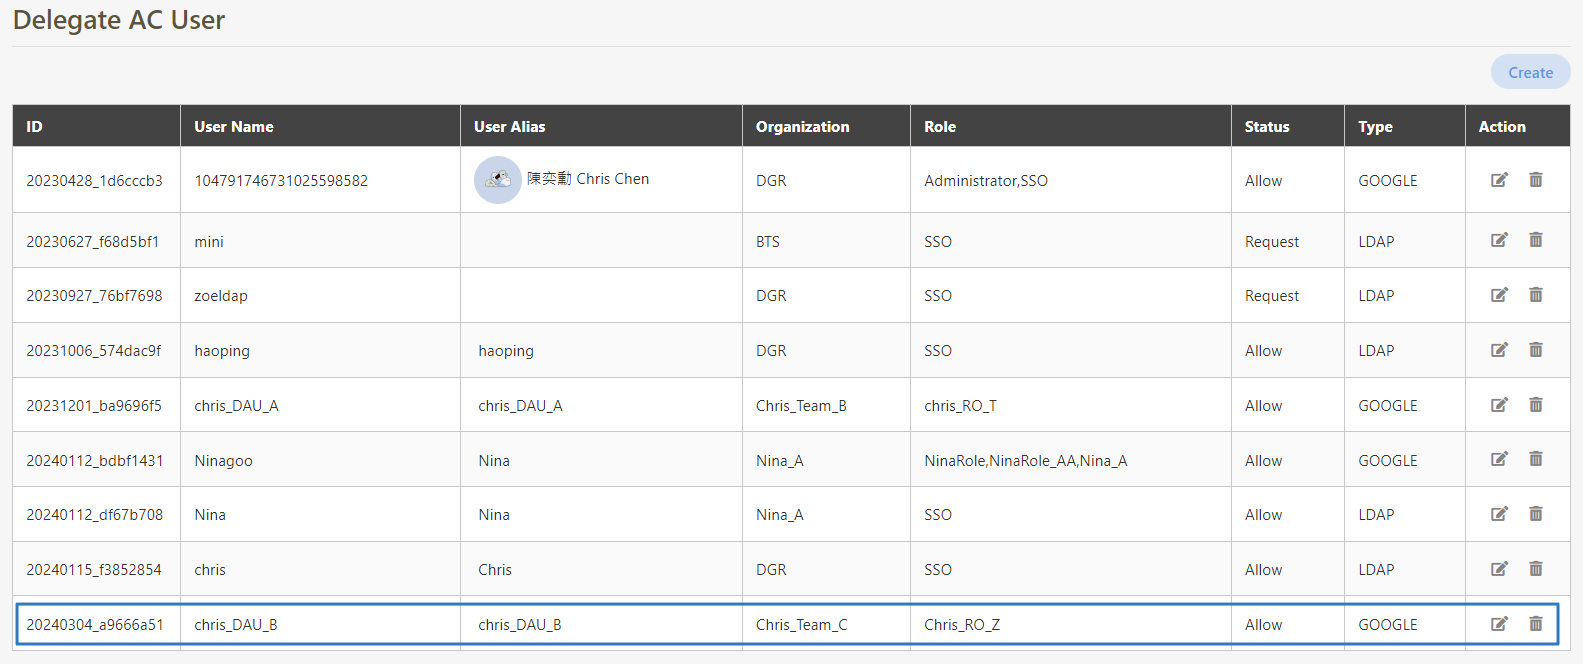
Once created, the newly added user information will be displayed in the Delegate AC User list.
Configuring Google Authentication and Logging In
The system provides maintenance functions for Google and Microsoft authentication servers. The following explains how to set up Google as an example.
Creating a Google OAuth Client ID
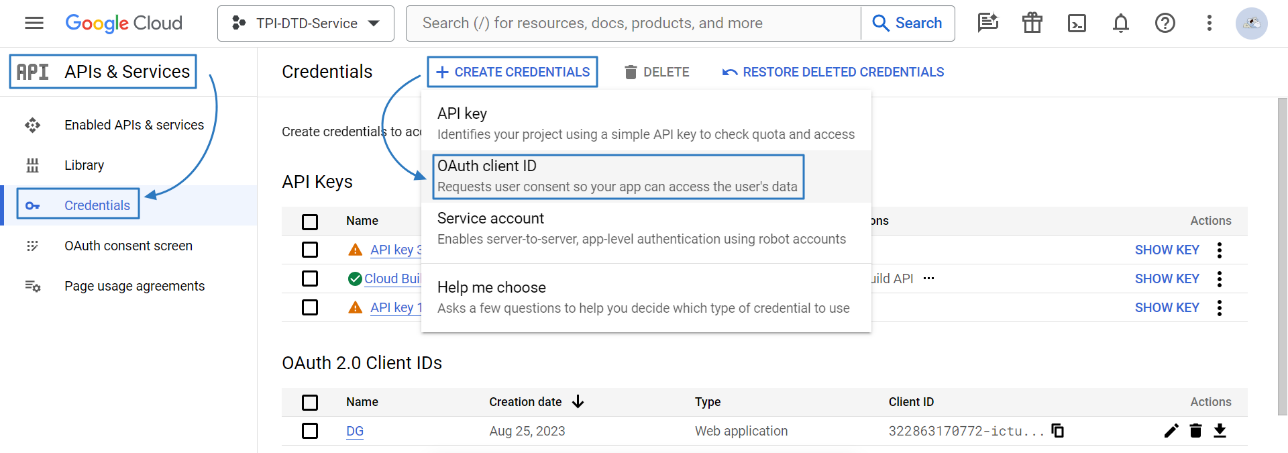
Open your browser and enter the following URL in the address bar: https://console.cloud.google.com/apis/credentials?hl=zh-tw. After registering and logging into the GCP page, navigate to APIs & Services > Credentials to access the credentials page.
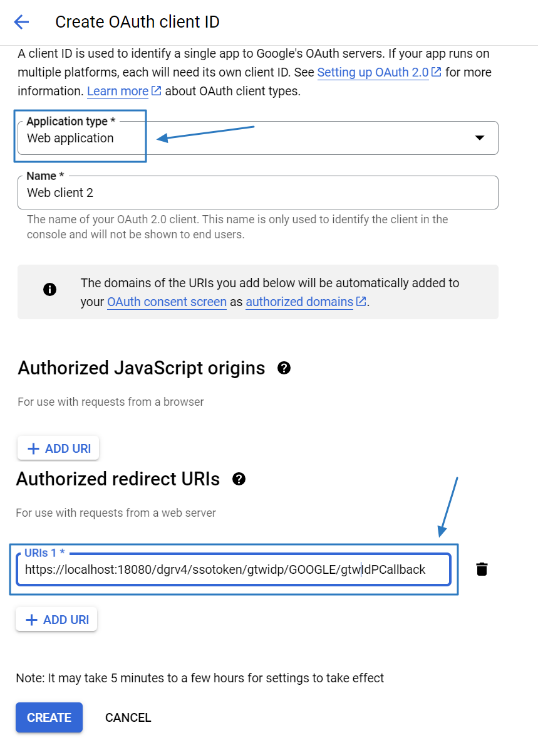
Click CREATE CREDENTIALS > OAuth client ID, and it will jump to the creation page.
Select Web application from the Application type field drop-down menu.
In the Authorized redirect URIs field, enter the following URL: https://[digiRunner's IP]:[port]/dgrv4/ssotoken/gtwidp/GOOGLE/gtwIdPCallback.
Click CREATE to complete the OAuth client ID creation.
Return to the credentials page, and the created data will be displayed on the OAuth 2.0 client ID list. Click the Edit icon to enter the page.
Copy the Client ID and Client secret from the Additional information field for use in subsequent steps as Client Id and Client Password.

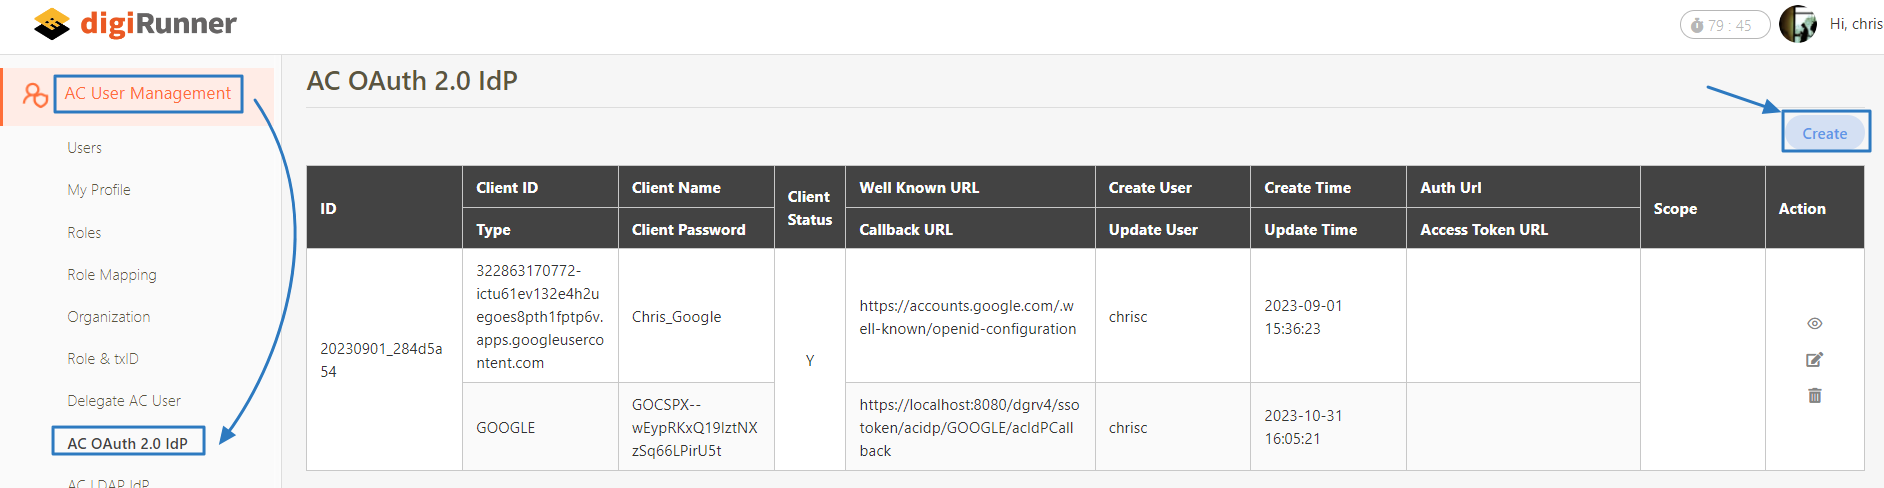
Return to the digiRunner Admin Console. Go to AC User Management > AC OAuth 2.0 IdP, and click Create to proceed.
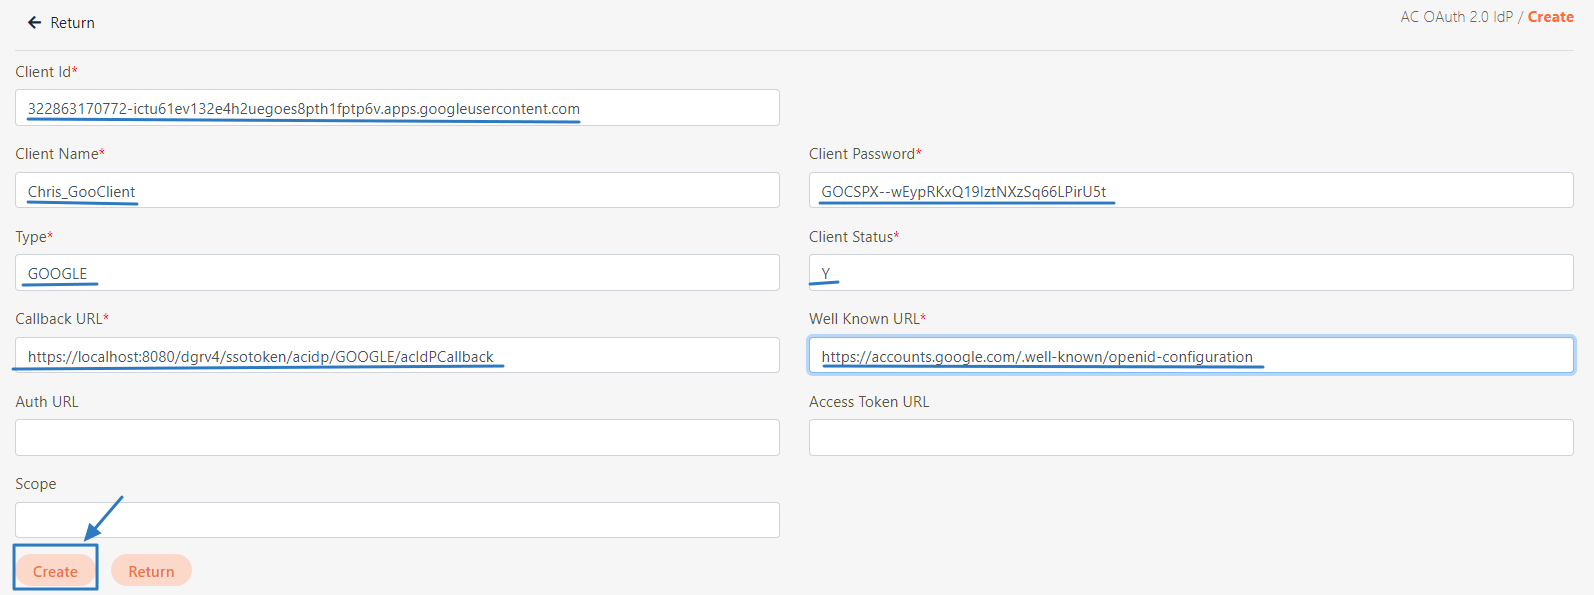
Fill in the required fields or make selections as instructed below, and click Create to complete the creation.
Client Name*: Fill in the client name.
Client Id* and Client Password*: Paste the Client ID and Client Secret obtained from Google Cloud Platform.
Type*: Fill in GOOGLE.
Client Status*: Fill in Y.
Well Known URL*: Fill in the URL, https://accounts.google.com/.well-known/openidconfiguration.
Callback URL*: Fill in the URL, https://[digiRunner's IP]:[port]/dgrv4/ssotoken/acidp/GOOGLE/acIdPCallback.
After clicking Create, the created OAuth 2.0 IdP data can be seen in the AC OAuth 2.0 IdP list.

Logging in with Third-party Google
Users logging in with Microsoft can refer to the procedure below.
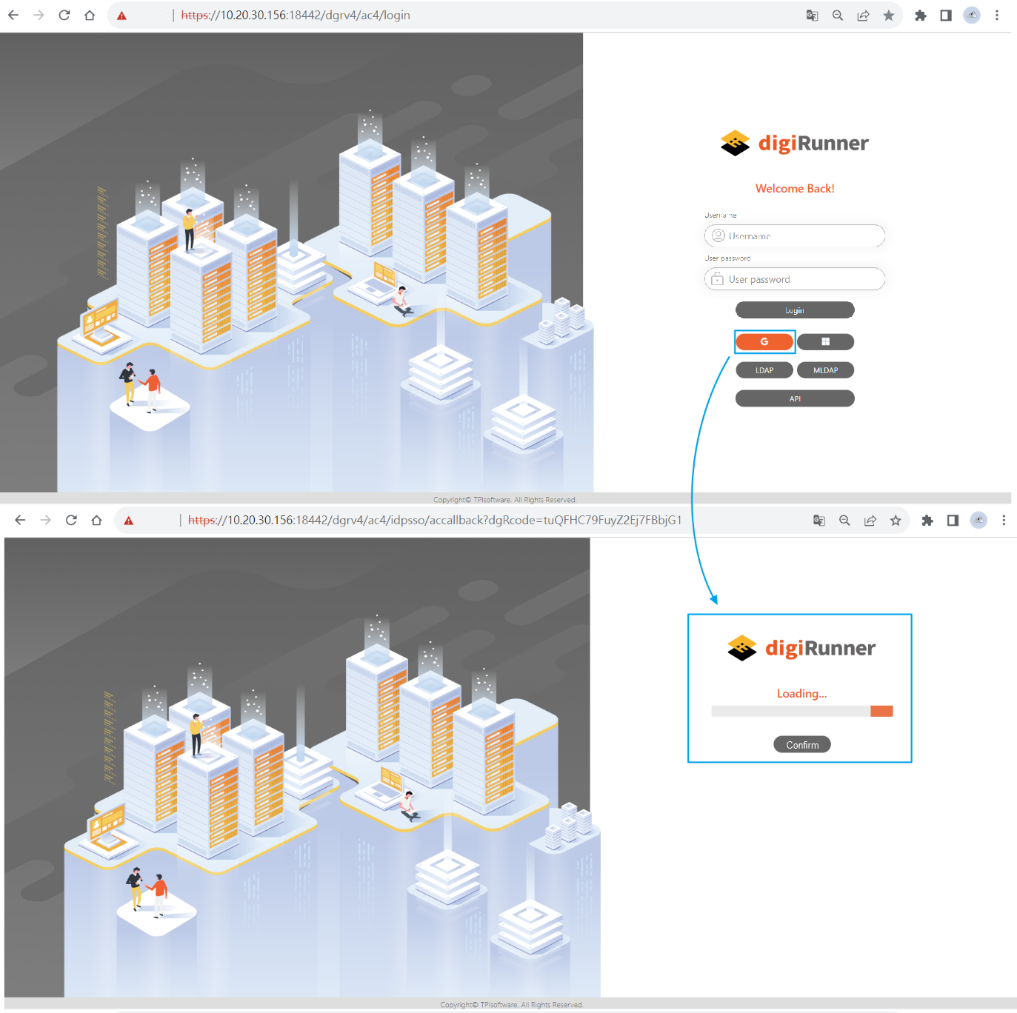
Open the web browser, and enter the following URL in the address bar: https://ip address:port number/dgrv4/ac4/login.
Click on the Google icon; if registration was already completed, the Google data will be retrieved automatically.
If the authentication is correct, the login process is complete.
Configuring LDAP Authentication and Logging In
The system provides maintenance functions for LDAP, mLDAP, and Windows AD authentication servers. The following explains how to set up LDAP as an example.
Go to AC User Management > AC LDAP IdP, and click Create.
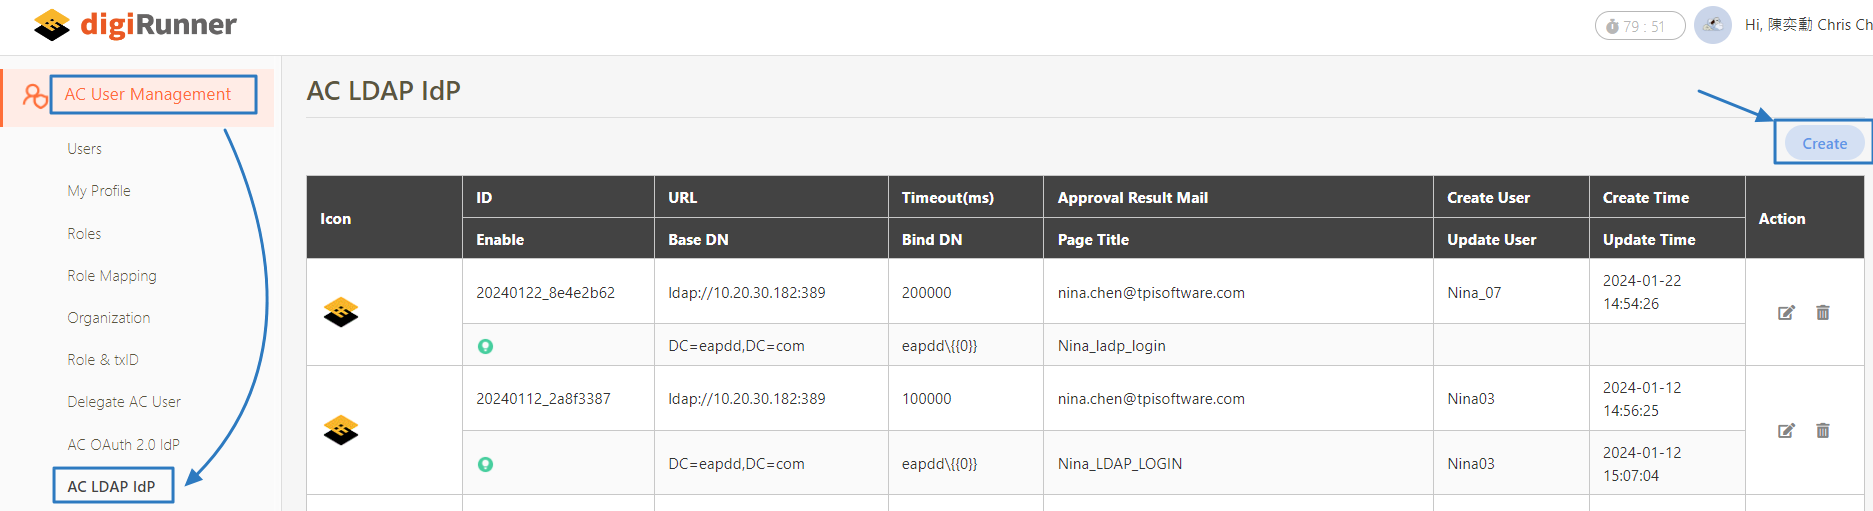
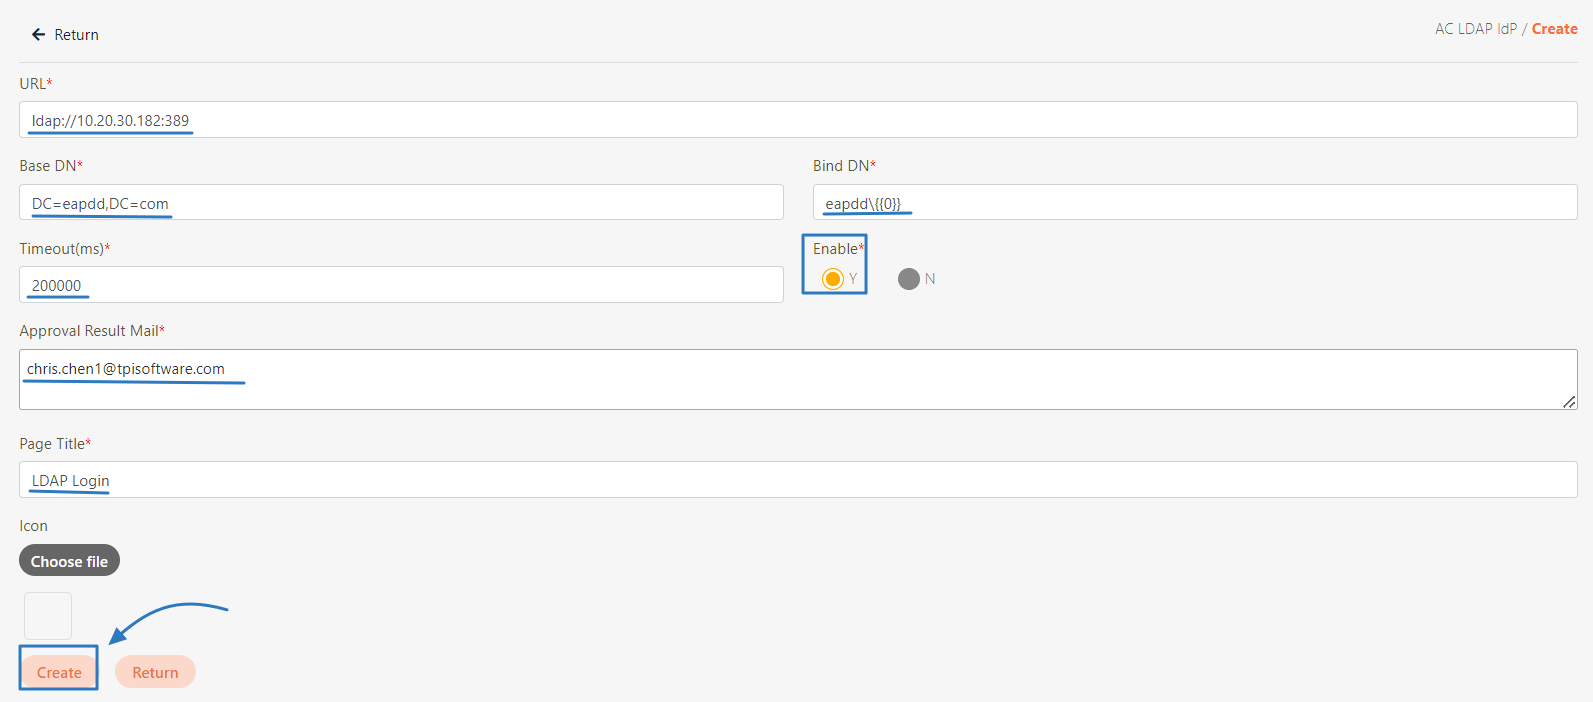
Fill in the required fields or make selections as instructed below, and click Create to complete the creation.
URL*, Timeout(ms)*, and Approval Result Mail*: Fill in the corresponding information.
Base DN* and Bind DN*: Fill in the data obtained from LDAP AD.
Enable*: Select Y.
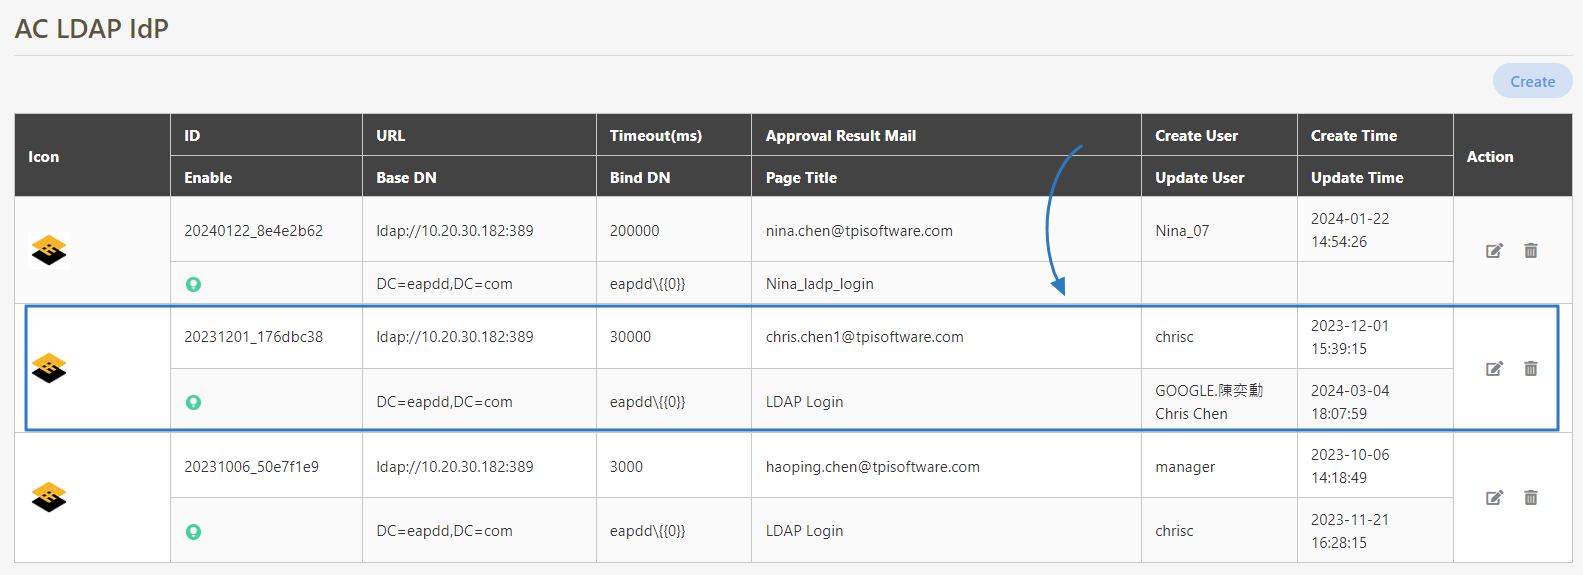
The created LDAP Idp data can be seen in the AC LDAP Idp list.
Initial Login
NOTE: Review is required after initial login.
Users logging in with MLDAP and API can refer to the procedure below.
Open the web browser, and enter the following URL in the address bar: https://ip address:port number/dgrv4/ac4/login.
Click LDAP and you will be directed to the LDAP login portal.
Log in with the username and password below:
Username: LDAP login account
User password: LDAP login password
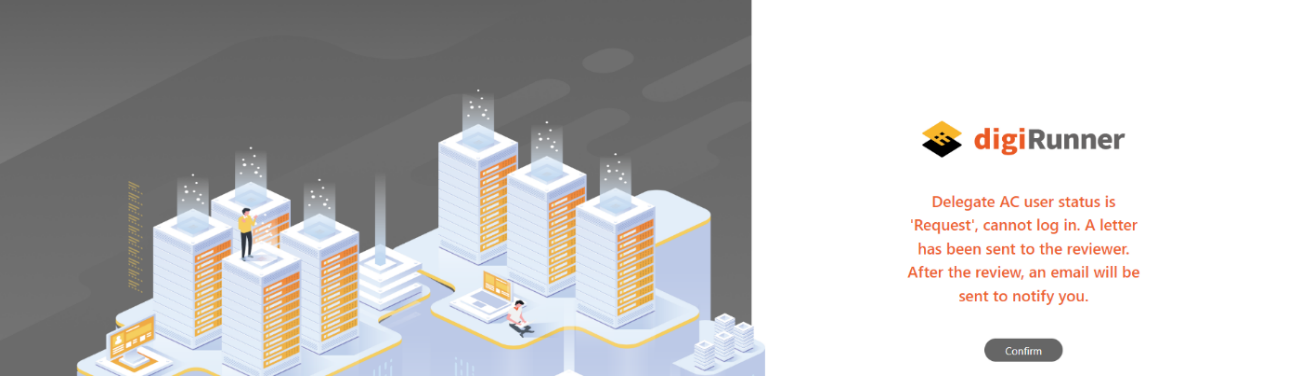
Click Login. Upon initial login, you will be notified that a review is required.
Use a reviewer account and go to AC User Management > Delegate AC User to enter the page.
Check the LDAP data created automatically, click on the Update icon for the account data to be reviewed to enter the update page.
Change the Status field from Request to Allow, and click Update to complete the update.
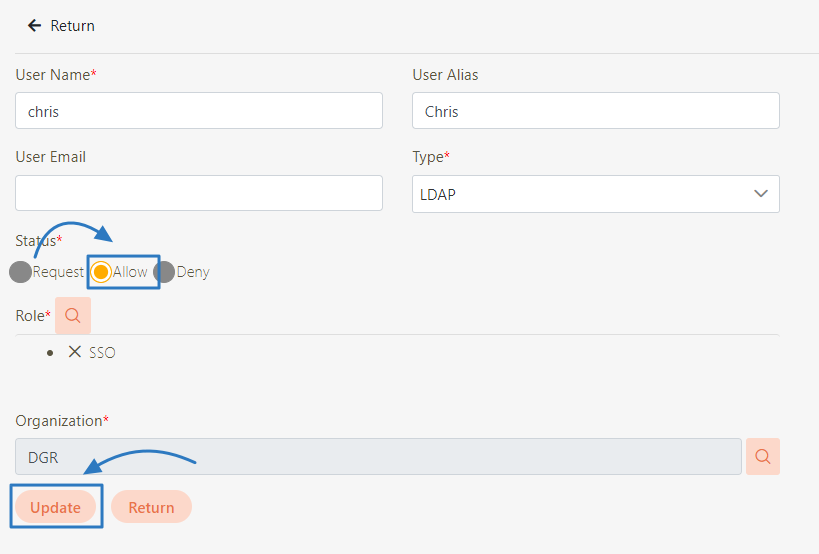
Return to the list and confirm that the status is Allow, then this LDAP account can be used for login.

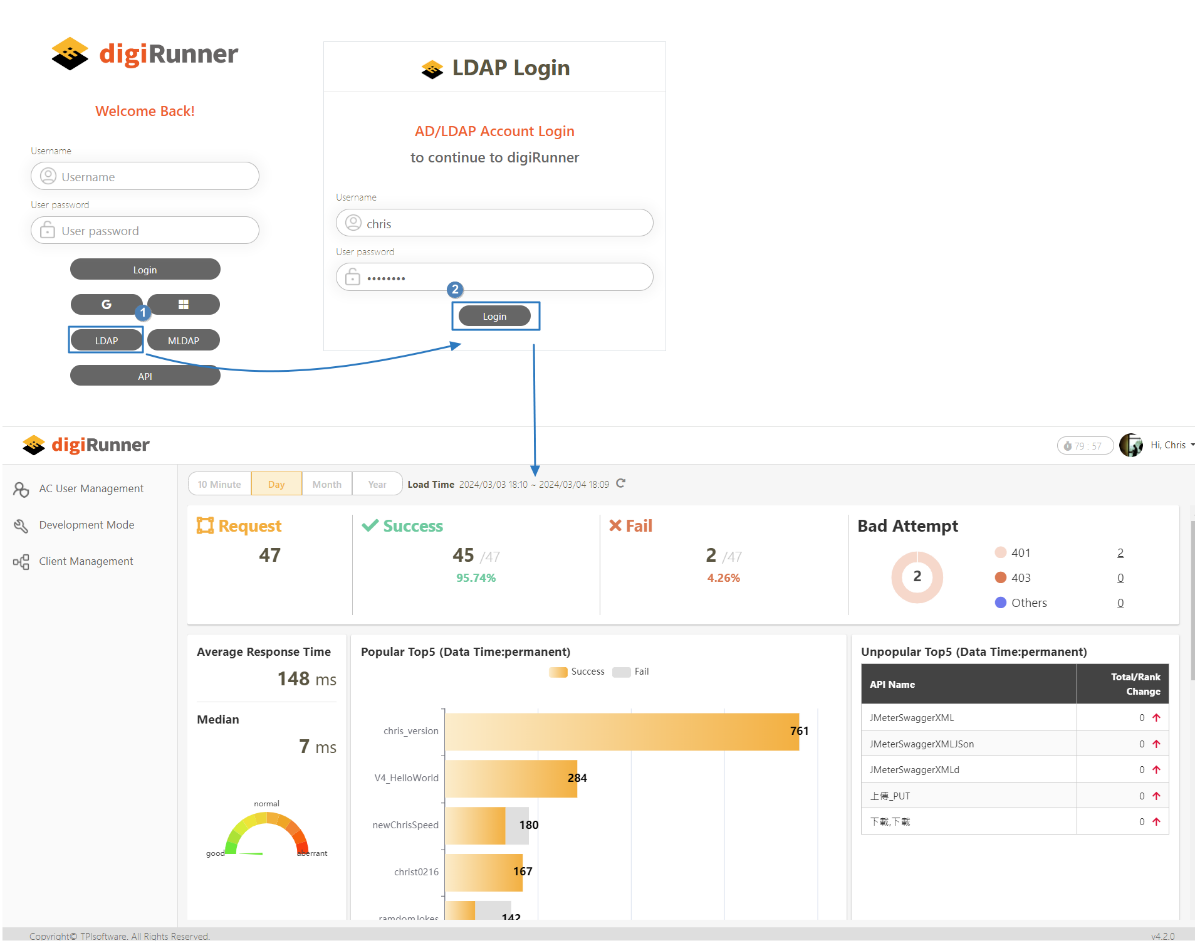
Logging in with Third-party LDAP
Users logging in with MLDAP and API can refer to the procedure below.
Open the web browser, and enter the following URL in the address bar: https://ip address:port number/dgrv4/ac4/login.
Click LDAP and you will be directed to the LDAP login portal.
Log in with the username and password below:
Username: LDAP login account
User password: LDAP login password
Click Login. If the authentication is correct, the login process is complete.
Was this helpful?