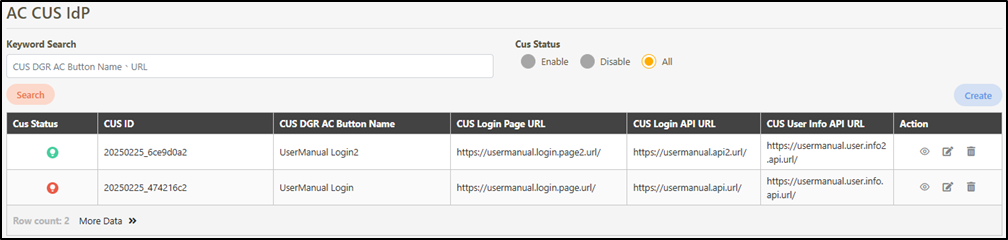
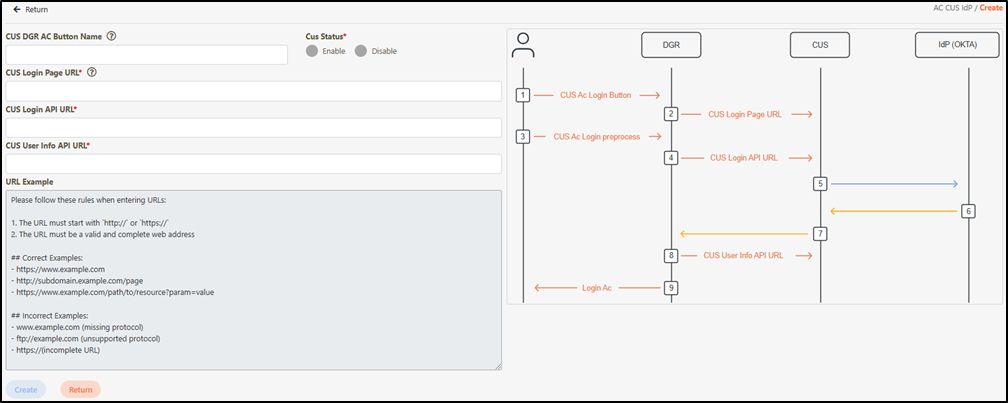
AC CUS IdP

Path: AC User Management > AC CUS IdP

In this section, you can find instructions on how to integrate a customized module with an identity provider (IdP) to meet SSO login management requirements. The login authentication settings apply to the digiRunner Admin Console.

Create AC CUS IdP

  1. Click Create to access the AC CUS IdP creation page.

  1. Fill in the data or make selections as instructed below. The fields marked with “*” are required.

  • CUS DGR AC Button Name: Specify the name or label text of the button displayed on the digiRunner login page, with CUS as the default.

  • Cus Status*: Select to Enable or Disable the IdP.

The best practice is to enable only one account. If multiple accounts are enabled, the system will use the most recently created one.

  • CUS Login Page URL*: Specify the URL where the user will be redirected upon clicking the CUS login button on the digiRunner login page. It is recommended to enter the CUS login page URL here.

  • CUS Login API URL*: Specify the API URL called during login.

  • CUS User Info API URL*: Specify the Uniform Resource Locator (URL) for retrieving CUS user information.

  • URL Example: Example format for the above URLs.

  1. Click Create to save and exit.

View AC CUS IdP

Click on the icon to access the details page.
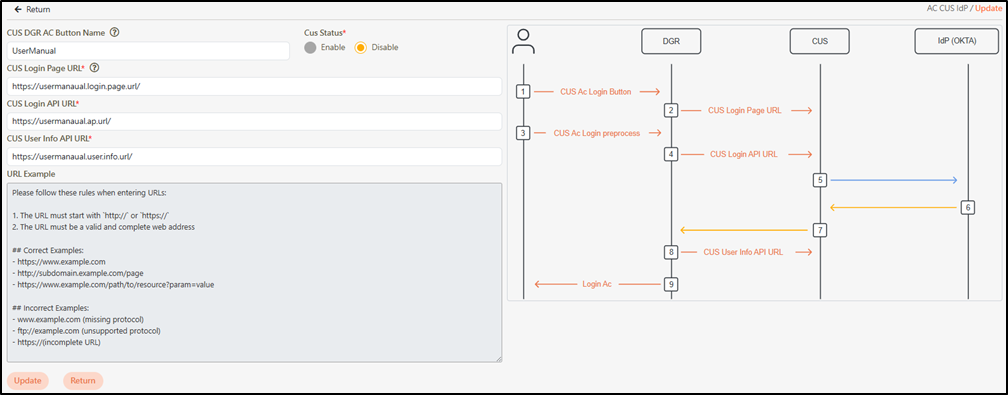
Update AC CUS IdP

  1. Click on the icon to access the Update page.

  1. Modify the desired fields, and click Update to save and exit.

Delete AC CUS IdP

  1. Search for the AC CUS IdP to delete, and click on the icon to proceed.

  1. A warning prompt displaying the message “Confirm Delete?” will pop up. Click Confirm to delete the AC CUS IdP and exit.

Last updated

Was this helpful?