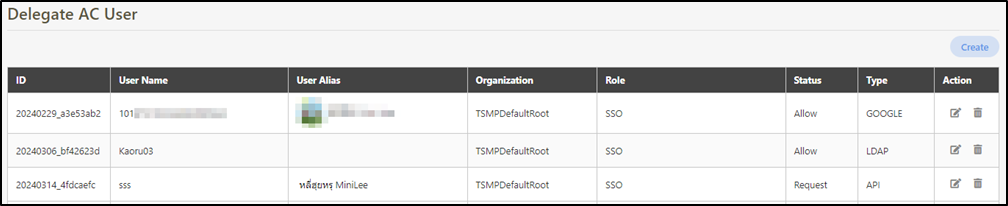
# Delegate AC User
**Path: AC User Management** > **Delegate AC User**
In this section, you can find instructions on how to create AC user accounts using OAuth2.0, LDAP, MLDAP, API and MS accounts. You can create, edit, or delete AC user accounts with the feature.
### Create AC User Accounts
In this section, you can find instructions on how to create AC user accounts using OAuth2.0, LDAP, MLDAP, API and MS accounts. You can create an AC user account for login.
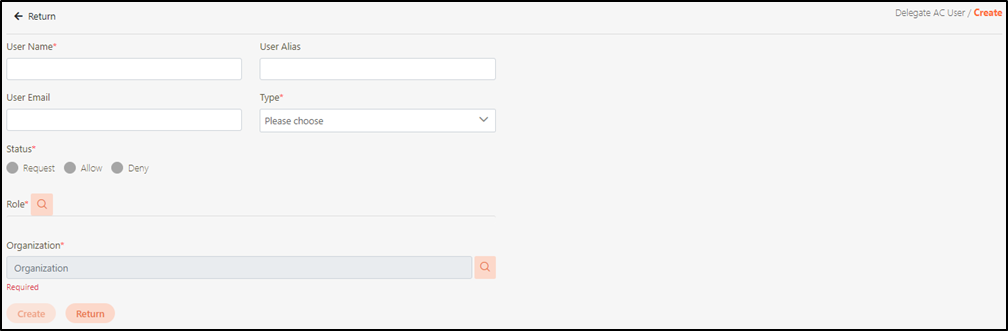
1. Click **Create** to access the AC user account creation page.
2. Fill in the data or make selections as instructed below. The fields marked with “\*” are required.
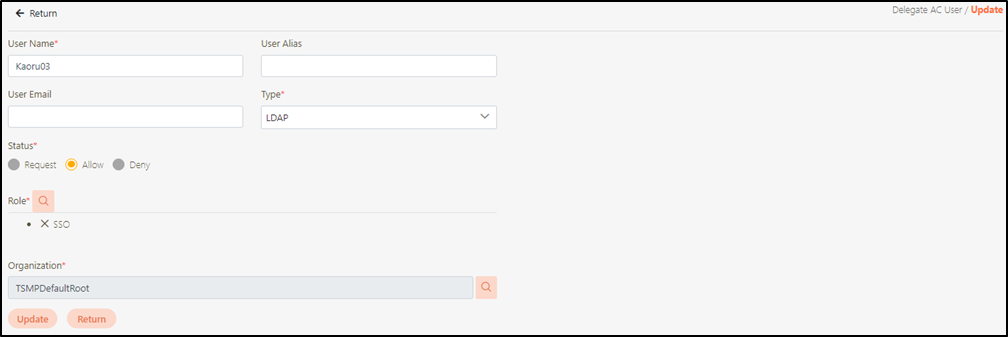
* **User Name**\***:** Fill in the user name.
* **User Alias:** Fill in the user alias.
* **User Email:** Fill in the the email address of the user.
* **Type**\***:** Select the linked account from **OAuth2.0**, **LDAP**, **MLDAP**, **API**, or **MS**, **CUS**, or **OIDC**.
* **Status**\***:** Select the account status from **Request**, **Allow**, or **Deny**.
* **Role**\***:** Specify the role of the user.
* **Organization**\***:** Specify the organization of the user.
3. Click **Create** to save and exit.
#### **Reviewing and Approving AC User Accounts**
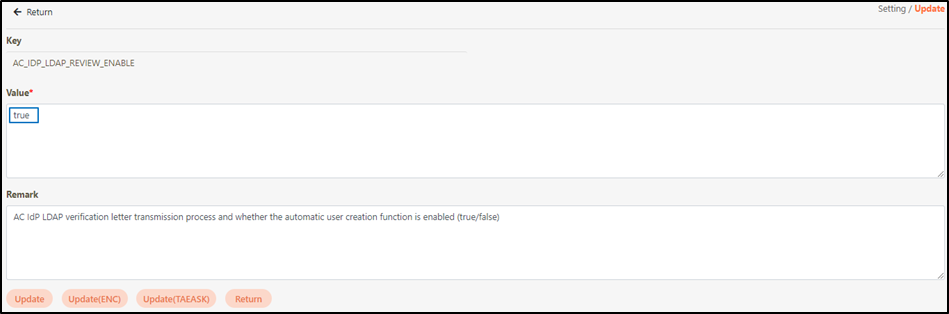
1. Go to **System Configs** > **Setting**, look for AC\_IDP\_LDAP\_REVIEW\_ENABLE, and check whether the value is **true**.
2. The system displays "**Delegate AC user status is 'Request', cannot log in. A letter has been sent to the reviewer. After the review, an email will be sent to notify you.**", indicating that the account created by this SSO must be reviewed before it can be used.
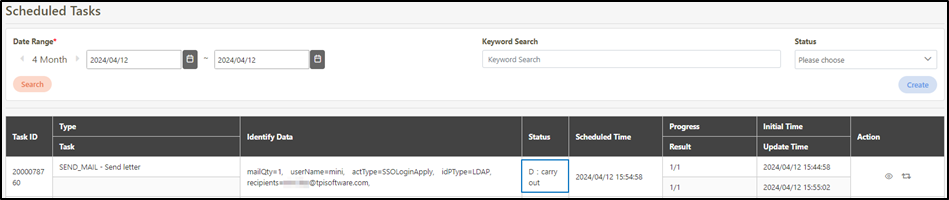
3. Go to **System Information > Scheduled Tasks** to check whether the approval letter has been sent, and the process has been completed.
4. Go to **System Information > Mail Log** to check whether an approval letter has been sent.
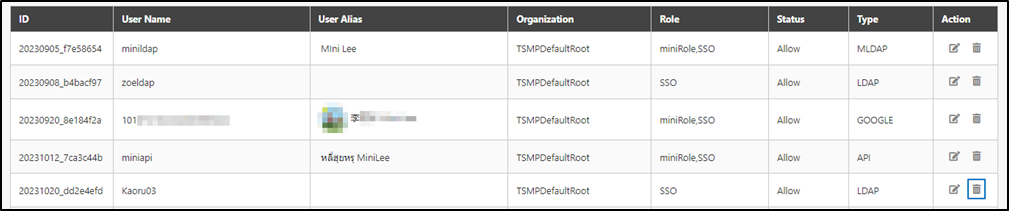
5. Go to **AC User Management** > **Delegate AC User** to view the users created by SSO, and click on the  icon to access the **Update** page. Check **Allow** to change the status to allowed, and click **Update** to proceed.
6. Click **LDAP** to access the LDAP login page and log in to the system using the approved SSO account.
{% hint style="info" %}
LDAP and MLDAP share the same process.
{% endhint %}
### Update AC User Accounts
In this section, you can find instructions on how to update the Information about AC user accounts.
1. Click on the  icon to access the **Update** page.
2. Modify the desired fields, and click **Update** to save and exit.
### Delete AC User Accounts
In this section, you can find instructions on how to delete the AC user account.
1. Search for the AC user account to delete, and click on the  icon to proceed.
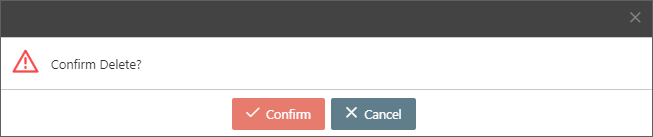
2. A warning prompt displaying the message “**Confirm Delete?**” will pop up. Click **Confirm** to delete the AC user account and exit.