API Client
Path: Client Management > API Client
Client accounts are usually used by API users; when your partners need to use your API, a client needs to be created here for your partner to browse the API portal, apply for API authorization and perform other actions with this account.
Create Client
In this section, you can find instructions on how to create users.
Click Create to access the client creation page.

Fill in the data or make selections as instructed below. The fields marked with “*” are required.
Client ID(username): Client’s account.
Client name*: Code of the client; limited to alphanumeric characters, underscore (_) and hyphen (-).
Application No.: Application number.
Display name*: Client’s name.
Password* and Confirm password*: Client’s password.
Password not limited to letters and numbers, up to 128 characters.
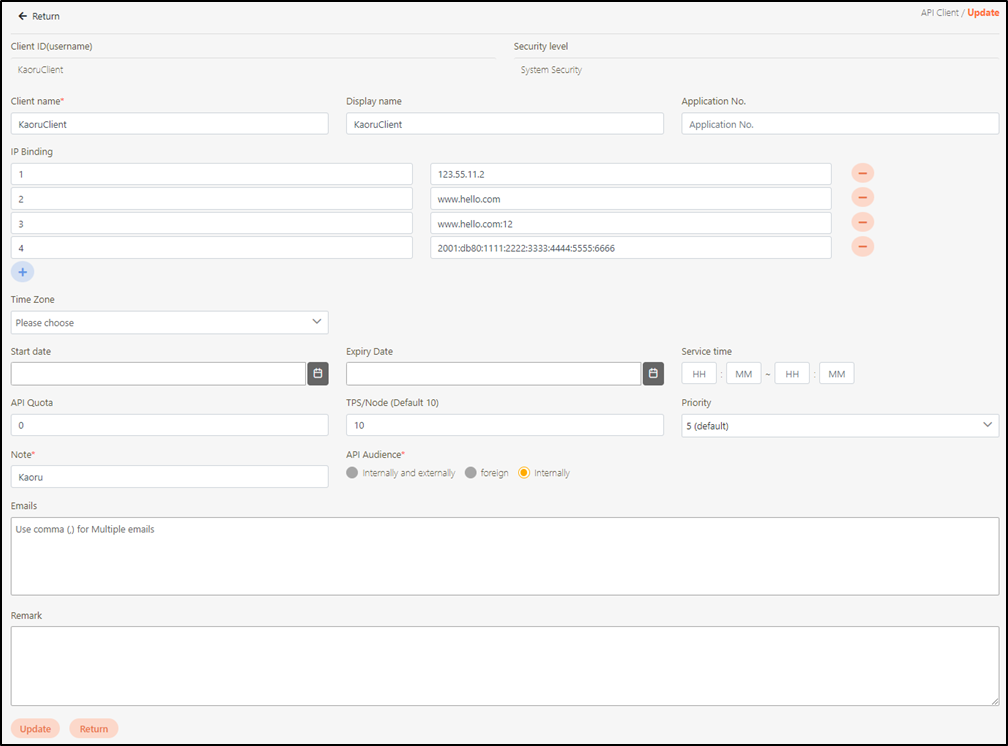
IP Binding: User’s host name and host IP; only ones created can be successfully called when calling APIs with IP.
Start date / Expiry Date / Service time: Client account activation and expiry time.
API Quota: Specifies the total number of API calls the client can make without restriction. If the same API was pressed repeatedly 10 times, it also counts as 10 times.
Set to 0 for unlimited calls.
TPS/Node (Default 10): Specifies the number of times this client can call the API per second. The default for this field is 10, meaning that the API will be called 10 times per second. For example, if both the TPS/Node and API Quota are set to 10, the user can make 10 API calls per second. However, once the user reaches a total of 10 calls for the day, further API access will be denied.
Set to 0 for unlimited calls.
Priority: The order of the priority that this user can use the gateway when the network is busy.
In this field, 0 is highest priority and 9 is the lowest.
Note*: Not limited to anyone.
Status*: This must be enabled for it to be used.
API Audience*: Set whether this client is applicable Internally and externally / foreign / Internally.
Emails: Multiple sets of E-mails can be set; separate them with a comma (,).
Remark: This is the special note left for clients.
Click Create to save and exit.

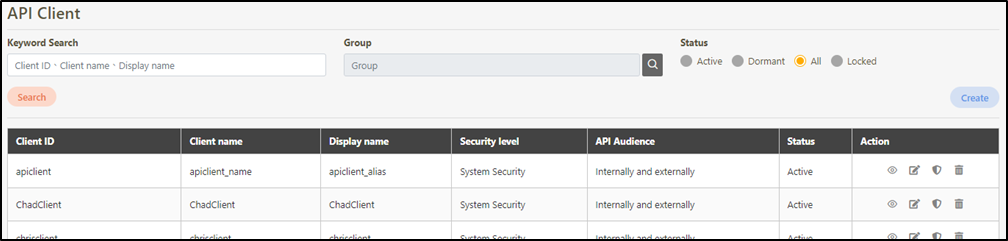
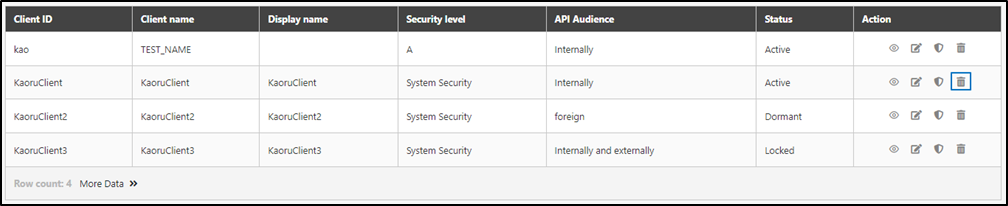
Search Client
Enter keywords in the Keyword Search field to search for clients and the group code of the client, and use the Status field to refine your search. The default status is AII.

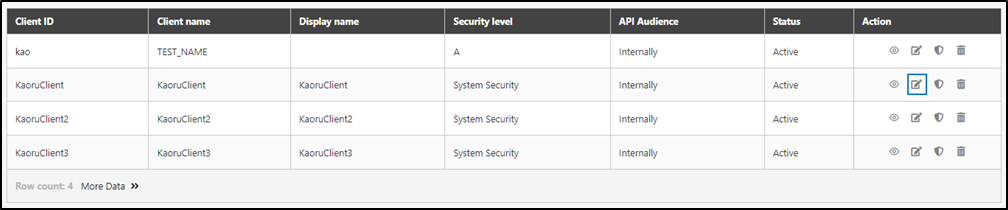
View Client
Search for the user to view, and click on the ![]() icon to access the client details page.
icon to access the client details page.
The information in Details can only be viewed and not edited.


Update Client
In this section, you can find instructions on how to update users.
Search for the client to modify, and click on the
 icon to access the update page.
Modify the desired fields, and click Update to save and exit.
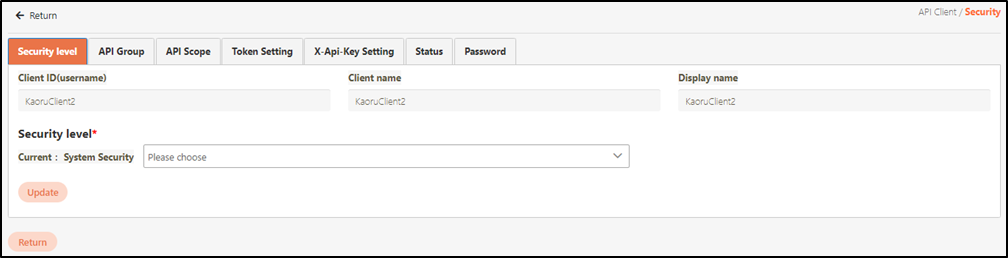
Client Security Configuration
In this section, you can find instructions on how to modify and set the security for this user.
First, search for the client to set, and click on the
 icon to access the client security configuration page.

Client security configurations include: Security level, API Group, API Scope, Token Setting, X-Api-Key Setting, Status, and Password.
Security Level
In which level A is the highest. Simply select the default system security for the security level.
If c is selected as the security level for the client here, security levels A and B cannot be found in API Group.
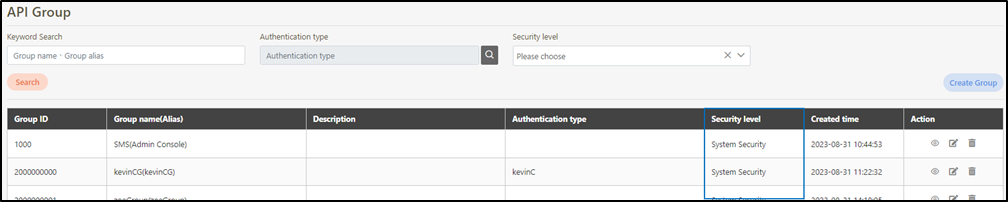
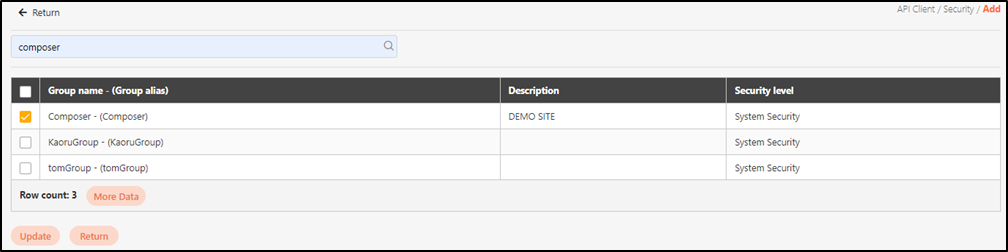
API Group
Assign clients to specific API groups or authorization scope groups for the client to have permission to call specific APIs. API groups that don’t need to be used can also be deleted here.

Click Add to access the set group page.

Search for the group to add in Search, and click Update to add it.
Click on the
 icon by authorization setting to delete the group you want to delete.

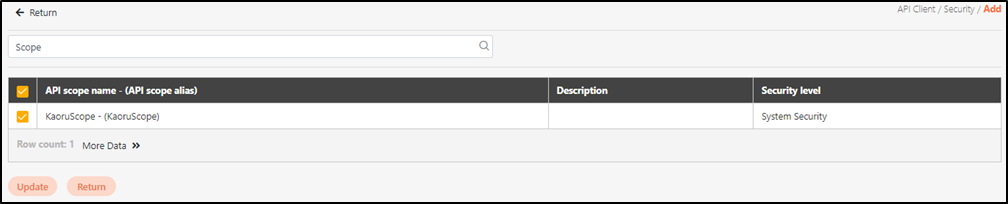
API Scope
Click Add in authorization scope setting to access the setting page. Modify the desired fields, and click Update to save and exit.

Token Setting
In this section, you can find instructions on how to set up the grant type of the clients, expiry of token and times of access, and the URL to be directed to after validation.
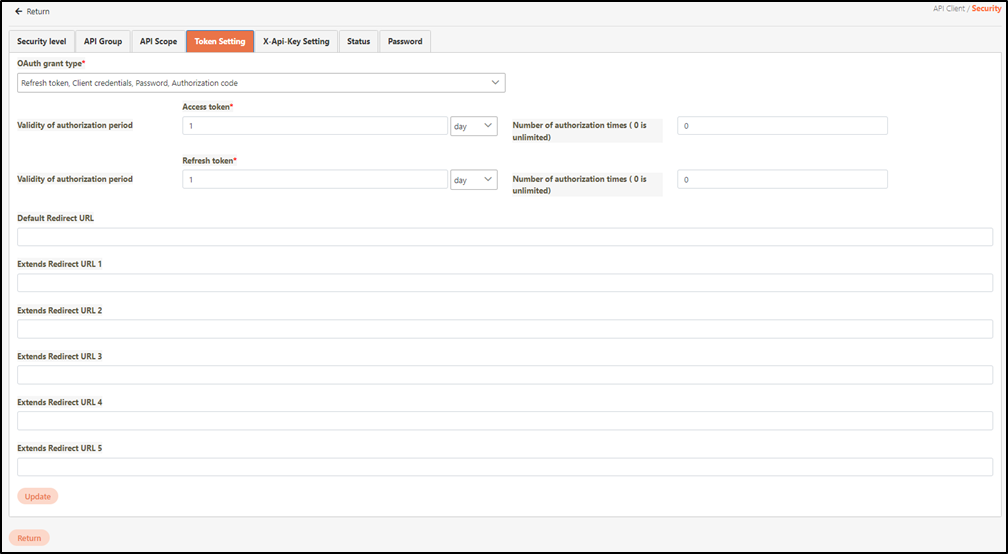
OAuth Grant Type: This field is used to determine which methods users will use to obtain tokens; multiple choices allowed. Take Password and Client Credentials for example. Password authentication requires two sets of values, namely
userId / UserPwd and clientId / clientPwd, to obtain the token. On the other hand, Client Credentials only necessitatesclientId / clientPwdto acquire the token.
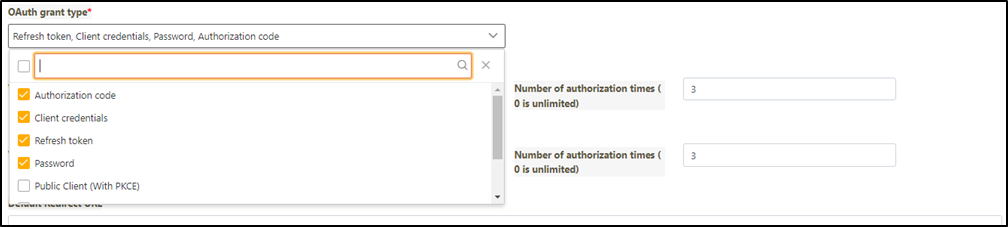
Tokens:
Contains two tokens, which are Access token and Refresh token. Validity of authorization period or Number of authorization times can be set for both of these; if the Validity of authorization period and Number of authorization times are set simultaneously, it is the number of times it can be accessed within the period.
Take the figure below for example. If the Validity of authorization period is set as 1 day for both the Access token and Refresh token, and the Number of authorization times are set as 3 times, it means that both the Access token and Refresh token can only be accessed 3 times within 1 day; it will become invalid if the number of times or number of days is exceeded.

Redirect URL: The URL of the redirection page.
X-Api-Key Setting
The X-Api-Key is a key or secret key used to identify and authenticate API requests, enhancing API security by preventing unauthorized access and providing authentication and authorization mechanisms.
The X-Api-Key is transmitted in plaintext, making it less secure in terms of information security.
Click Add a X Api Key to create a new X-Api-Key.

Fill in the data or make selections as instructed below. The fields marked with "*" are required.
Alias*: An identifiable name for the key.
Effective Date: The date from which the API can be used.
Expiry Date*: The date until which the API remains valid.
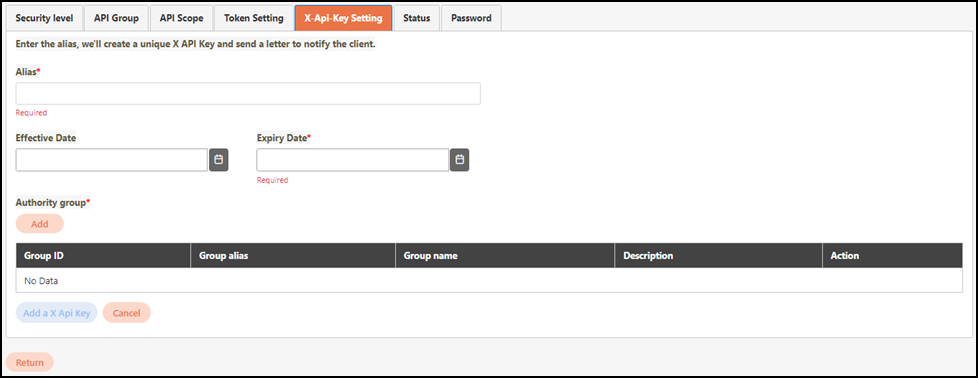
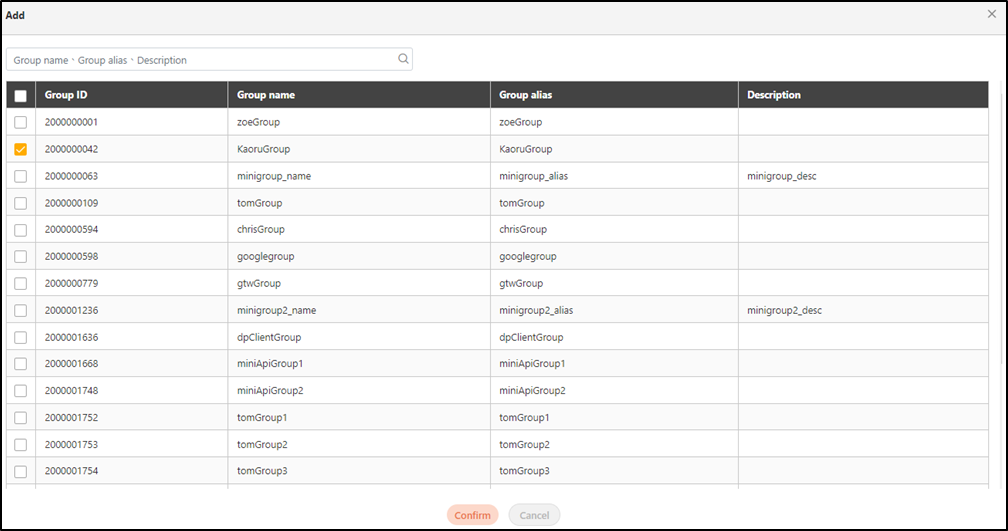
In the Authority group* field, click Add to access the list page and select the authorization group for the X-Api-Key, and click Confirm to save and exit.
Click Add a X Api Key to complete the setting, and send a notification to the client.
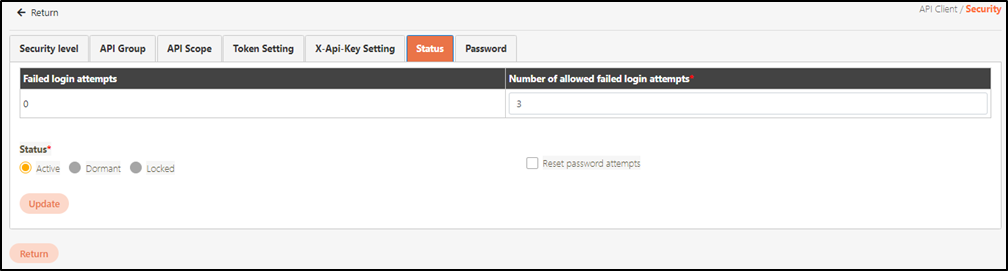
Status
Users can modify the number of allowed failed login attempts and client status on this page, including resetting the password attempts.
The default number of allowed failed login attempts is 3 times.
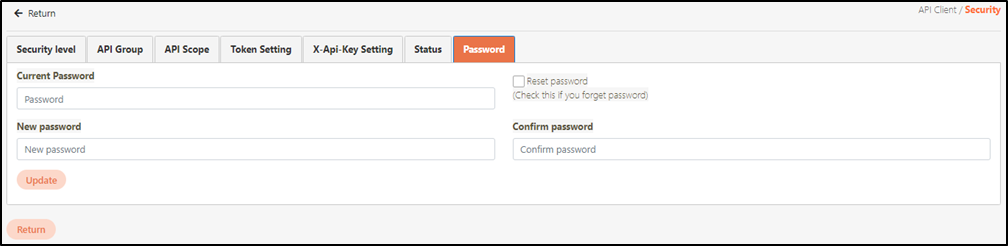
Password
Users can change their passwords here; if they forgot their password, select the reset button and the system will send a mail with a set of passwords attached, then use this password to come here to update the password.
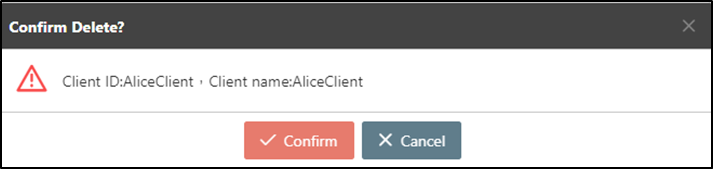
Delete Client
Search for the client to delete, and click on the icon to proceed.
A warning prompt displaying the message “Confirm Delete?” will pop up. Click Confirm to delete the client and exit.
Last updated
Was this helpful?