Sandbox testing in digiRunner enables developers to simulate API operations safely, ensuring functionality and service quality without impacting live services. It supports parallel development for frontend and backend teams using mock data, reducing delays and improving efficiency.
Configuring Sandbox Testing
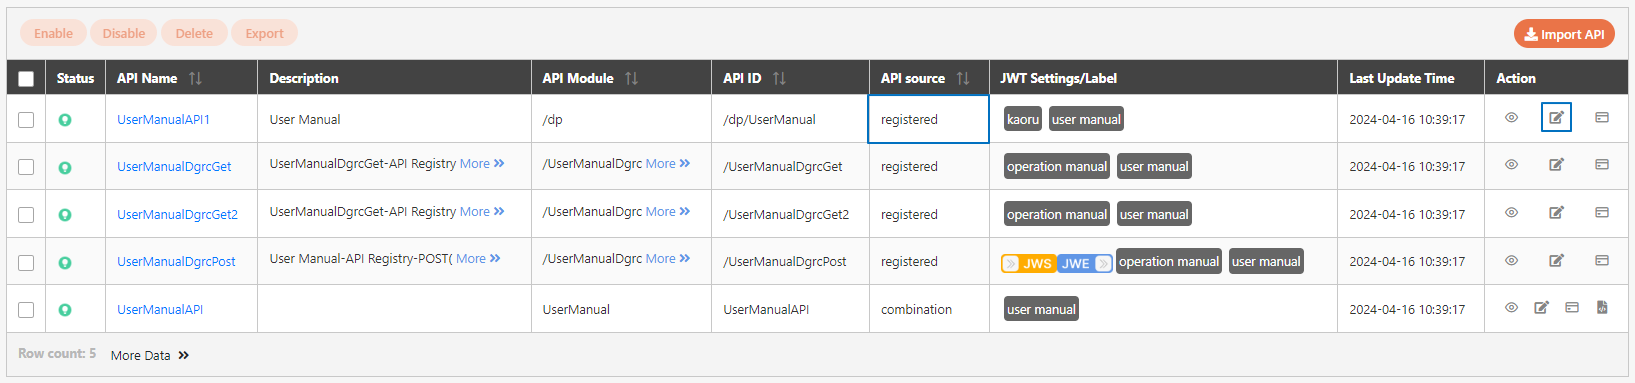
Access API Management
Go to API Management, and click on theicon to update the API you want to test.
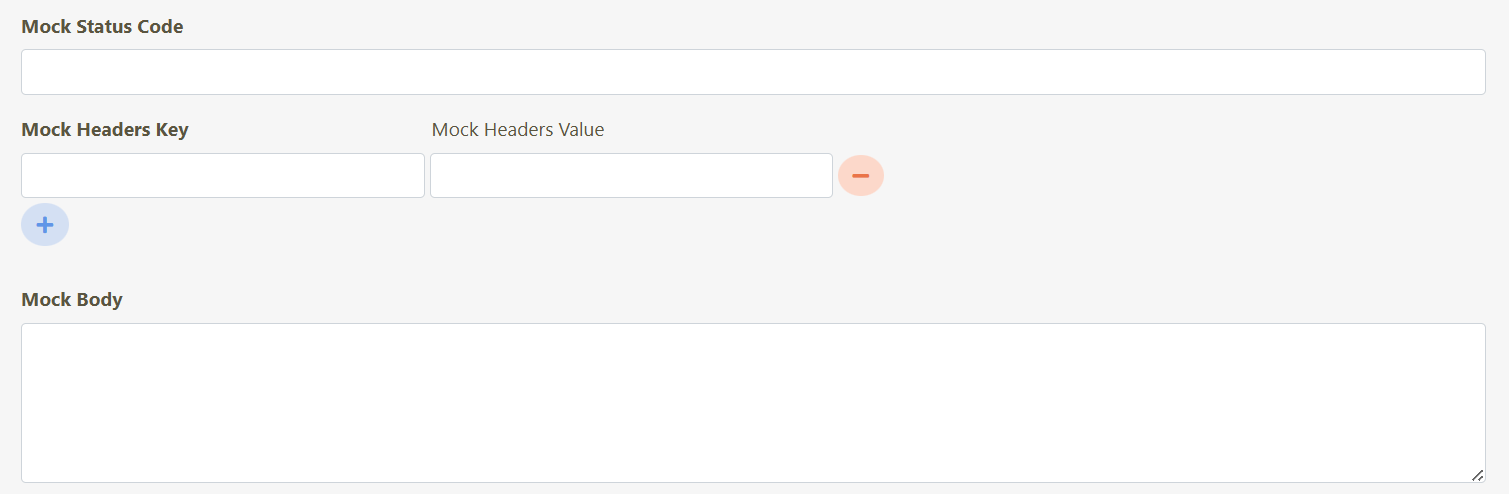
Specify Mock Test Values
In the mock configuration section, fill in Mock Status Code, Mock HeadersKey, Mock Headers Value, and Mock Body to simulate the API response during testing.
Mock Status Code: Specify the HTTP status code the API should return during the mock test, such as 200 for success, 404 for not found, 500 for server error.
Mock Headers Key: Specify the custom header keys to include in the mock response. These headers provide additional information, such as content type, authorization, or caching policies.
Mock Headers Value: Specify the corresponding values for the custom headers defined in the Mock Headers Key field. For example, for a Content-Type header, you could assign the value application/json.
Mock Body: Specify the simulated response body in JSON format. For example:
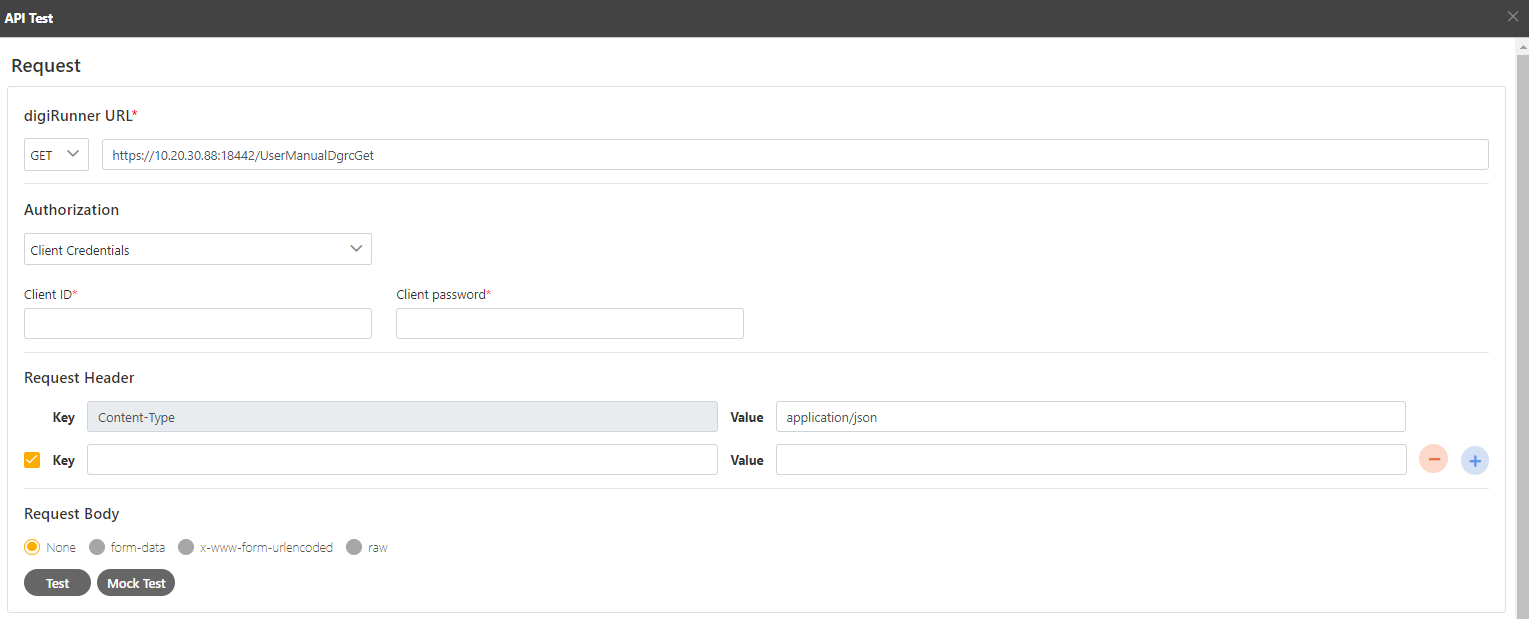
Run Mock Test
Go to API Test.
Use the Mock Test feature to send a request to the API and verify that the system returns the mock data configured previously.
Calling Mock Data with External Tool
Follow the steps below to call mock data set in digiRunner using an external tool like Postman.
Set Request Type and URL
Select the appropriate HTTP method (e.g., GET, POST) based on the API you are testing.
Fill in the URL of the API endpoint for testing.
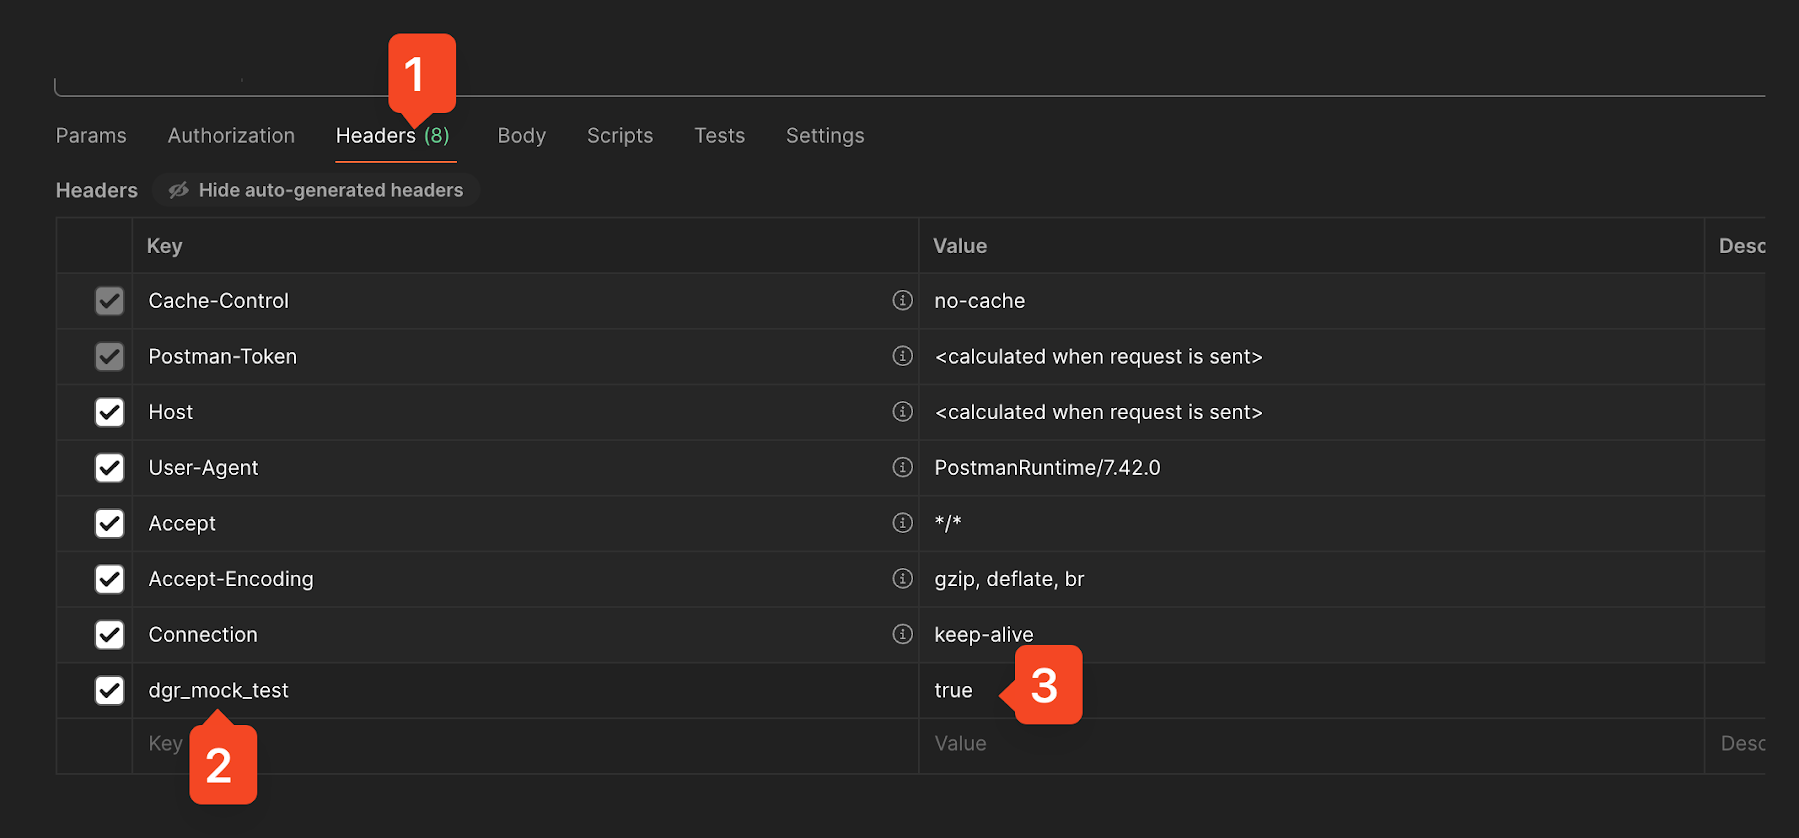
Add Headers for Mock Testing
Launch Postman, and go to the Headers tab (as shown in the image).
Add a new header with the key dgr_mock_test, and set its value to true (refer to steps 2 and 3 in the image). This informs digiRunner that you want to use mock data for the request.
Add any additional required headers, such as Content-Type or Authorization, according to the API specifications.
Send the Request
Once the mock headers are set up, send the request.
The response should include the mock data you configured in digiRunner, including the mock status code, headers, and body.