# Resetting User Password and Confirmation Email for Admin Console User
If there are users who forgot their passwords, administrators can reset the password and send the new password via E-mail to the E-mail address the user used to register, so that the user can login again using the new password received.
### Resetting the Password
1. Go to **AC User Management** > **Users** to enter the user maintenance page, and enter the username in the **keyword** search field to query the user to modify, then click **Search**.

2. Click on  of the user data to access the update page.

3. Check the **Reset password** option, click **Update**, and the system will send the reset password letter 10 minutes later.

### Verifying Password Reset Email Schedule
1. Go to **System Information** > **Scheduled Tasks** to enter the schedule page.
2. Locate the send mail schedule in the list and check the **Scheduled Time** field to confirm the schedule is set to execute at the specified time.
3. Check the **Status** field of the schedule. If it displays **wait** or **Executing**, click **Search** to refresh the page and update the schedule status. If the status displays **carry out**, it indicates that the schedule has been successfully executed.

### Verifying Mail Log and Checking Inbox
1. Go to **System Information** > **Mail Log** to enter the mail log page.
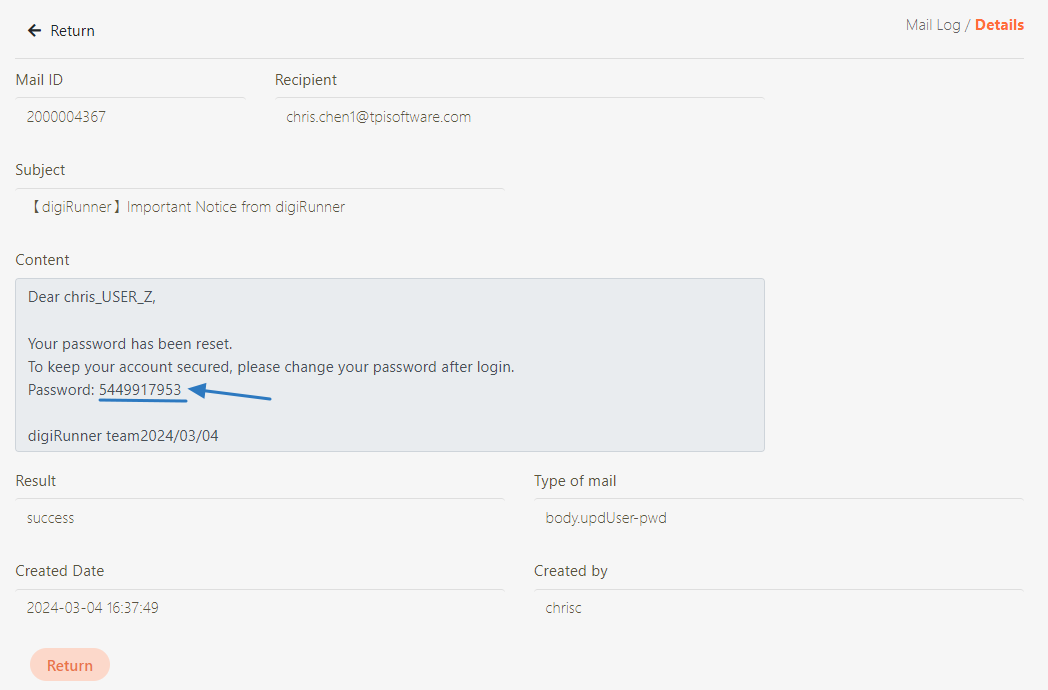
2. The mail log list will be sorted by time, from newest to oldest. Check if the **Result** field shows **success** to confirm that the email has been successfully sent.

3. Click on  to confirm that the email contains the reset password information.
4. Go to your email inbox, confirm receipt of the email, and use the default password to log in and reset your password.

### Troubleshooting Confirmation Email Errors
If the system failed to send the confirmation email due to setting errors, review the SMTP settings and make updates.
1. Go to **System Information** > **Mail Log** to enter the mail log page.
2. The mail log list will be sorted by time, from newest to oldest. Check the **Result** field, and if it shows **failure**, proceed with the following steps.
3. Click on  and check for the error message *"Username and Password not accepted"*, which indicates that the email could not be sent due to account or password errors.

4. Go to **System Configs** > **Setting** to enter the setting page.
5. The values of **SERVICE\_MAIL\_AUTH** and **SERVICE\_MAIL\_ENABLE** must both be set to *true* in order to activate the sender verification process.

6. The value of **SERVICE\_MAIL\_HOST** is *smtp.gmail.com* by default, which defines its mail server. This system uses Gmail’s SMTP by default.
7. The value of **SERVICE\_MAIL\_PORT** should be set to the SMTP port. By default, it is set to *587*, which is used for sending emails with SMTPS encryption. Verify that this port is set correctly.

8. The value of **SERVICE\_MAIL\_USERNAME** should be set to the email account that will be used for sending emails.
9. The value of **SERVICE\_MAIL\_PASSWORD** should be set to the password for the email account used for sending emails.

10. Go to **System Information** > **Scheduled Tasks** to enter the schedule page.
11. Click on the **Redo** icon and a confirmation window will pop up. Click **OK** to execute the mail sending schedule again.

12. Go to **System Information** > **Mail Log** to enter the mail log page.
13. The mail log list will be sorted by time, from newest to oldest. Check if the **Result** field shows **success** to confirm that the email has been successfully sent.